









































Sidebar
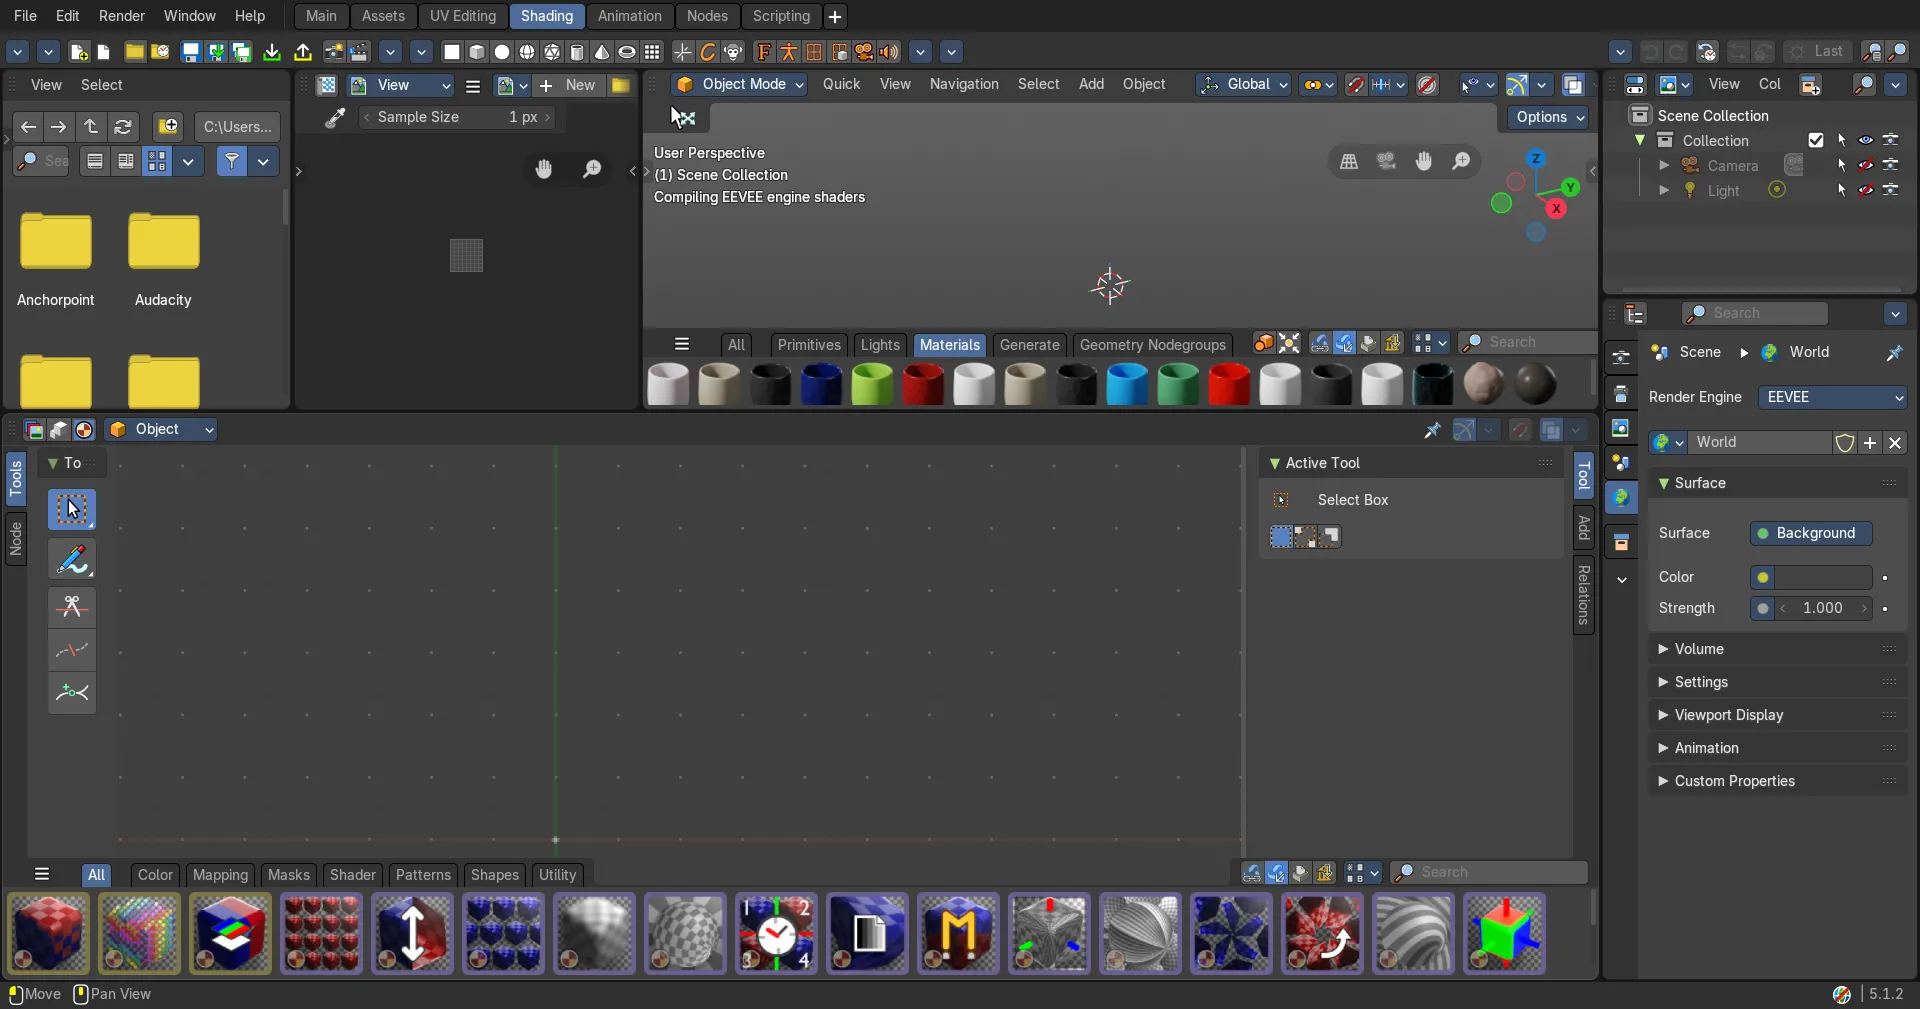
The Video Sequence Editor is made of several areas.
Introduction
The Video Sequence Editor is made of several areas. And it is made of two editor types. Preview and Sequence.
At the right side you will find the sidebar with further options and settings for the VSE and its tools.
Right Click menus
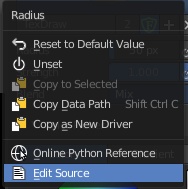
You will open the usual right click menus when clicking with the right mouse at elements in the sidebar. Its content is in big parts self explaining.
The right click menus are explained in the chapter 6 Editors Introduction.
Preview › Tool Tab
Tool Tab
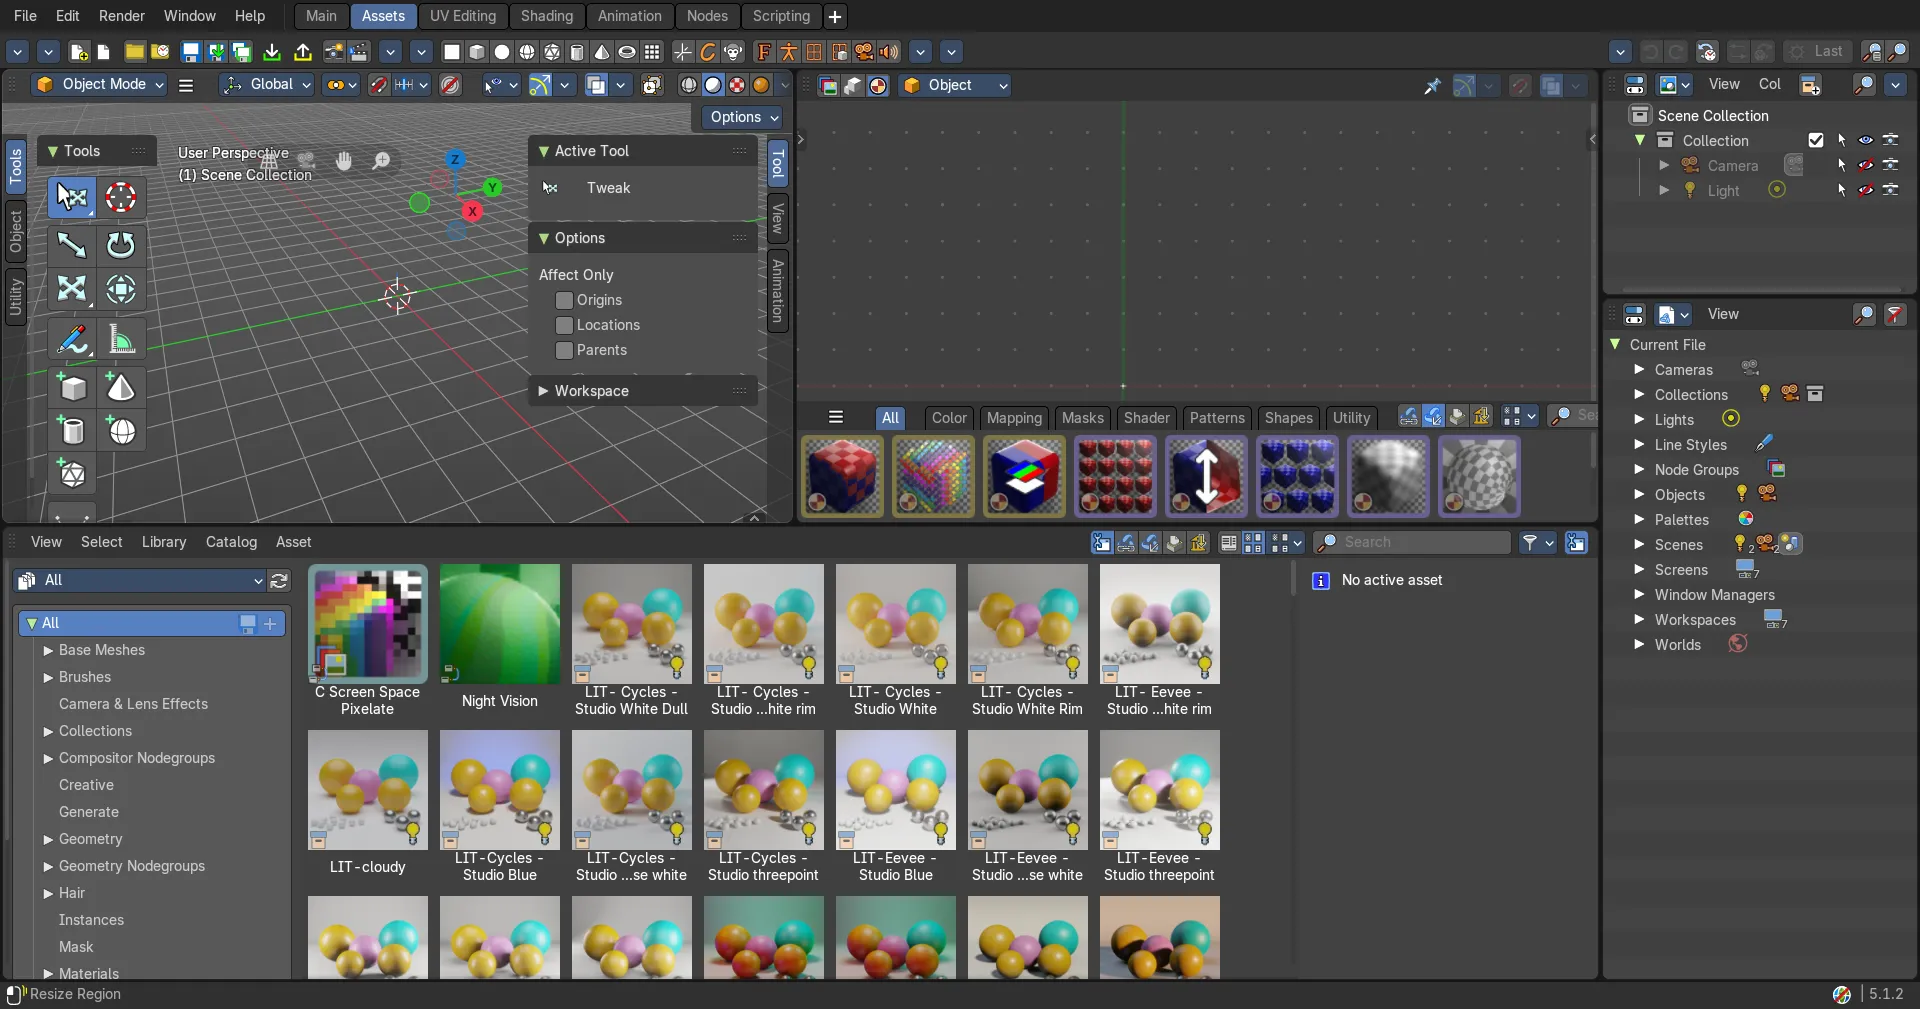
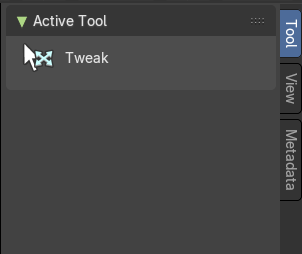
In the tool tab you will find the tool related settings for the tools in the tool shelf. They are described in the tool shelf chapters.
Active Tool panel
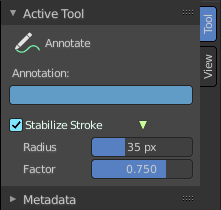
Displays the settings for the tools in the tool shelf. These settings are explained in the tool shelf chapters.
Preview › View Tab
Syncing options with the 3d view.
View Settings Tab
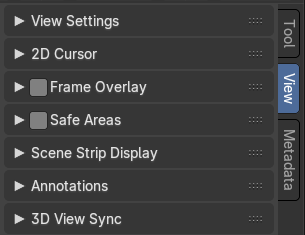
In the View Settings tab you will find the display related settings.
Note that not all content is available in all submodes. The Preview submode shows other content thant he Sequencer submode.
View Settings Panel
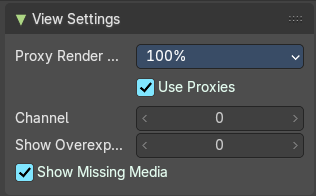
Proxy Render Size
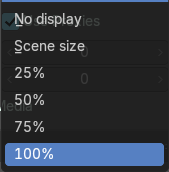
Size to display proxies at in the preview region. Using a smaller preview size will increase speed.
Proxies is a simplified data set to speed up workflow.
| Entry | What it does |
|---|---|
| Use Proxies | Use proxy images instead of the real material to speed up workflow. |
| Channel | Which channel number to show in the image preview. The value 0 is the result of all strips combined. |
| Show Overexposed | Shows overexposed (bright white) areas using a zebra pattern. The threshold can be adjust with the slider. |
| Show Missing Media | Render missing images or movies with a solit magenta color. |
Location X / Y
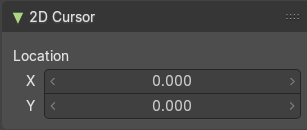
The position of the 3d cursor.
Frame Overlay Panel
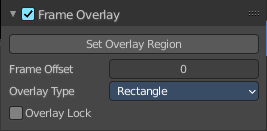
Display an overlay on top of the sequencer with a frame offset of the content.
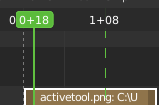
When the feature is active then you will see a green dashed line in the sequencer timeline.
| Entry | What it does |
|---|---|
| Set Overlay Region | Box select a portion of the viewport to display the overlay content. |
| Frame offset | What offset frame to use, relative to the current frame position. |
Overlay Type
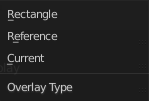
The overlay draw type.
Overlay Lock
Locks the overlay frame to the current frame. It will not go ahead when you play the video.
Save Areas panel
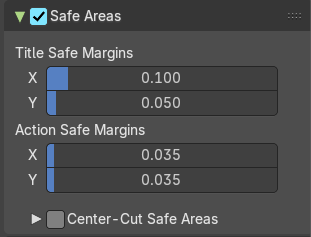
Modern LCD or plasma monitors usually doesn't have over scan areas anymore. But especially older TV screens still may have varying amounts of over scan. And cuts quite a bit content away at the border. And so not all content is shown at all monitors. Safe areas is the area that is always visible at all hardware.
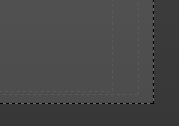
Safe areas are guides to ensure that the most important parts of the content can be seen across all screens. The lines are unfortunately a bit hard to see when you are in camera view. They mark the safe areas.
Safe areas can be set from the Camera and Sequencer views.
Tip: Each country sets a legal standard for broadcasting. These include also specific values for safe areas. Bforartists defaults for safe areas follow the EBU (European Union) standard. Make sure you are using the correct values when working for broadcast to avoid any trouble.
| Entry | What it does |
|---|---|
| Title Safe Margins X/Y | Also known as Graphics Safe. Information (graphics or text) inside this area can be seen by the majority of viewers. |
| Action Safe Margins X/Y | An extra “margin” for the screen, which can be used to keep elements from piling up against the edges. |
Center-Cut Safe Areas
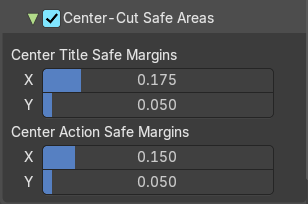
Center-cuts are a second set of safe areas to ensure content is seen correctly on screens with a different aspect ratio. Old TV sets receiving 16:9 or 21:9 video will cut off the sides. Position content inside the center-cut areas to make sure the most important elements of your composition can still be visible in these screens.
| Entry | What it does |
|---|---|
| Center Title Safe Margins X/Y | Information (graphics or text) inside this area can be seen by the majority of viewers. |
| Center Action Safe Margins X/Y | Safe area for general elements in a different aspect ratio. |
Scene Strip Display panel
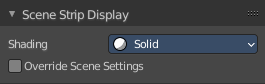
Settings for the strip type Scene Strip.
Shading
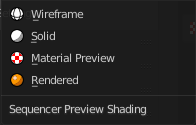
How to display the scene content in the preview window.
Override scene settings
Use the workbench render settings from the sequencer scene instead of the settings instead of each individual scene used in the strip.
Annotations panel
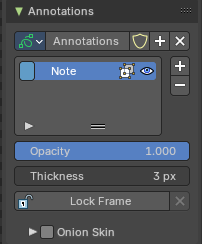
Manage the Annotation layers and materials.
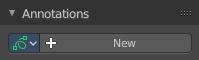
When you don't have drawn an annotation yet then the panel just contains a New button.
Annotations prop
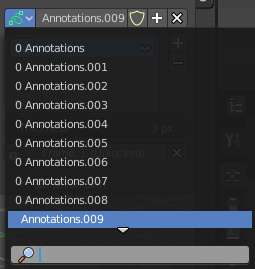
Add, remove and rename new annotations.
Drop down box
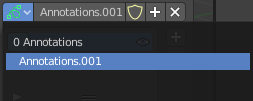
A list of the available annotation layers.
| Entry | What it does |
|---|---|
| Edit Box | The name of the current annotation. You can rename the annotation to your needs here. |
| Fake User | Assign a fake user to this annotation. Fake users is an odd concept to keep data in the scene even if it has no user somewhere. The fake user is then a dummy user so that the object is not deleted when saving the scene. |
| Add Annotation | Add a new annotation. |
| Delete Annotation | Delete the annotation. |
List of Annotation Strokes

Here you see your Annotation layers for the current Annotation. Every layer can have an own color.
At the right side you find buttons to sort them and to add and remove new Annotation layers.
You can change the color by clicking at the color field. A color dialog will pop up. You can rename annotation layers by double clicking at it.
The eye icon allows you to make it invisible And it has a search field.
| Entry | What it does |
|---|---|
| Thickness | The thickness of the annotation stroke. |
| Frame Locked/Unlocked | Lock frame displayed by current layer. This toggles whether the active layer is the only one that can be edited. |
Onion Skin subpanel
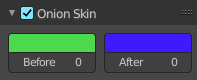
Enable Onion Skinning
Onion Skinning allows to show ghosts of the keyframes before and after the current frame. In this sub panel you can adjust the color of the onion skin frames. With the numbers below the colors you can define how many frames before or after are displayed that way.
Sync Mode
The sync method.
Built-In
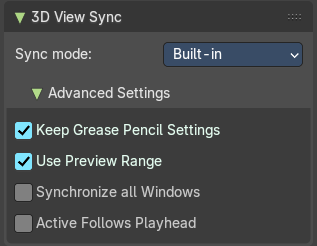
Advanced Settings
| Entry | What it does |
|---|---|
| Keep Grease Pencil Settings | Keep active Grease Pencil tool settings while navigating scene strips. |
| Use Preview Range | Update the current scene strip to match the range. |
| Synchronize all Windows | If the 3d View sync impacts all main windows. |
| Active follows Playhead | Update the active scene strip while scrubbing the playhead. |
Legacy
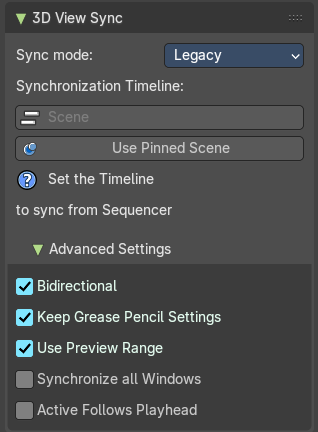
Synchronization Timeline
Scene
The scene to synchronize.
Use Pinned Scene
Mak the pinned scene the active scene. The button and the “Set the Timeline” hint will vanish then.
Advanced Settings
| Entry | What it does |
|---|---|
| Bidirectional | Changing the active scene should also update the timeline scene’s current frame in the sequencer. |
| Keep Grease Pencil Settings | Keep active Grease Pencil tool settings while navigating scene strips. |
| Use Preview Range | Update the current scene strip to match the range. |
| Synchronize all Windows | If the 3d View sync impacts all main windows. |
| Active follows Playhead | Update the active scene strip while scrubbing the playhead. |
Sequencer › Strip Tab
Strip Tab
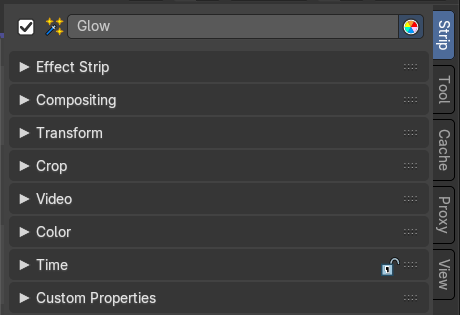
The strip tab contains all the strip type related settings. For the different strip types see the Add menu.
Some panels have the same content for all strip types. Some not. Some strip types have their own panels.
Note: Like in the 3D View, this tab is also accessible from the Properties editor Strip tab.
Strip tab header
In the strip tab header you will see an icon for the current strip type. The name of the strip. And a checkbox to set this strip active.
The strip can be renamed by double clicking left into the edit box.
| Entry | What it does |
|---|---|
| Type Icon | This indicates what kind of strip is selected |
| Name | The name of the strip. |
| Color | The color of the strip in the sequencer timeline. |
| Mute | Enables/Disables the strip. |
Compositing Panel
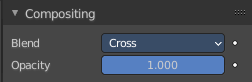
Available for Movie, Image, Adjustment and Meta strips.
Blend
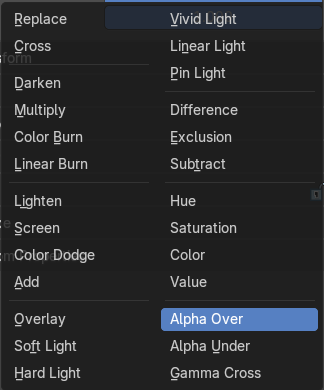
The blend method to control how the strip combines with other strips.
Opacity
How much the strip color affects other strips.
Transform Panel
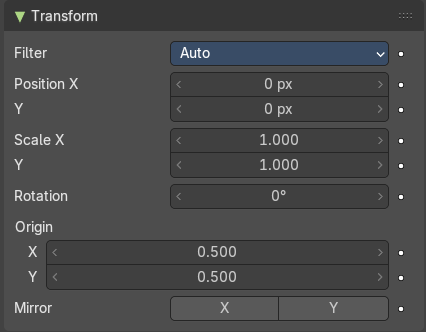
Filter
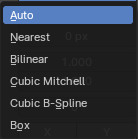
Filter type to use for transformations.
| Entry | What it does |
|---|---|
| Auto | Automatically choose filter based on scaling factor. |
| Nearest | Use nearest sample. |
| Bilinear | Interpolate between 2x2 Samples |
| Cubic Mitchell | Cubic Mitchell filter on 4x4 Samples. |
| Cubic B-Spline | Cubic B-Spline Filter on 4x4 Samples. Blurry, but not ringing. |
| Box | Averages source image samples that fall under destination pixel. |
| Entry | What it does |
|---|---|
| Position X | The X offset. |
| Y | The Y offset. |
| Scale X | The X scale. |
| Y | The Y scale. |
| Rotation | The rotation around the image center. |
| Origin | Origin of image for transformation. |
| Mirror | Flip on the X and/or Y axis. |
Crop Panel
Left, Right, Top, Bottom
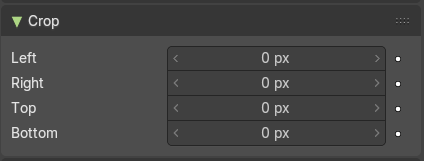
Crop the frame.
Video Panel
Strobe
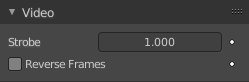
Don't display every frame, but just every nth frame.
Reverse Frames
Reverse the frame order.
Color Panel
Saturation
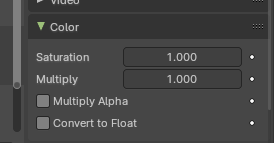
The intensity of the input color.
| Entry | What it does |
|---|---|
| Multiply | Multiply colors by this factor. |
| Multiply Alpha | Multiply Alpha along with color channels. |
| Convert to Float | Convert input to float data. |
Sound Panel
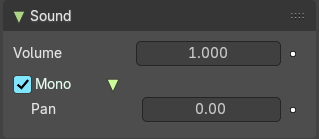
This panel shows with an audio clip selected.
| Entry | What it does |
|---|---|
| Volume | The volume of the audio clip. |
| Mono | Set the audio clip to mono. · Pan: When mono, the pan of the audio clip. |
Time Panel
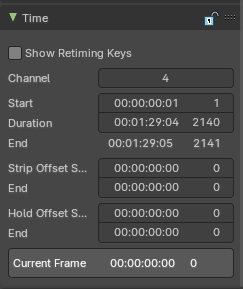
Time related settings.
| Entry | What it does |
|---|---|
| Lock | Lock strip so that it cannot be transformed. |
| Show Retiming Keys | This toggles the overlay and retiming state of a Movie or Image Sequence strip. For more information, refer to chapter Editors - Video Sequence Editor - Header - Strip Menu retiming section. Note: To retime a strip, select a Movie or Image Sequence strip. |
| Channel | The channel of the strip. |
| Start | The start frame of the strip. |
| Duration | The duration of the strip. |
| End | The end frame of the strip. · Strip Offset Start: The strip offset start. This offsets the beginning of the strip in the timeline. · End: The strip offset end. This offsets the end of the strip in the timeline. · Hold Offset Start: Animation start offset (trim start) · End: Animation end offset (trim end) · Current Frame: Info box that displays the position of the frame cursor at the current frame. |
Scene Panel
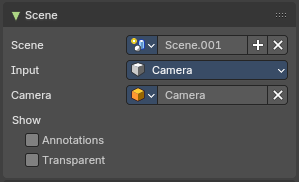
This panel just shows with strip type scene.
Scene Property
Scene Browser
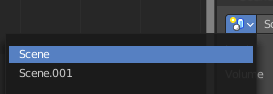
A scene browser that contains the available scenes in the file.
Scene edit box
The name of the scene. It can be renamed by double clicking into the edit box.
Add
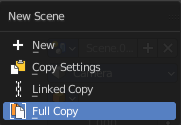
Add a new scene. This button calls a menu where you can choose with what method you want to create the new scene.
| Entry | What it does |
|---|---|
| New | Adds a new empty scene. |
| Copy Settings | Adds a new empty scene. And copies the settings from the current scene. |
| Linked Copy | Link in the collections from the current scene. (Shadow Copy) |
| Full Copy | Make a full copy of the current scene. |
Remove
Remove the scene as the active one. Note that the scene is still available in the scene browser.
Input
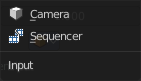
Type of input to use. The camera of the scene. Or a file from the sequencer in this scene.
Input Type Camera
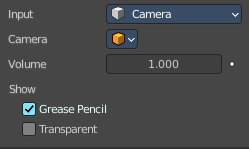
Volume
The audio volume.
Camera
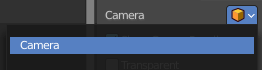
Which camera of the scene to use.
| Entry | What it does |
|---|---|
| Show Annotation | Show grease pencil strokes in workbench previews. |
| Transparent | Use a transparent background. |
Input type Sequencer
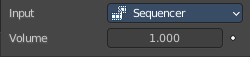
Volume
The audio volume.
Mask Panel
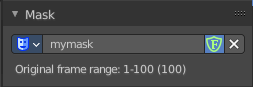
This panel just shows with strip type Mask.
Mask Property
Mask Browser
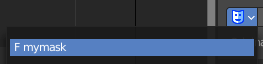
A mask browser that contains the available masks in the file.
Mask edit box
The name of the scene. It can be renamed by double clicking into the edit box.
Fake User
Assign a fake user to this mask. Fake users is a odd concept to keep data in the scene even if it has no user somewhere. The fake user is then a dummy user so that the object is not deleted when saving the scene.
Remove
Remove the scene as the active one. Note that the scene is still available in the scene browser.
Effect Strip Panel
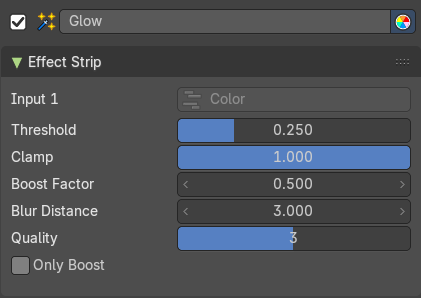
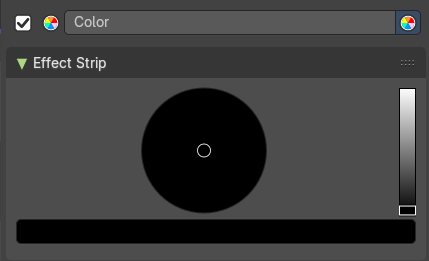
Settings for the single effect strip types.
The content differs, dependant of the chosen type.
Effect strip type Color Mix
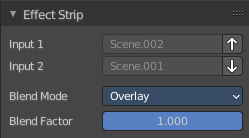
Input 1
The first strip.
Input 2
The second strip.
Swap Strips
Swap the strips.
| Entry | What it does |
|---|---|
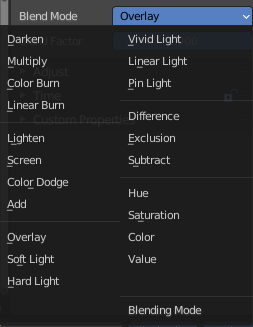
| Blend Mode | The color blend mode to use. |
| Blend Factor | The blend factor. 1.000 means 100%. |
Effect strip type Text
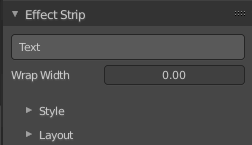
| Entry | What it does |
|---|---|
| Text | The text to displayed. |
| Wrap Width | World wrap width as factor. Zero disables the wrap. |
Style sub panel
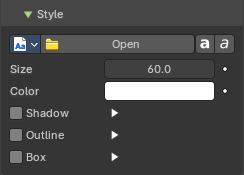
Font property


When no font is loaded then the internal font is used.
Font browser
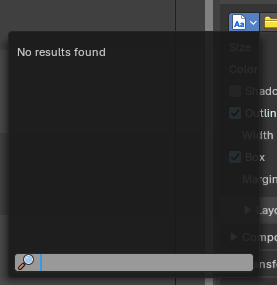
The list of loaded fonts. This list is empty by default. It displays the fonts that you load.
| Entry | What it does |
|---|---|
| Open | Load a font. |
| Font Edit Box | Display the current active font. You can rename the font by double clicking in the edit box. |
| Fake User | Assign a fake user to this font. Fake users is an odd concept to keep data in the scene even if it has no user somewhere. The fake user is then a dummy user so that the object is not deleted when saving the scene. |
| Open Font | Load a font. |
| Remove | Remove the selected font as the active one. Note that the font is still in the list then. |
| Bold | Display the font bold. |
| Italic | Display the font italic. |
| Entry | What it does |
|---|---|
| Size | Size of the text. |
| Color | The text color. |
Shadow
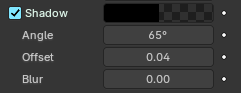
Creates a shadow of the specified color under the text.
| Entry | What it does |
|---|---|
| Shadow color | The color of the shadow. Clicking at the color field opens a color dialog. |
| Angle | The shadow angle. In which direction the shadow shall point. |
| Offset | Add an offset to the shadow in pixels |
| Blur | Blur the shadow by a pixel amount. |
Outline
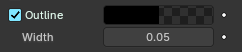
Color
The outline color.
Width
The outline width.
Box
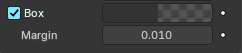
Display colored box behind text.
| Entry | What it does |
|---|---|
| Box Color | The color of the box. |
| Margin | The margin of the box. Based at the image width. |
Layout sub panel
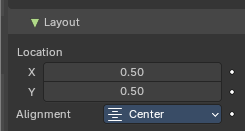
Location X/Y
Positions the text on the X, Y axis.
Alignment
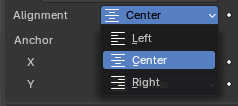
The horizontal X alignment of the text. Can be Left, Center or Right
Anchor X/Y
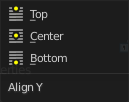
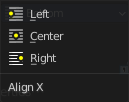
Horizontal (X) or vertical (Y) anchor point of the text relative to the location.
Effect strip type Gaussian Blur
Input 1
The strip to blur. This strip cannot be changed. You need to apply the effect with the correct strip selected.
| Entry | What it does |
|---|---|
| Size X | The size of the blur along X axis. |
| Y | The size of the blur along Y axis. |
Effect strip type Multicam
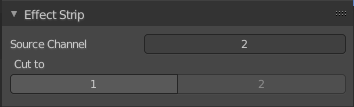
| Entry | What it does |
|---|---|
| Source Channel | The channel which the Multicam Selector gets its input from. |
| Cut to | Cuts the Multicam strip at the current frame and changes the Source Channel automatically to the selected channels. |
Effect strip type Speed Control
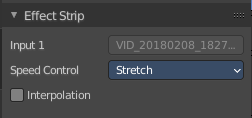
Input
The video where the speed control is applied to. This is read only.
Speed Control
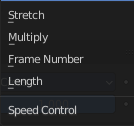
Stretch
Adjust input playback so that the input duration fits the strip length
Multiply

Multiply with the speed factor.
Multiply factor
The speed factor.
Frame Number

Frame Number of the Input strip.
Frame number
The frame number.
Length
Interpolation
Do crossfade blending between current and previous frame.
Effect strip type Color
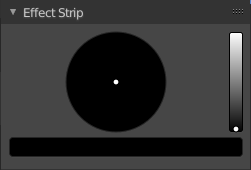
Color Picker
Adjust the color of the color strip.
Effect strip type Transform
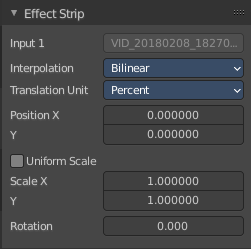
Input 1
The strip to transform. This strip cannot be changed. You need to apply the effect with the correct strip selected.
Interpolation
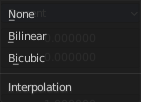
The interpolation type for the transform.
Translation Unit
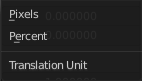
The measure unit to use for the transform.
| Entry | What it does |
|---|---|
| Position X | Amount to move the input in the X axis. |
| Y | Amount to move the input in the Y axis. |
| Uniform scale | Scale uniformly, preserve the aspect ratio. |
| Scale X | Amount to scale the input in the X axis. |
| Y | Amount to scale the input in the Y axis. |
| Rotation | Degrees to rotate the input. |
Effect strip type Glow
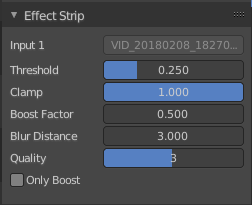
| Entry | What it does |
|---|---|
| Input 1 | The strip to use. This strip cannot be changed. You need to apply the effect with the correct strip selected. |
| Threshold | Minimum intensity to trigger a glow. |
| Clamp | The brightness limit of intensity. |
| Boost Factor | Brightness multiplier. |
| Blur Distance | The radius of the glow effect. |
| Quality | The accuracy of the blur effect. |
| Only Boost | Show the glow buffer only. |
Effect strip type Wipe
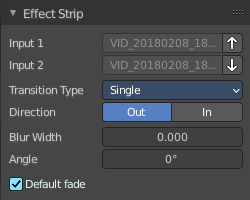
| Entry | What it does |
|---|---|
| Input 1 | The first strip. |
| Input 2 | The second strip. |
| Swap Inputs | Swap the two strips. |
Transition type
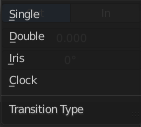
The wipe effect type.
| Entry | What it does |
|---|---|
| Direction | The direction of the wipe. |
| Blur width | The width of the blur edge, relative to the image size. |
| Angle | The edge angle. |
Default Fade
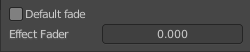
Use the builtin default effect time, which is as long as the fade clip. Or adjust the effect time.
Effect strip type Alpha over Drop
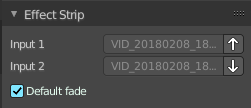
| Entry | What it does |
|---|---|
| Input 1 | The first strip. |
| Input 2 | The second strip. |
| Swap Inputs | Swap the two strips. |
Default Fade
Use the builtin default effect time, which is as long as the fade clip. Or adjust the effect time.
Effect strip type Multiply
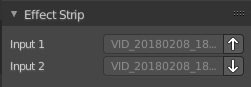
| Entry | What it does |
|---|---|
| Input 1 | The first strip. |
| Input 2 | The second strip. |
| Swap Inputs | Swap the two strips. |
Effect strip type Gamma Cross
| Entry | What it does |
|---|---|
| Input 1 | The first strip. |
| Input 2 | The second strip. |
| Swap Inputs | Swap the two strips. |
Default Fade
Use the builtin default effect time, which is as long as the fade clip. Or adjust the effect time.
Effect strip type Alpha Under
| Entry | What it does |
|---|---|
| Input 1 | The first strip. |
| Input 2 | The second strip. |
| Swap Inputs | Swap the two strips. |
Default Fade
Use the builtin default effect time, which is as long as the fade clip. Or adjust the effect time.
Effect strip type Alpha Over
| Entry | What it does |
|---|---|
| Input 1 | The first strip. |
| Input 2 | The second strip. |
| Swap Inputs | Swap the two strips. |
Default Fade
Use the builtin default effect time, which is as long as the fade clip. Or adjust the effect time.
Effect strip type Subtract
| Entry | What it does |
|---|---|
| Input 1 | The first strip. |
| Input 2 | The second strip. |
| Swap Inputs | Swap the two strips. |
Effect strip type Add
| Entry | What it does |
|---|---|
| Input 1 | The first strip. |
| Input 2 | The second strip. |
| Swap Inputs | Swap the two strips. |
Effect strip type Crossfade
| Entry | What it does |
|---|---|
| Input 1 | The first strip. |
| Input 2 | The second strip. |
| Swap Inputs | Swap the two strips. |
Default Fade
Use the builtin default effect time, which is as long as the fade clip. Or adjust the effect time.
Source Panel
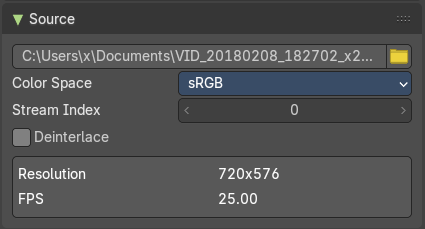
The source path and settings for a loaded video clip.
File
The source file.
Browse
Browse for another file.
Color Space
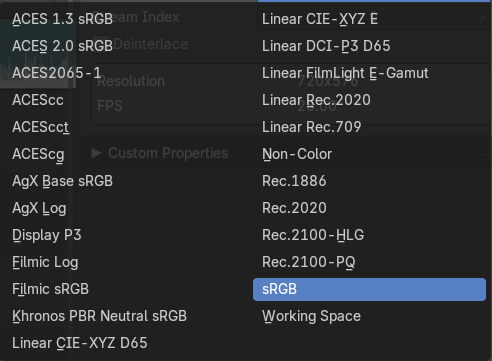
Which color space to use for the loaded video clip.
| Entry | What it does |
|---|---|
| Stream Index | For files with several movie streams, use the streamn with the given index. |
| Deinterlace | Remove fields from video movies. |
| Info Box | The resolution and frames per seconds of the video. |
Custom Properties Panel
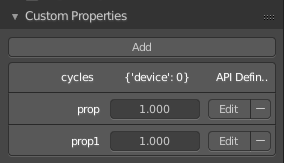
Here you can define custom properties that can be used for scripting.
Here you might also find custom properties from addons or scripts.
Add
Adds a new property.
Edit
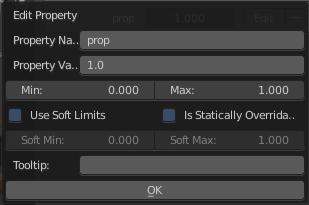
Opens a panel where you can adjust the settings for the custom property.
Remove
Removes the property.
Sequencer › Tool Tab
Tool Tab
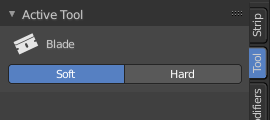
In the tool tab you will find the tool related settings for the tools in the tool shelf. These settings are explained for the single tools in the tool shelf chapter.
Tool Tab and Top Bar
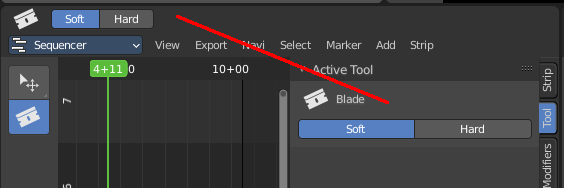
The content in the Tool Tab is besides one panel the same than in the Topbar.
Different from the 3D view, he top bar cannot be hidden.
Sequencer › Cache Tab
Cache Settings panel
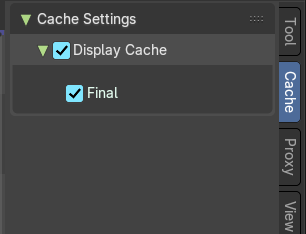
The Cache is used to save frames in memory for preview, so they can be later displayed much faster than rendered from scratch. Cache capacity can be set in System tab of the Preferences.
In this panel you can set up types of images that will be cached for all strips.
Display Cache
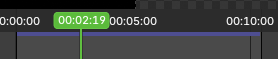
This displays the cache overlay in the Sequencer timeline. This draws a purple bar.
Final
Cache final image for each frame.
Sequencer › Proxy Tab
Proxy Settings Panel
Storage
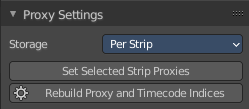
Defines whether the proxies are for individual strips or the entire sequence.
Per Strip
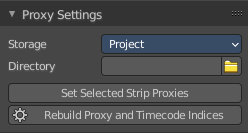
Proxies are stored in the directory of the input.
| Entry | What it does |
|---|---|
| Project | All proxies are stored in one directory. · Proxy Directory: The location to store the proxies for the project. |
| Set Selected Strip Proxies | Set proxy size and overwrite flag for all selected strips. |
| Rebuild Proxy and Time code Indices | Generates Proxies and Time codes for all selected strips, same as doing Strip ? Rebuild Proxy and Time code indices. |
Strip Proxy & Time code panel
Use Proxy Timecode
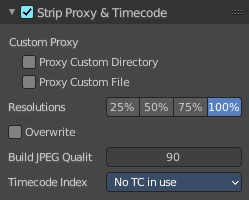
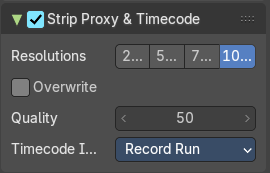
Enable Proxy Timecode.
Custom Proxy
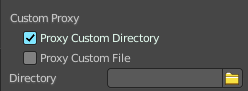
Proxy Custom Directory
Use a custom directory to store data. Activating the tool reveals a directory picker.
Proxy Custom File
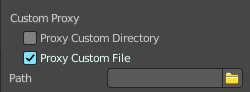
Use a custom file to read proxy data from. Activating the tool reveals a directory picker.
You can either show the directory or the custom file path directory picker.
| Entry | What it does |
|---|---|
| Resolutions | Buttons to control how big the proxies are. The available options are 25%, 50%, 75%, 100 percent of original strip size. |
| Overwrite | Saves over any existing proxies in the proxy storage directory. |
| Build Jpeg Quality | Defines the quality of the JPEG images used for proxies. |
Time code Index
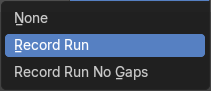
When you are working with footage directly copied from a camera without pre-processing it, there might be bunch of artifacts, mostly due to seeking a given frame in sequence. This happens because such footage usually does not have correct frame rate values in their headers. This issue can still arise when the source clip has the same frame rate as the scene settings. In order for Blender to correctly calculate frames and frame rate there are two possible solutions:
Preprocess your video with e.g. MEncoder to repair the file header and insert the correct keyframes.
Use Proxy/Time code option in Blender.
The following time codes are supported:
No TC in use – do not use any time code
Record Run
Free Run
Free Run (rec date)
Record Run No Gaps
Note: Record Run is the time code which usually is best to use, but if the clip’s file is totally damaged, Record Run No Gaps will be the only chance of getting acceptable result.
Sequencer › View Tab
Syncing options with the 3d view.
Sync Mode
The sync method.
Built-In
Advanced Settings
| Entry | What it does |
|---|---|
| Keep Grease Pencil Settings | Keep active Grease Pencil tool settings while navigating scene strips. |
| Use Preview Range | Update the current scene strip to match the range. |
| Synchronize all Windows | If the 3d View sync impacts all main windows. |
| Active follows Playhead | Update the active scene strip while scrubbing the playhead. |
Legacy
Synchronization Timeline
Scene
The scene to synchronize.
Use Pinned Scene
Mak the pinned scene the active scene. The button and the “Set the Timeline” hint will vanish then.
Advanced Settings
| Entry | What it does |
|---|---|
| Bidirectional | Changing the active scene should also update the timeline scene’s current frame in the sequencer. |
| Keep Grease Pencil Settings | Keep active Grease Pencil tool settings while navigating scene strips. |
| Use Preview Range | Update the current scene strip to match the range. |
| Synchronize all Windows | If the 3d View sync impacts all main windows. |
| Active follows Playhead | Update the active scene strip while scrubbing the playhead. |