



































Header
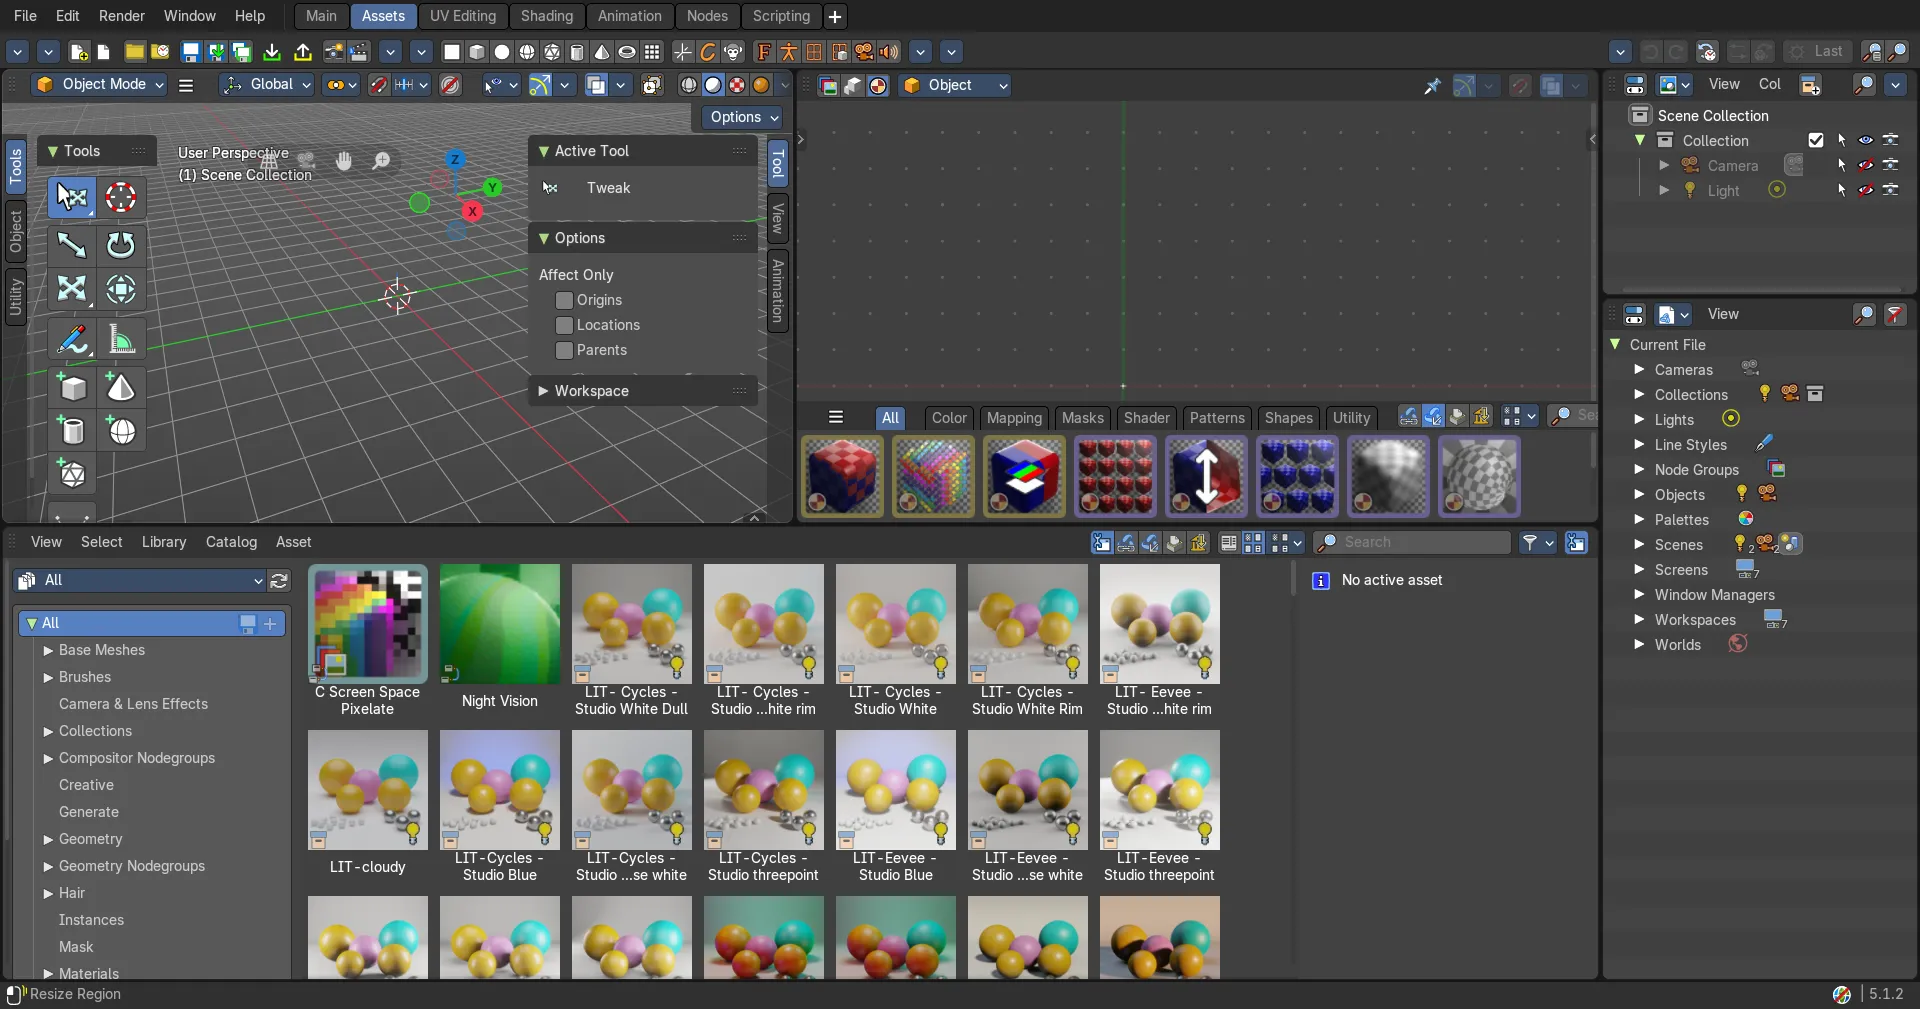
The Header contains some menus and settings.
Video Sequence Editor - Header
The Header contains some menus and settings.
The header is divided into two areas.
Left Type of sequencer view with additional menus.

Right contains tools and options, including the timeline, editing, snapping, overlay and settings.
Header right click menus
The general right click menu functionality is explained in chapter 6 Editors introduction.
Editortype Menu
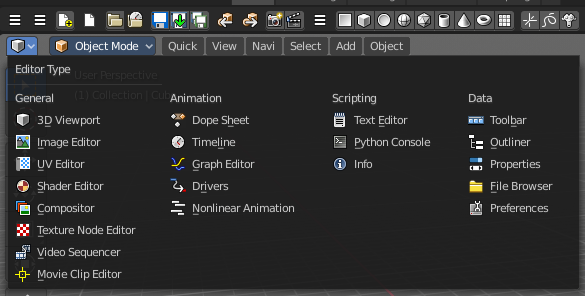
Bforartists is made of several editor types. Headers can display a menu where you can switch to other editor types.
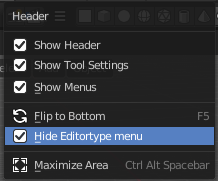
This menu is hidden by default. It is meant to edit the layouts, and should not be necessary for regular work. You can reveal it in the header right click menu.
Tools and Options
Header tools and options - Preview view

Pivot Point
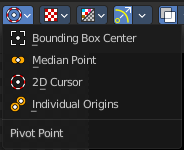
The Pivot Point is the center of your object or your selection. The names should be self explaining.
Snapping
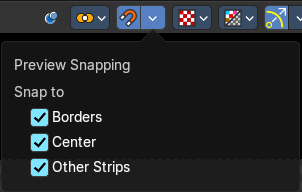
Snap strips during transform.
Preview Snapping
Snap to
Borders
Snap to preview borders.
Center
Snap to preview center.
Other Strips
Snap to borders and origins of deselected, visible strips.
Display Mode
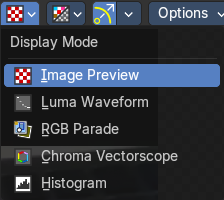
How to display the preview video.
Image Preview
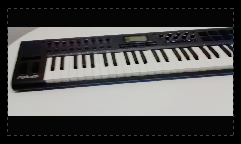
Displays the image material.
Luma Waveform
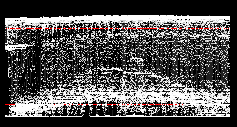
Displays the luma waveform of the image.
RGB Parade
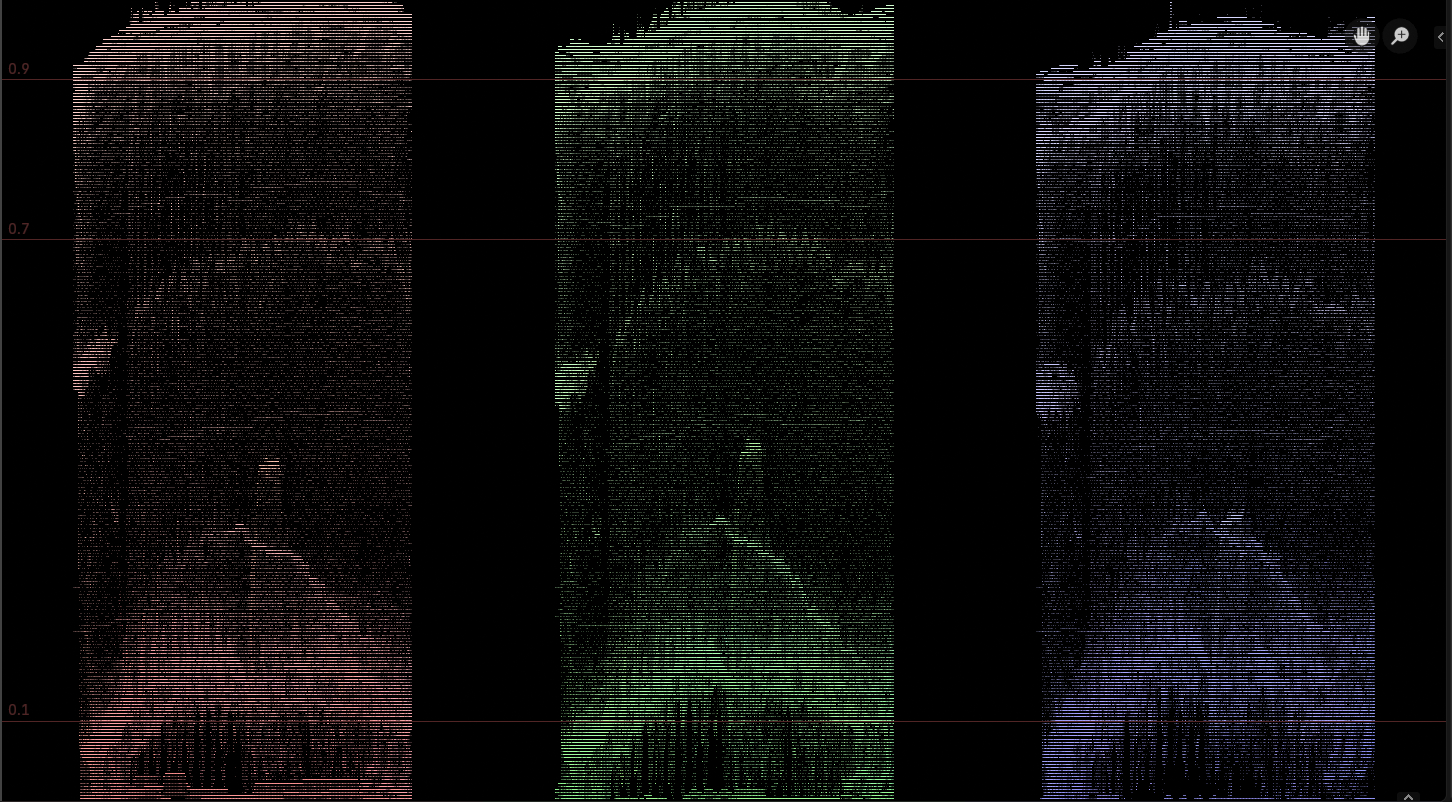
Displays the rgb channels
Chroma Vectorscope
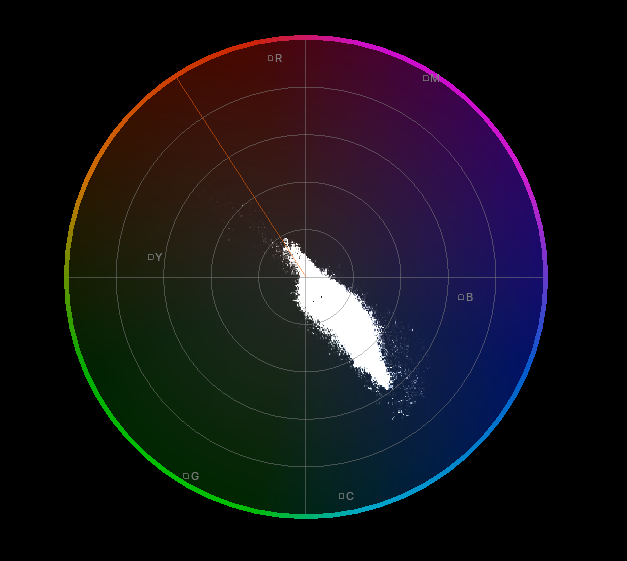
Displays the chroma vectorscope of the image.
Histogram
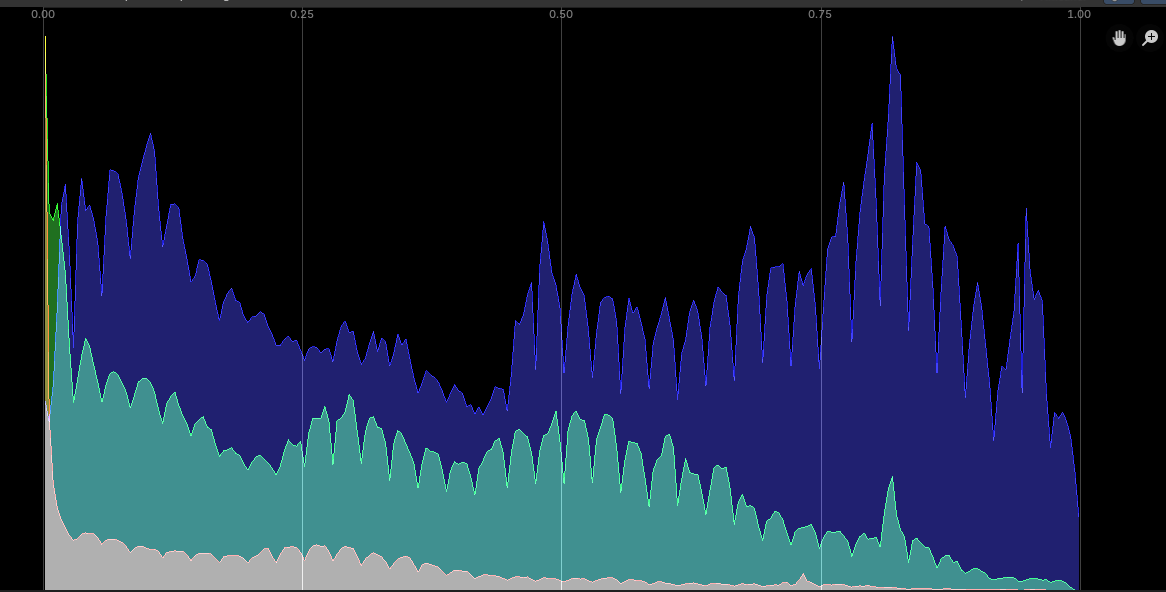
Displays a histogram of the image.
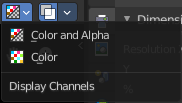
Display Channels
What channels of the video to display.
Color and Alpha
Display the color channels and alpha channel.
Color
Display just the color channels.
Show Gizmo
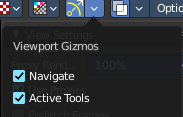
Show or hide the viewport gizmos.
Viewport Gizmos
What kind of gizmos to show.
Active Tools
Toggles the navigation gizmos.
Active Tools
Toggles the active tool gizmos.
Options
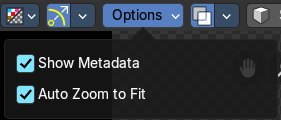
Show Metadata
Show metadata of first visible strip in the viewport.
Zoom to Fit
Automatically zoom preview image to fully fit into the preview window. Note: Zooming in or out turns off the feature automatically.
Show Overlay
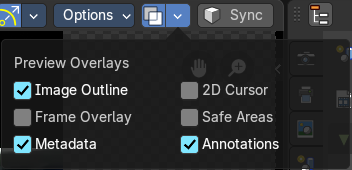
Turn on or off all overlays.
Preview Overlays
Image Outline
Outline the selected image element.
Frame Overlay
Show the frame overlays.
Metadata
Show the Metadata overlay.
2D Cursor

Show the 2d cursor.
Safe Areas
Show the safe area overlays.
Annotations
Show the annotations.
Sync
This will toggle the 3D Sequencer synchronization with scene strips and scene switching. Refer to the 3D Sequencer addon chapter for more information.
Header Tools and Options - Sequencer View

Scene
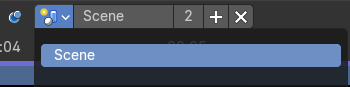
The timeline scene that you use for the video.
Overlap Mode
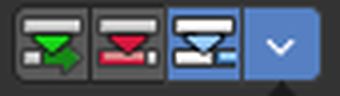
How to resolve overlap after transformation. The three buttons next to each other pick the mode.
Ripple
Move strips until there is no overlap anymore. Strips after the moved strip are pushed along, so nothing is cut and no gaps open up. This replaces the former "Expand" mode.
Overwrite
Trim or split strips to resolve overlap.
Shuffle
Move the transformed strip to the nearest free space to resolve overlap.
Ripple Options
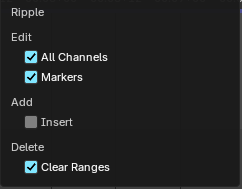
The drop-down next to the Overlap Mode buttons holds the Ripple settings:
- All Channels ripples the strips on the other channels too. When it is off, only strips on the same channels as the edited strips move.
- Markers moves the markers along with the strips.
- Insert splits the strips at the leftmost edited handle and pushes the rest aside. When it is off, strips only move as far as needed to resolve the overlap.
- Clear Ranges deletes the strip contents inside the removed ranges on the rippled channels, so the later strips close the whole gap. When it is off, the later strips only move as far as they can.
Snap
Snap to strip edges or current frame.
Snapping Settings
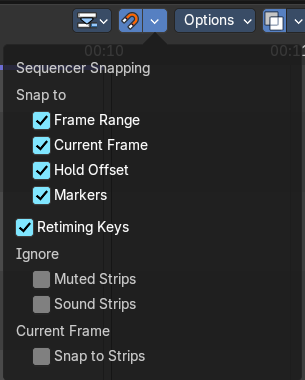
Sequencer Snapping
Snap to
Frame Range
Snap to the current frame range
Current Frame
Snap to the current frame
Hold Offset
Snap to strip Hold offsets.
Markers
Snap to Markers.
Retiming Keys
Toggles the visibility of retiming keyframes when retiming strips.
Ignore
Muted Strips
Ignores muted strips.
Sound Strips
Ignores sound strips.
Current Frame
Snap to Strips
Sets the current frame to the start or end point of the selected clip.
Options
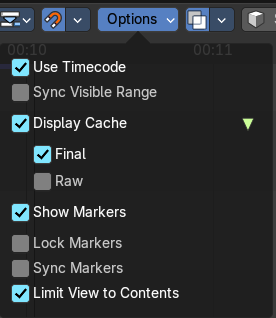
Use Timecode
Shows time as a timecode (hours, minutes, seconds and frames) instead of frame numbers.
Sync Visible Range
Keep the visible timeline range synchronized across time-based editors. Synchronize the visible timeline range with other visible time based editors. To enable syncing, each editor must have 'Sync Visible Range' turned on.
Display Cache
Turns on displaying the cache overlay and shows cache settings. Toggle to visualize cached images in the timeline.
Final
Show the final images.
Raw
Show the raw images. This is a Developers extra.
Show Markers
Display the markers menu and the markers at the bottom in the timeline.
Lock Markers
Prevent marker editing.
Sync Markers
Transform markers with the strips.
Limit View to Content
Limit timeline height to maximum used channel slots.
Show Overlays
Turn on or off all overlays.
Sequencer Overlays
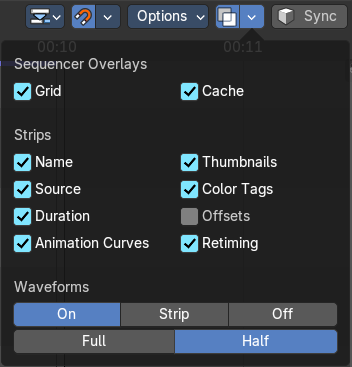
Grid
Show the grid in the sequencer timeline.
Cache
Visualize cached images on the timelines.
Strips
Name
Show the name of the clip.
Source
Show the source of the clip.
Duration
Display the duration of the clip.
Animation Curves
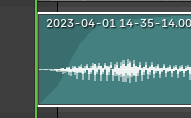
Display the strip opacity/volume curves.
Thumbnails
Draw thumbnails as strip overlay. This works for movie and image strips. To draw thumbnails, this overlay has to be enabled and strips must be tall enough.
Color Tags
Display the strip color tags in the sequencer.
Offset
What offset frame to use, relative to the current frame position.
Retiming
Display the retiming keys on top of the strips.
Waveforms
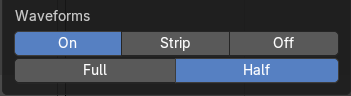
How waveforms are displayed.
On
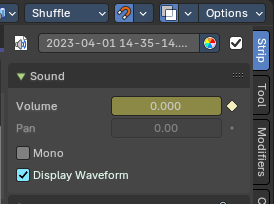
Shows waveforms
Strip
Shows strip settings per strip in the Sound panel Display Waveform settings.
Off
Hides all waveforms.
Waveform Style
What waveform style to use.
Full
Shows a bidirectional wave form.
Half
Shows a one-sided wave form.
Sync
This will toggle the 3D Sequencer synchronization with scene strips and scene switching. Refer to the 3D Sequencer addon chapter for more information.
Header Tools and Options - Sequencer & Preview view

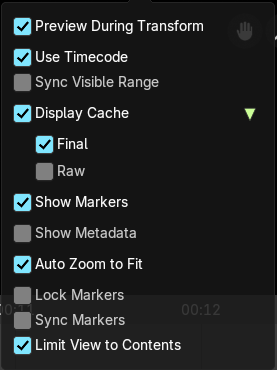
The tools in the Sequencer & Preview view mode are most likely a combination of single modes. Both showing at the same time.
There is one exception in the options panel. Preview as backdrop is not shown in this mode.
Quick Menu
Quick Menu
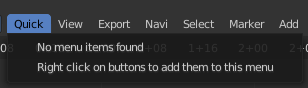
The quick menu, or in long Quick Favorites menu, is a menu that can be customized to your needs. Here you can add operators for quick access.
It is located in the header. But it can be called by hotkey Q directly under the mouse. This hotkey works in other editors too.
When the menu is empty, then you will see the message "No Menu Items found". This means that you first have to add some tools to the menu. It is a user configurable menu.
Note that added operators in this menu does not have icons. Just text.
Adding an operator to the Quick menu
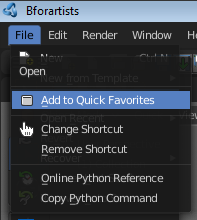
Open the panel or the menu where your operator is that you want to add.
Let's add the open command from the File menu. Open the File menu, right click at open, and choose Add to Quick Favorites.
Do the same with Save As. We should now have two new menu items in the Quick menu, which you can use now.
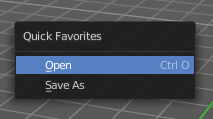
As a rule of thumb, when the right click menu has an Add to Quick Favorites, then you can add it to the quick menu.
Note that you can also add operators from the tool shelf at the left. And also operators from other editor types. Some other editors have their own quick menu though. The Image Editor for example. These operators gets added in the quick menu of the image editor then. And does not show in the quick menu in the header of the 3D view.
Adding a menu to the Quick menu
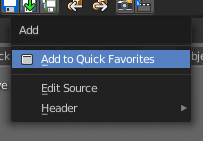
It is also possible to add a menu to the Quick menu. For example the whole Add menu. The way is the same. Right click at it, and choose Add to Quick Favorites.
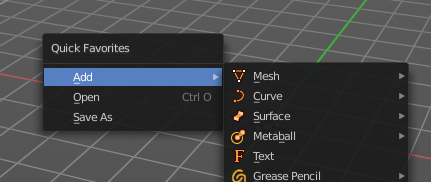
Order
You might notice that the add menu adds at the top of the menu, and not at the bottom as you would expect. First comes menus, then comes operators. And they get added in the order in which you add them.
Besides that, operators and menus gets added in the order that you add them. They cannot be sorted afterwards. So be careful how you add them. You can of course always remove operators and menus, and re-add them at the end of the list.
Removing an operator from the Quick menu
The Quick Favorites menu (Q) holds the tools and menus you add to it yourself. See Quick Favorites in the Interface chapter.
Context and mode dependent content
The quick favorites. menu exists in nearly all editors. But it is just in the 3D view available in the header. So that you know this functionality exists. In the other editors you call it with hotkey Q.
The content of the quick favorites. menu changes, dependent over which editor you are, and in what mode you are. When you add for example an operator from the image editor, then this operator just shows in the quick menu when you call the menu from the image editor. Same goes for the modes. Edit mode tools will just show in edit mode. And so on.
View Menu
Type of Sequencer View
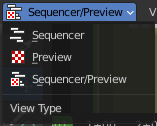
The Video Sequence Editor is two editors in one. The Preview sequencer view is a preview window. Here plays the video. The Sequencer sequencer view is the view that contains the video and audio strips.
The view menu for Sequencer/Preview contains the same menu items than in the other two views. So we won't explicitely list it here again.
View Menu in Preview window
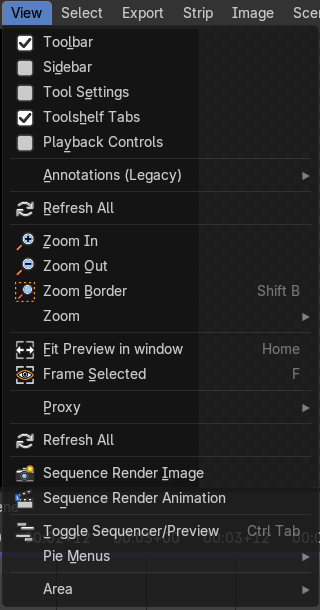
The View menu contains all View related tools.
Toolbar
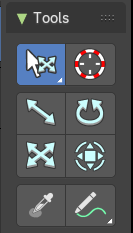
Shows or hides the toolbar at the left.
Sidebar
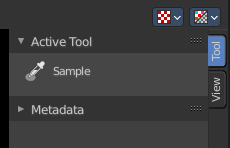
Shows or hides the sidebar at the right in the viewport.
Tool Settings
Show or hide the tool settings at the top.
Tool shelf tabs
Show or hide the tool shelf tabs in the tool shelf.
Playback Controls
Reveals the footer with the playback controls.
Annotations (Legacy) submenu
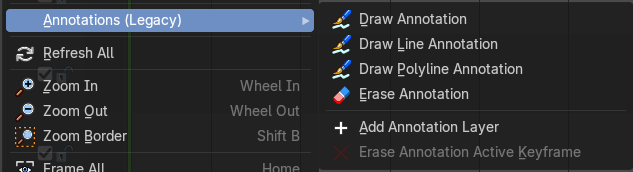
This group of operators is useful to take notes without changing tool-shelf operators. These notes can be colored in the View tab of the Property Shelf. Each layer is a single color. You can also animate the notes with keyframes, editable in the dopesheet.
Note: These are legacy operators, meaning they are equally available in the Toolshelf as a modal operator.
Draw Annotation
Starts the annotation free hand draw tool in the editor.
Draw Line Annotation
Starts the annotation line draw tool to draw straight lines in the editor.
Draw Polyline Annotation
Starts the annotation Polyline draw tool in the editor which allows to draw multiple connected straight lines in the editor.
Erase Annotation
Starts the annotation erase tool in the editor which erases any strokes in the editor.
Add Annotation Layer
Starts a new annotation layer.
Erase Annotation Active Keyframe
Erases the active keyframe of the annotation.
Zoom In
Zooms in.
Zoom Out
Zooms out.
Zoom Border
Draw a rectangle around the target area to zoom in or out. Left mouse button zoooms in. Middle mouse button zooms out.
Zoom
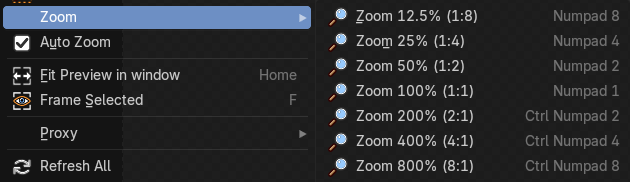
A set of predefined zoom factors.
Fit Preview in Window
Zooms in or out until the video displays fitting in the viewport.
Frame Selected
Centers the selection and zooms to fit.
Proxy

Proxy works just with movie or image strips. What it does is to create a smaller set of preview images. This speeds up the calculation while you are at editing the video. The final result uses the final images again then.
Setup
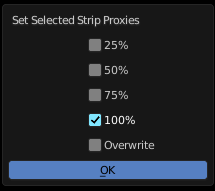
Calls a panel where you can choose the resolution of the proxy images. Clicking OK starts the creation process.
Rebuild
Recreates the proxy images
Scene Render Size
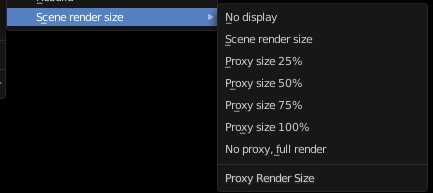
What render size the display should choose.
Refresh All
Refresh the sequence editor.
Sequence render Image
Renders an image of the current frame.
Sequence render Animation
Renders the animation in the preview range.
Toggle Sequencer/Preview
Toggles the type of sequencer view between Sequencer or Preview.
Pie Menu

The available pie menus for the sequencer in View mode.
Area
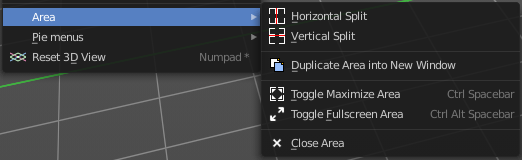
This menu contains general view functionality. And exists in most other editor types too.
Toggle Quad view
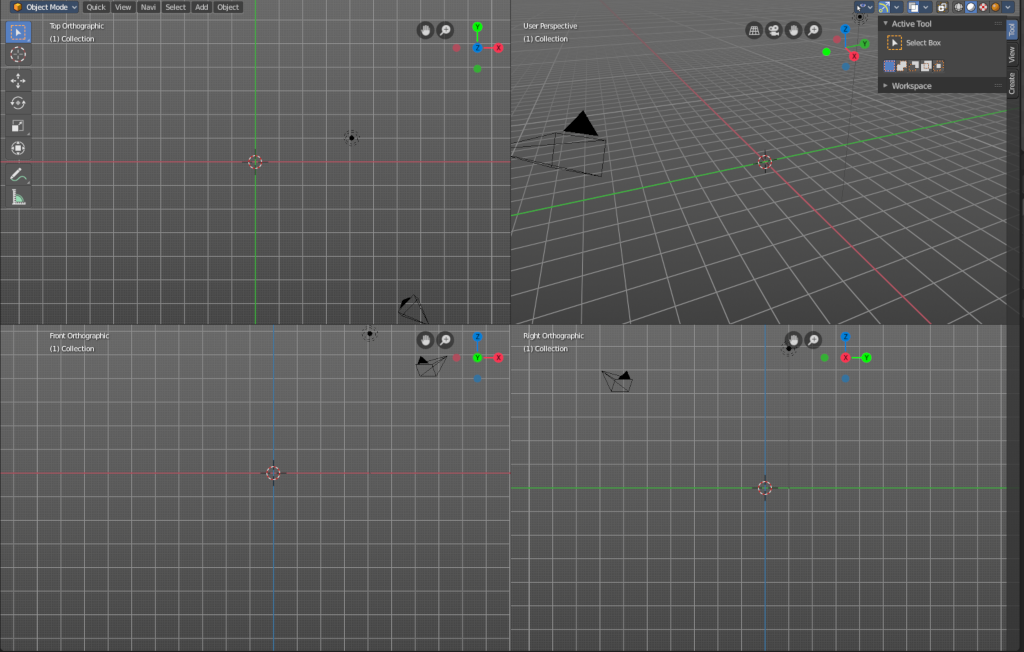
Displays the 3D View divided into four split screen parts. Note that the orthographic views cannot be switched in this mode. They remain orthographic, you cannot rotate them.
To return to single view reuse the menu item in the View menu.
Horizontal Split
Splits the current view horizontally into two independent editor windows.
Vertical Split
Splits the current view vertically into two independent editor windows.
Duplicate Area into New Window
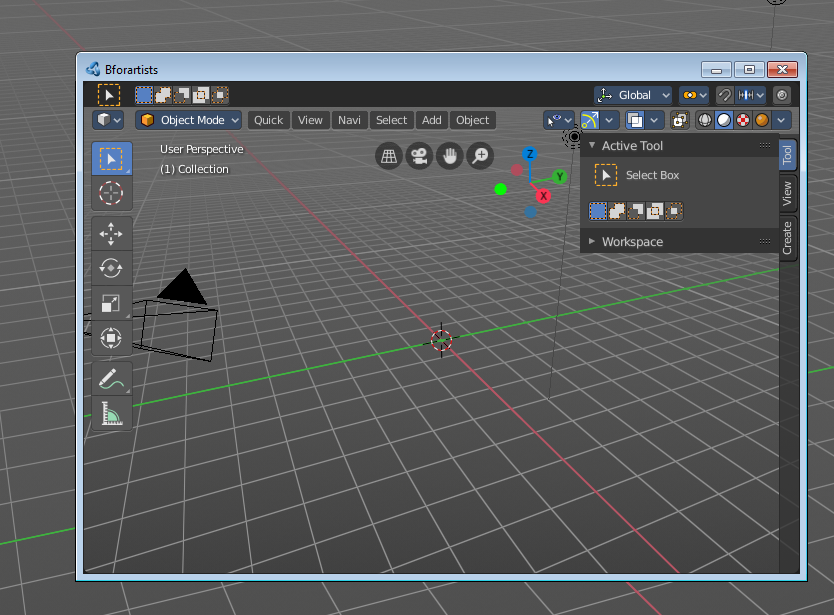
Duplicate Area into New Window opens this editor in a floating window. See Floating editor windows in the Interface chapter.
Toggle Maximize Area
Displays the editor maximized with menus. To return from the maximized view press hotkey Ctrl + Space bar. Or reuse the menu item in the area menu.
Toggle Full screen Area
Displays the editor maximized without menus. To return from the full screen view press hotkey Ctrl + Alt + Space bar.
Close Area
Closes the area window.
View Menu in Sequencer window
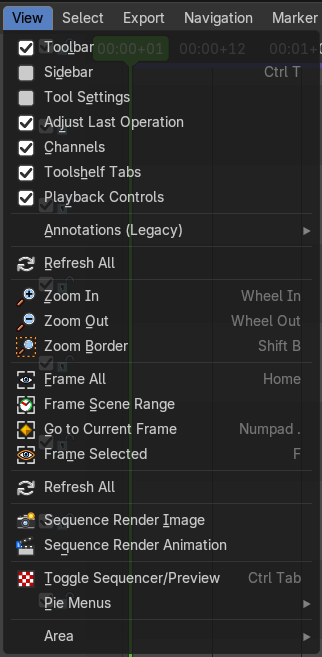
The View menu contains all View related tools.
Toolbar
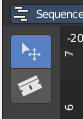
Shows or hides the toolbar at the left.
Sidebar
Shows or hides the sidebar at the right in the viewport.
Tool Settings
Show or hide the tool settings at the top.
Adjust Last Operation - View Menu in Sequencer window
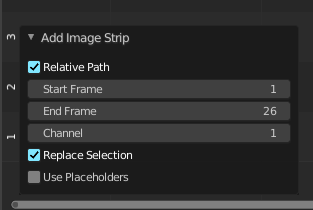
Displays the Adjust last operation panel down left.
Channels
Display the channels in front of the timeline
Tool Shelf Tabs
Show or hide the tool shelf tabs in the tool shelf.
Footer
Shows the footer.
Zoom In
Zooms in.
Zoom Out
Zooms out.
Zoom Border
Zooms to the selection.
Frame all
Zooms in or out to display all elements fitting into the view.
Frame Scene Range / Frame Preview Range
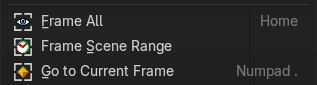
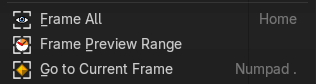
This menu item changes the name and the icon, dependant of if the Use Preview range is activated. Which can be done besides the play elements in the Timeline editor or in the footer.

Resize the horizontal view to the current scene or preview frame range.
Go to current frame
Centers the view at the current frame.
Frame selected
Zooms in or out to display the currently selected element fitting into the view.
Refresh all
Refreshes the sequence editor.
Sequence render Image
Renders an image of the current frame.
Sequence render Animation
Renders the animation in the preview range.
Toggle Sequencer/Preview
Toggles the type of sequencer view between Sequencer or Preview.
Pie Menu
The available pie menus for the sequencer in Sequencer mode.
Area
This menu contains general view functionality. And exists in most other editor types too.
Toggle Quad view
Displays the 3D View divided into four split screen parts. Note that the orthographic views cannot be switched in this mode. They remain orthographic, you cannot rotate them.
To return to single view reuse the menu item in the View menu.
Horizontal Split
Splits the current view horizontally into two independent editor windows.
Vertical Split
Splits the current view vertically into two independent editor windows.
Duplicate Area into New Window
Toggle Maximize Area
Displays the editor maximized with menus. To return from the maximized view press hotkey Ctrl + Space bar. Or reuse the menu item in the area menu.
Toggle Full screen Area
Displays the editor maximized without menus. To return from the full screen view press hotkey Ctrl + Alt + Space bar.
Close Area
Closes the area window.
Export Menu
Export menu
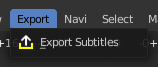
This menu exists in both view types. It currently has just one entry.
Export Subtitles
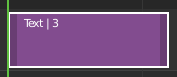
Exports the subtitles of a video in stl format. You need to have a subtitle text strip in the video.
Navigation Menu
Navigation menu
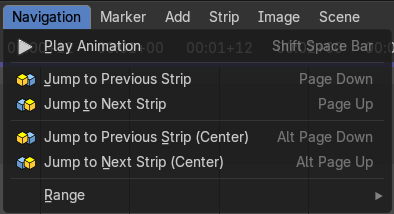
This menu exists in Sequencer view type.
Play Animation
Plays the movie.
Jump to Previous Strip
Jumps to the start of the previous strip.
Jump to Next Strip
Jumps to the start of the next strip.
Jump to Previous Strip(Center)
Jumps to the center of the previous strip.
Jump to Next Strip(Center)
Jumps to the center of the next strip.
Range
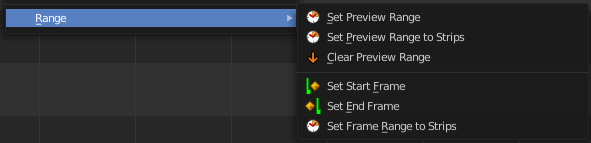
Play range related functionality. Most of it can also be adjusted in the play elements in the timeline editor.
Set Preview Range
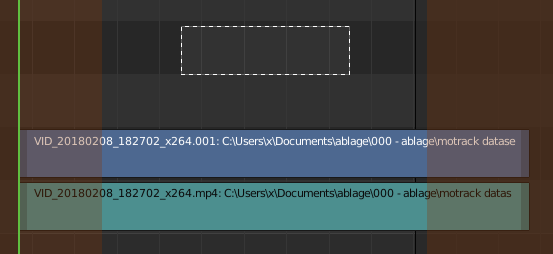
Calls a border select tool that allows you to set the range of the preview.
Set Preview Range to Strips
Sets the width of the preview range to the length of the strips.
Clear Preview Range
Removes the preview range.
Set Frame Range to Strips
Sets the start and end frame to the start and end frames of the strips in the sequencer.
Tip: To make the current frame the start or end of playback, use the two buttons next to Start and End in the timeline footer.
Select Menu
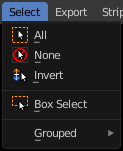
Select menu in Sequencer window
All
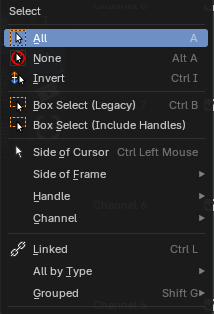
Select everything.
None
Select nothing.
Invert
Flip the selection: selected strips become unselected and the other way round.
Box Select (Legacy)
Drag a rectangle to select strips. Hold Shift to remove strips from the selection. You rarely need it: dragging with the Tweak tool selects the same way.
Box Select (Include Handles)
Like Box Select, but it also selects the handles at the start and end of each strip, so you can trim several strips at once.
Side of Cursor
Selects every strip on the same side of the playhead as your mouse.
Side of Frame submenu

Left
Select the strips left from the current frame.
Right
Select the strips right from the current frame.
Handle submenu
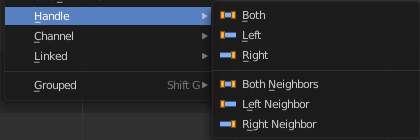
Both
Select all handles of the selected strips.
Left
Select the left handles of the selected strips.
Right
Select the right handles of the selected strips.
Both Neighbours
Select all handles of the selected strips. Plus the handles from the neighbour strips that touches this strip.
Left Neighbours
Select the left handles of the selected strips. Plus the handle from the neighbour strips that touches the left handle of the strip.
Right Neighbours
Select the right handles of the selected strips. Plus the handle from the neighbour strips that touches the right handle of the strip.
Adjust Last Operation - Select Handles
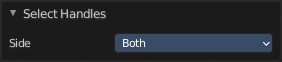
The panel that appears after Select Handles. It changes which handles the operator selects.
Side
Which side to select.
Channel submenu

Left
Select the strips left from the current frame that are in the same channel.
Right
Select the strips right from the current frame that are in the same channel.
Both sides
Select all strips in the channel of the currently selected strip.
Linked
Selects every strip that touches the strips you have selected.
All by Type submenu
Selects every strip of one kind, for example all Sound strips or all Text strips. The kinds are Scene, Clip, Mask, Movie, Sound, Image, Color, Text, Adjustment Layer, Compositor, Effect and Visual.
Grouped submenu
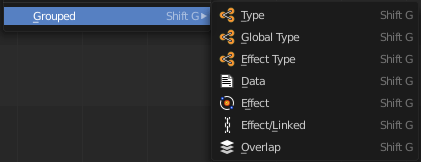
Select all strips that are equal to the current selected strip by the chosen method. The menu items should be self explaining.
Select menu in Preview window
All
Select everything.
None
Select nothing.
Invert
Flip the selection.
Box Select (Legacy)
Drag a rectangle to select strips. Hold Shift to remove strips from the selection.
Grouped
Select all strips that are equal to the current selected strip by the chosen method. The menu items should be self explaining.
Text Select
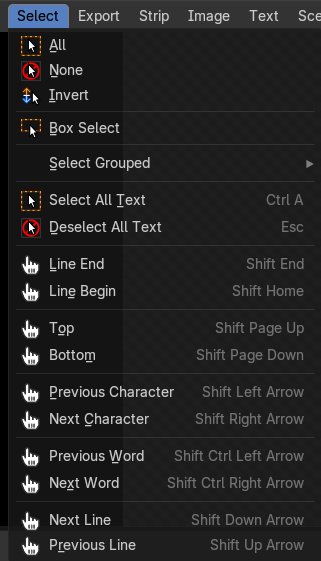
These operators are used to select characters, words, lines and blocks of text.
You can also select all and deselect all.
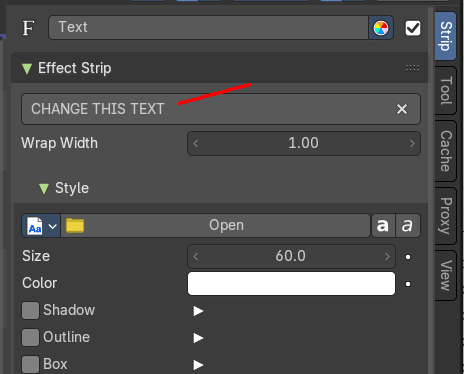
Note: These are only shown when a text strip is selected. And they are greyed out first.
You need to edit the text at least once in the sidebar.
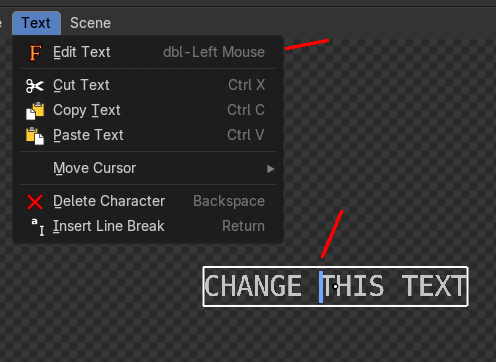
AND you need to go in edit mode by a double click then.
Marker Menu
Dopesheet Editor - Marker Menu
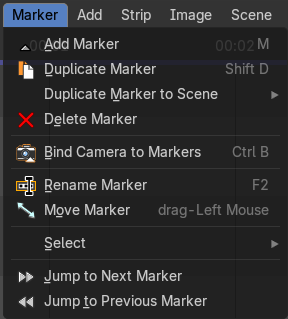
Markers are visual landmarks. They can mark a start of a specific animation sequence, the end of a camera movement, and so on.
When you add one then a marker area appears at the bottom of the timeline.
Markers can be pulled around by clicking at them and dragging them left or right. The active marker is yellow.
By holding down shift you can select more than one marker.
Add Marker
Adds a marker at the current frame position.
Duplicate Marker
Duplicates the selected marker(s). The duplicate(s) sticks at the mouse until you click to give it the target destination.
Duplicate Marker to Scene
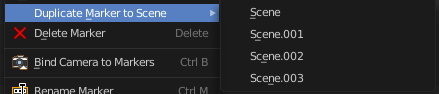
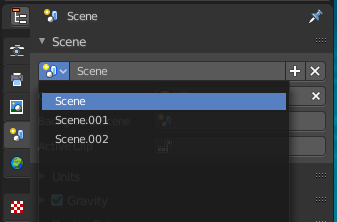
Duplicate markers to other scenes. A blend file can contain more than one scene. See Scene Properties in the Properties editor.
Delete Marker
Deletes the selected marker(s).
Bind Camera to Markers
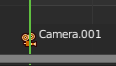
This feature is of interest when you work with scene strips. Bind camera to markers turns an object into a camera object. This can be any object in the scene. Not just camera objects.
When the current frame position does not have a marker yet, then it creates a marker at the current frame position.
By binding different objects or cameras at different marker locations you can switch cameras automatically.
The marker with a bind camera attached will show a camera icon.
Rename Marker
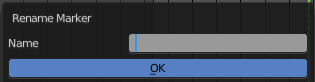
A menu will open up where you can rename the active marker.
Move Marker
Hotkey only functionality! This menu item exists to show the hotkey to move the marker.
Select submenu
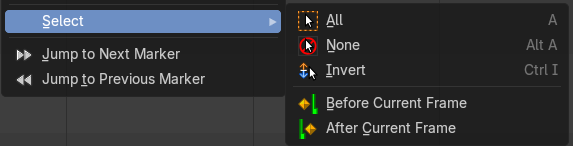
All
Select all markers.
None
Deselect all markers.
Invert
Invert selection.
Before Current Frame
Select markers before current frame
After Current Frame
Select markers after current frame.
Jump to Next Marker
Sets the frame position to the next marker.
Jump to Previous Marker
Sets the frame position to the previous marker.
Add Menu
Add menu
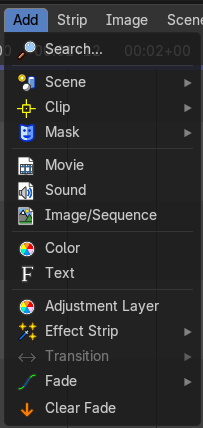
The sequencer does not only display video and audio strips. There are several strip types available. You can in the Add menu load image sequences, single images, masks, and even whole scenes.
Different strip types have different colors. You can customize them further in the sidebar in the strip tab.
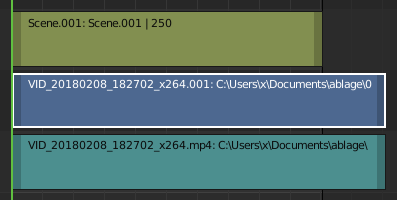
Note that some strip types can also be loaded by drag n drop. When you load the strips by the file selector then you will see some import options there. These import settings are mentioned here.
Search
A way to search the menu by typing. Press spacebar to also start searching.
Scene submenu
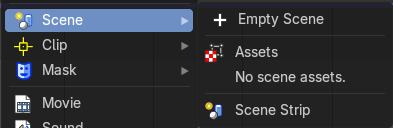
Scene strips are a way to insert the render output of another scene into your sequence. Instead of rendering out a video, then inserting the video file, you can insert the scene directly.
The strip length will be determined based on the animation settings in that scene.
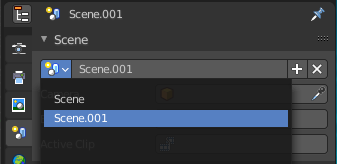
Note: You can't use the same scene than the one where you have the Video Sequence Editor open. You need to have a second scene with the content. Scenes can be managed in the Scene tab in the Properties Editor.
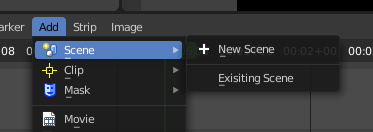
Scenes must exist in the current file. Available scenes appears in the Scene menu.
You can also create a strip directly from this Add Scene Strips operator using the New Scene entry.
Clip submenu
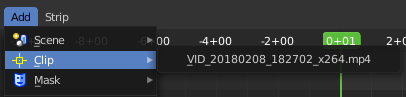
Clips comes from the Movie Clip Editor. The Movie Clip Editor is part of the motion tracking workspace, and primarily used for motion tracking.
Clips must exist in the current file. Available clips appears in the Clip menu.
Mask submenu

The Mask strip generates a mask image from the selected mask data-block generated in the Movie Clip Editor. This works similar to the Mask Node but without the options available for finer control. The mask image is always generated at the render resolution, scaling along with different proxy levels.
Masks must exist in the current file. Available masks appears in the Mask menu.
Movie
Import a video.
Import settings
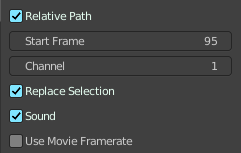
Relative Path
Use a relative path to the blend file.
Start Frame
Start frame of the strip.
Channel
In which channel to insert.
Replace Selection
Replace selected strips at import.
Sound
Import sound. A video is usually made of an image part and an audio part.
Use Movie Frame rate
Use the frame rate of the video to keep video and audio in sync.
Sound
Import an audio file.
Import settings
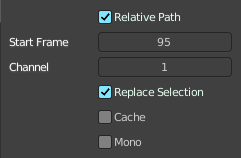
Relative Path
Use a relative path to the blend file.
Start Frame
Start frame of the strip.
Channel
In which channel to insert.
Replace Selection
Replace selected strips at import.
Cache
Cache the sound in memory.
Mono
Import the audio file as mono.
Image/Sequence
Adds a single image or a sequence of images.
When you add a single image then a strip with the length of one second gets created.
When you want to import an image sequence you have to select all the images of the sequence.
Import settings
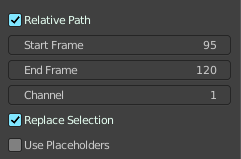
Relative Path
Use a relative path to the blend file.
Start Frame
Start frame of the strip.
End Frame
End frame of the strip.
Replace Selection
Replace selected strips at import.
Use Placeholders
Use placeholder images in an image sequence with missing images.
Image sequences can use placeholder files. This works by enabling Use placeholders checkbox when adding an image strip. The option detects the frame range of opened images using Blender’s frame naming scheme (filename + frame number +.. .extension) and makes an image sequence with all files in between even if they are missing. This allows you to render an image sequence with a few frames missing and still the image strip will have the correct range to account for the missing frames displayed as black. When the missing frames are rendered or placed in the same folder, you can refresh the Sequencer and get the missing frames in the strip. The option is also available when using the Change Data/File operator and allows you to add more images to the range.
Color
Adds a strip with a plain color. Color is one of many effect strips.
Text Strip
A Text strip allows you to display text in the Sequence.
Adjustment Layer
The Adjustment Layer strip works like a regular input file strip except for the fact, that it considers all strips below it as its input.
Real-world use cases, you want to add some last finishing color correction on top of parts of your final sequence, timeline without messing with meta strips around. Just add an adjustment layer on top and activate the color balance.
Or you can stack a primary color correction and several secondary color corrections on top of each other (probably using the new mask input for area selection).
Effect Strip submenu
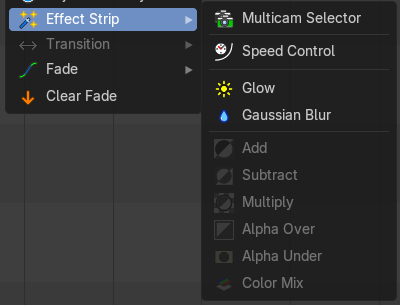
Effect strips that adds effects to the image part of the strips.
The color related strips that are greyed out here requires to have two strips selected. The one controls the other strip then.
The last operator panel is mostly similar for all types.
Multicam Selector
The Multicam Selector strip is used for multi-camera editing. Multi-camera editing is when a scene is recorded using multiple cameras from different angles and then edited together afterwards. This process can be rather easy in the VSE if you properly setup every to improve your workflow.
Workflow
Add your video strips.
Sync all your cameras by either using Audio Wave forms or by the movement of objects.
Tip: To make syncing strips easier you can group cameras, their audio, and their effects together using Meta Strips.
Add a viewer region for every input channel and to improve the performance use proxies.
Add a Multicam Selector strip above all the channel tracks.
After completing these steps you should get something similar to the image below:
Select the Multicam strip.
When you select the Multicam strip, the keys 1 to 9 are mapped to the cut buttons. So, select the Multicam strip and start playback and press the keys for the correct input while watching the individual cameras.
You will now have a small Multicam Selector strip for every cut.
Transform
Moves, rotates or scales the images within a strip.
Speed Control
Speed Control time-warps the strip, making it play faster or slower than it normally would. A Global Speed less than 1.0 makes the strip play slower; greater than 1.0 makes it play faster.
Playing faster means that some frames are skipped, and the strip will run out of frames before the end frame. When the strip runs out of frames to display, it will just keep repeating the last one; action will appear to freeze. To avoid this, position the next strip under the original at a point where you want the motion to continue.
Glow
This effect makes parts of an image glow brighter. To “animate” the glow effect, mix it with the base image using the Gamma Cross effect, crossing from the base image to the glowing one.
Gaussian Blur
Blurs the input strip in a defined direction.
Add
The Add Effect adds the colors of two strips together. Use this effect with a base image strip, and a modifier strip. The modifier strip can be either a solid color or a black-and-white mask, or another image.
You can use this effect to increase the brightness of an image, or if you use a BW mask, selectively increase the brightness of certain areas of the image. The Mix node, in Add mode, does exactly the same thing as the Add SFX strip here, and is controlled the same way by feeding the Factor input.
Subtract Effect
This effect takes away one strip’s color from the second.
Make a negative of an image using this effect, or switch the order of the strips and just darken the strip. Subtracting a hue of blue from a white image will make it yellow, since red and green make yellow.
Multiply
The Multiply effect multiplies two colors. Bforartists uses values between (0.0 to 1.0) for the colors. This operation does not have to be normalized, the multiplication of two terms between (0.0 to 1.0) always gives a result between (0.0 to 1.0).
With the “traditional” representation of three bytes, like RGB(124, 255, 56), the multiplications give far too high results, like RGB(7316, 46410, 1848), that have to be normalized (brought back) by dividing them by 256 to fit in the range of (0 to 255)…
Multiply can be used with a Mask. Or with Uniform Colors.
Multiplying a color with a “normal” image allows you to soften some hues of this one (and so – symmetrically – to enhance the others).
For example, if you have a brown pixel RGB(0.50, 0.29, 0.05), and you multiply it with a cyan filter (uniform color RGB(0.0, 1.0, 1.0)), you will get a color RGB(0.0, 0.29, 0.5). Visually, the result is to zero the reds and bring up (by “symmetry” – the real values remain unchanged!) the blues and greens. Physically, it is the same effect as shining a cyan light onto a chocolate bar. Emotionally, vegetation becomes more lush, water becomes more Caribbean and inviting, skies become friendlier.
Note: This effect reduces the global luminosity of the picture (the result will always be smaller than the smallest operand). If one of the images is all white, the result is the other picture; if one of the images is all black, the result is all black!
Over Drop
Alpha channel effect. With Over Drop the first strip selected is the foreground. But as with Alpha Over, the Opacity controls the transparency of this foreground. Warning! By clicking the Premultiply Alpha button in the Sidebar of the foreground strip, the alpha values of the two strips are not multiplied or added together.
Alpha Over
Alpha channel effect. With Alpha Over the first strip selected is the background, and the second one goes over the first one selected. The Opacity controls the transparency of the foreground.
Alpha Under
Alpha channel effect. With Alpha Under the first strip selected is the foreground, and the second one, the background. The Opacity controls the transparency of the background.
Color Mix
The Color Mix effect strip mixes two strips by working on the individual and corresponding pixels of the two input strips. This effect can do the exact same operation as the Add, Subtract, or Multiply effect strips but also other color blending modes.
Transition submenu
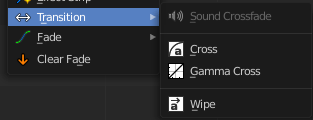
Adds transitions between two selected strips.
These strips are effect strips. And will have similar adjust last operation panels therefore.
Sound Crossfade
Adds a cross fade between two selected audio strips.
Cross
The Cross transition adds a cross fade transition. Strips can be overlapping or have a gap between them, But when strips contain a gap the last and first frame of each strip is extend which can cause a pause if any of the strips are a sequence.
Gamma Cross
Similar to the Cross transition. It adds a cross fade transition. But uses color correction while transitioning between the two strips. This results in a smoother transition.
Wipe
Adds a transition from one strip to the next strip. The duration of the wipe is the intersection of the two source strips and cannot be adjusted. To adjust the start and end of the wipe you must adjust the temporal bounds of the source strips in a way that alters their intersection.
Fade submenu
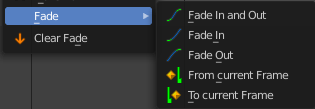
Adds a fade effect to the selected strip(s). The menu items should be self explaining.
Clear Fade
Removes all fade effects from the selected strips.
Strip Menu
Strip menu in Sequencer window
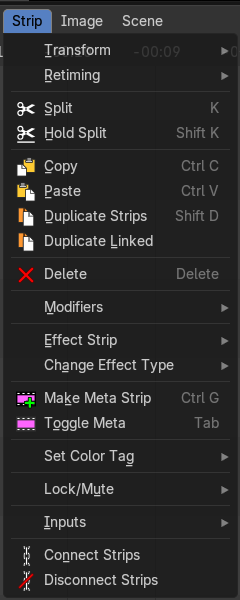
The strip menu contains strip related functionality. The content differs, dependent of the selected strip.
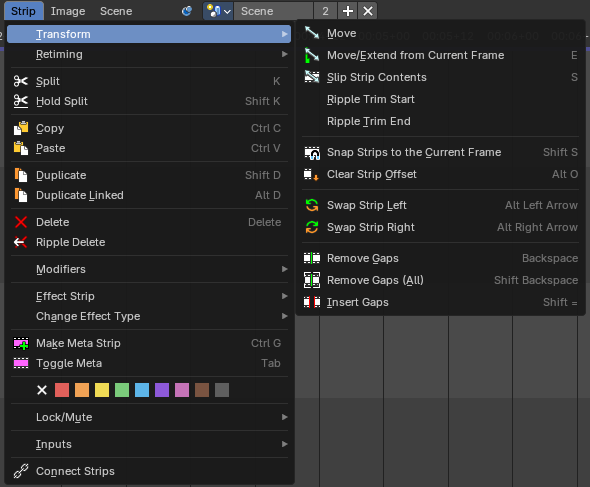
Transform - Submenu
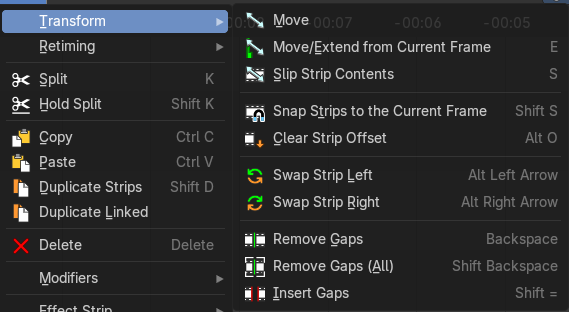
This sub-menu contains transform operators that you can use on strips.
Move
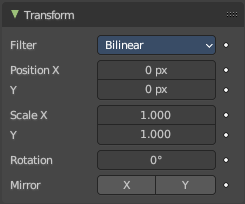
Moves the selected strip(s).
Move/Extend from Current Frame
Extends the selected strips relative to the frame indicator and the mouse position. All selected strip handles to the mouse side of the current frame indicator will transform together.
Slip Strip Contents
Change the position of the contents of a strip without moving the strip itself.
Snap Strips to the Current Frame
Snaps the selected strips to the current frame.
Clear Strip Offset
Clear strip offset from the start and end frames.
Swap Strip Left
Swap the active strip with the strip to the left.
Swap Strip Right
Swap the active strip with the strip to the right.
Ripple Trim Start
Trims the start of the selected strip(s) to the current frame and moves the following strips to close the gap.
Ripple Trim End
Trims the end of the selected strip(s) to the current frame and moves the following strips to close the gap.
Remove Gaps
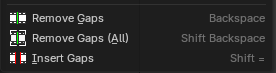
Removes gaps at the frame indicator position in the current channel. Strips after the indicator will move to the left to close the gap.
Remove Gaps (All)
Remove all gaps between all clips at the right side.
Insert Gaps
Inserts a gap at the frame indicator position. Strips after the indicator will move to the right by the amount of gap frames.
Retiming - Submenu
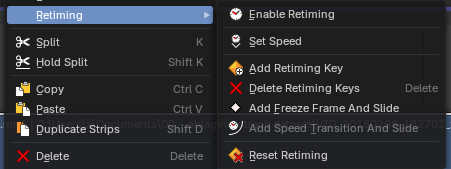
This submenu contains retiming operators to help change the speed of movie strips. This menu is context sensitive. If you select a retiming keyframe, you will see a new set of operators.
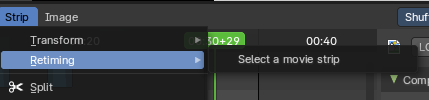
Note: These operators only work on movie strips, and you must have one selected to see the operators.
Enable/Disable Retiming
Enables and Disables the retiming keys of a strip. When you enable retiming, you will be able to set keyframes to retime at difference speeds, to set freeze frames, and or set gradient time changes between keyframes.
Set Speed
Sets the speed of a retimed segment. If there is no segment, it will create a new segment. To edit the segment, Enable Retiming.
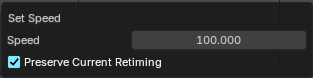
Note: The speed is a percentage of total, where 100% is original speed, 110% of the movie playback is 10% faster, and at 90% the movie playback is 10% slower.
Speed
The new speed value.
Preserve Current Retiming
With preserve current retiming the strip changes length instead of changing next segment speed.
Add Retiming Key
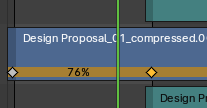
Adds a retiming key. Here you can change strip speeds in various locations within the strip to squash and stretch time dynamically. To edit a retiming key, click on it in the bottom row of the movie strip and drag left or right. A percentage overlay will show the amount of time change is happening between the keyframes.
Delete Retiming Key
Removes the selected retiming keys.
Add Freezeframe
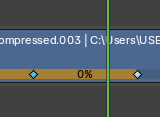
Adds a freeze frame by creating two retiming keyframes with 0% time change between them. You can then later adjust the length of the freezeframe by adjusting either of the retiming keyframes.
Add Speed Transition And Slide

Add a smooth time transition between two retimed segments.

To do this, create 3 retiming keyframes, select the middle one, then use the operator. This will create two new keyframes with a begging percentage and an ending percentage. The distance between these two retiming keyframes will be the duration of the transition.
Note: This operator only shows when you have a retiming keyframe selected.
Reset Timing
Resets the movie strip to original playback speed.
Split
Split the selected strip into two parts at the current frame.
Hold Split
Like Split, it splits a strip in two strips. But you will not be able to drag the endpoints to show the frames past the split of each resulting strip. You can adjust the Hold Offset number fields in the Strip Info panel.
Copy
Copies the selected strip(s).
Paste
Pastes copied strip(s).
Duplicate Strips
Duplicates the selected strip(s).
Duplicate Linked
This creates a linked duplicate of the selected strip(s), meaning the new strip shares the same underlying data as the original.
Delete
Deletes the selected strip(s).
Ripple Delete
Deletes the selected strip(s) and moves the following strips to close the gap.
Delete Strip & Data
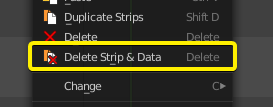
Deletes the selected scene strip types and associated scene data.
This will then convert the associated scene to an orphan data block which will be permanently removed upon save and re-load of the *.blend file.
Modifiers – Submenu
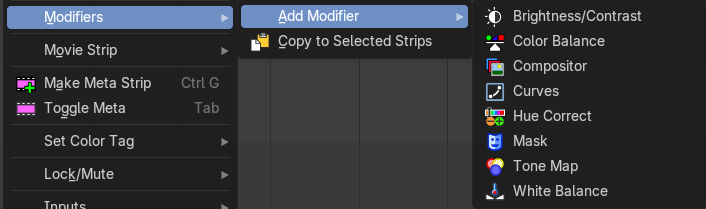
All strip types. Adds a strip modifier. Strip modifiers are explained in the sidebar chapters.
Sound strips has different content in the modifier menu.

Copy modifiers to selection
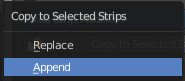
Copies the modifiers from the source strip to the target strip by given method. It opens a popup where you can choose the method.
First select the source strip. Hold down shift, select the second strip. Perform the tool.
Effect Strip

Strip type Effects.
Reassign Inputs
Reassigns the input of the strips. Unfortunately not to find out how this works.
Swap Inputs
Swaps the inputs of the selected strips. Unfortunately not to find out how this works.
Change Effect Types
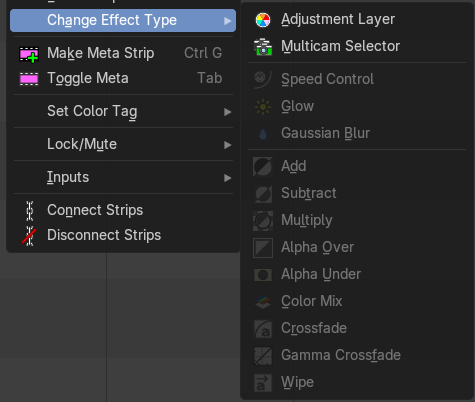
Changes a selected existing effect strip effect type. Only shows when an effect strip is selected.
These operators show and hide depending on the strip selection context.
If a strip cannot be changed, it will advise you to selected a changeable strip, which are Scene, Effect and Data strips.
Movie Strip - Submenu

Strip type Movie.
Set Render Size
Set the render size and aspect from the active strip. Attention, there is no feedback if the operation was successful. It simply sets it.
Deinterlace Movies
Deinterlaces the selected movie strips.
Set Render Size

Strip type Image.
Set the render size and aspect from the active image strip. Attention, there is no feedback if the operation was successful. It simply sets it.
Interlace Movies
Strip type Image. Create a strip for every image in the image sequence strip.
Adjust Last Operation - Separate Images
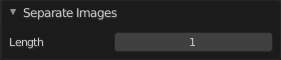
The length of each frame of the new created strips.
Make Meta Strip
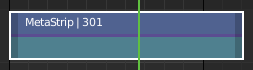
Creates a meta strip out of the selected strips. A Meta Strip is a strip which contain multiple strips treated as if it was one strip. It allows you to reduce the vertical space used in the Sequencer. You can edit it the same way as any other strips.
Note: The default blend mode for a Meta strip is Replace. There are many cases where this alters the results of the animation so be sure to check the results and adjust the blend mode if necessary.
UnMeta Strip
Separating (ungrouping) the Meta strip restores the strips to their relative positions and channels.
Toggle Meta
Toggles between the meta and unmeta state. You need to have a meta strip in the sequencer timeline already.
Color Tags
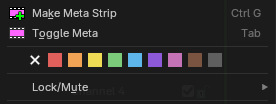
Give strips a color so you can spot them quickly, for example all dialogue in green and all music in blue. Select the strips and click a color in the row of color buttons. The X button removes the color.
The same row is in the right-click menu of a strip.
Lock/Mute - Submenu
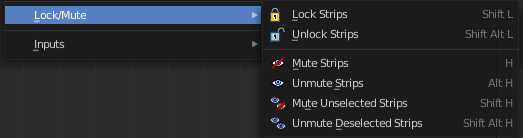
Lock Strips
Locks the strip from editing. They can't be moved or edited anymore.
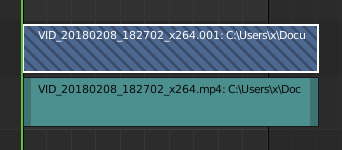
Locked strips appears hatched.
Unlock Strips
Unlock locked strips.
Mute Strips
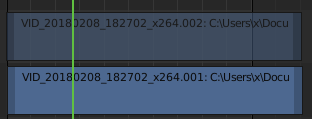
Mutes the selected strips. They do not play anymore, and they appear greyed out.
Unmute Strips
Unmutes selected muted strip.
Mute unselected strips
Mute the unselected strips.
Unmute deselected Strips
Unmute all deselected strips.
Inputs - Submenu

Reload Strips
Reloads the strips in the sequencer.
Reload Strips and Adjust Length
Reloads the strips in the sequencer.
Change Paths/Files
Undocumented Operator. Opens a file selector.
Swap Data
Swaps the data between two selected strips. The strips must be compatible.
Connect Strips

Link selected strips together for simplified group selection. When strips are connected, they will show a connected link icon to the top left of the strips.
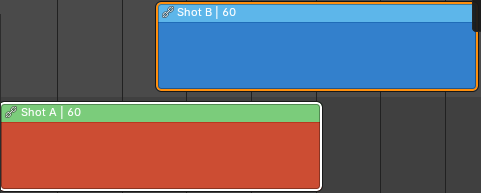
When connected and you move one, you will move all connected strips.
Note: To use, select multiple strips then connect.
Disconnect Strips
Unlink the selected strips, so you can select and move them one by one again.
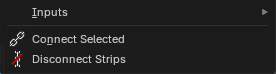
The menu changes with your selection. When the selected strips are not connected, it shows Connect Strips. When they are, it shows Connect Selected and Disconnect Strips. You find the same button in the tool shelf, in the Strip tab.
Strip menu in Preview window
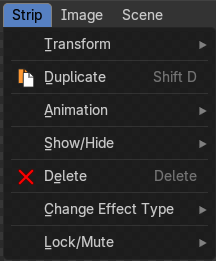
The strip menu contains strip related functionality.
Transform - Submenu
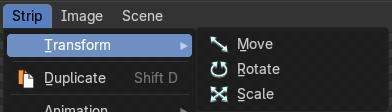
Move
Move the selected item.
Rotate
Rotate the selected item.
Scale
Scale the selected item.
Duplicate
Duplicates the selected item.
Animation
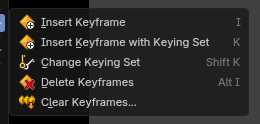
Insert Keyframe
Insert keyframes on the current frame. It inserts the keyframes in the active keying set. In case there is no keying set defined, it uses the default keying set defined in the User Preferences.
Insert Keyframe with Keying Set
Insert Keyframe for specified keying set.
Change Keying Set
Set a new active keying set.
Delete Keyframes
Removes keyframes from the selected strip the current frame.
Clear Keyframes
Removes all keyframes for the selected strip across the entire timeline.
Show / Hide sub menu
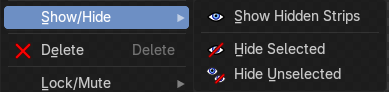
Show hidden strips
Reveals hidden strips.
Hide selected
Hides selected strips.
Hide Unselected
Hides unselected strips.
Delete
Deletes the selected strips.
Lock/Mute - Submenu
Lock Strips
Locks the strip from editing. They can't be moved or edited anymore.
Locked strips appears hatched.
Unlock Strips
Unlock locked strips.
Mute Strips
Mutes the selected strips. They do not play anymore, and they appear greyed out.
Unmute Strips
Unmutes selected muted strip.
Mute unselected strips
Mute the unselected strips.
Unmute deselected Strips
Unmute all deselected strips.
Image Menu
Image menu
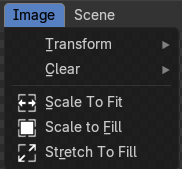
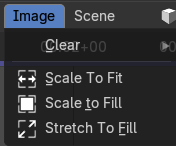
The Image menu contains strip related functionality. The images of the strips can be transformed in the preview window.
The transform sub menu is just displayed in the preview view.
Transform
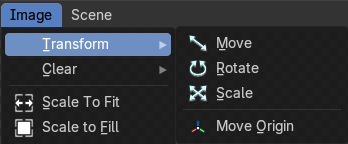
Move
Move the image.
Rotate
Rotate the image.
Scale
Scale the image.
Move Origin
Move the origin of the image to another location.
Clear
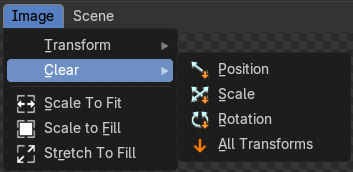
Position
Resets the position of the image.
Scale
Resets the scale of the image.
Rotation
Resets the rotation of the image.
All Transforms
Resets all transformations of the image.
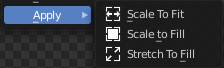
Scale to Fit
Scales the image to fit in the preview window in at least one direction.
Scale to Fill
Scales the image so that the whole preview window is covered.
Stretch to Fill
Stretches the image so that the whole preview window is covered.
Text Menu
Text menu
The Text menu contains text strip related functionality.
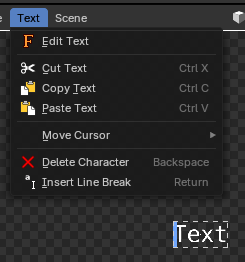
Note: This is only in the Preview mode of the Sequencer editor.
Edit Text
Toggles the text editing mode, so you can edit the text directly in the preview.
Cut Text
Cuts the selection.
Copy Text
Copies the selection.
Paste Text
Pastes a copied selection.
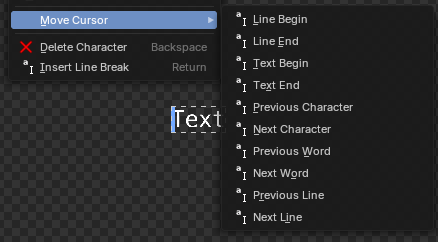
Move Cursor
Set the cursor at specific positions in the text. Note: These operators are typically done through arrow keys, page up/down and home/end keys.
Delete Character
Deletes the selected text.
Insert Line Break
Inserts a new line.
Scene Menu
Text menu
Of interest when you deal with more than one scene. Activate the Sync button.
Adjust Timing
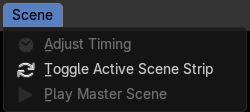
Adjust the timing of the active scene interactively.
Toggle Active Scene Strip
Updates the active scene to active scene strip. If synchronization timeline in Sequencer is not set, this toggles the current scene to active scene strip in the sequencer.
Play Master Scene
Starts or stops the playback of synchronization timeline.