




































Header
The header contains various menus and tools.
Introduction
The header contains various menus and tools. This chapter here is about the tools and options elements in the header.
The text menus are covered in its own chapter each.

Playback Elements

The playback elements allows you to play your animation, and set the animation range.
Time Jump Delta
Number of frames or seconds to jump forward or backward.
Jump Unit
What to use for the time jump. Frames or Seconds.
| Property | What it changes |
|---|---|
| Jump to Endpoint - start | Jumps to the first frame. |
| Jump to Keyframe - previous | Jumps to the keyframe before the current position. |
| Play Animation - backward | Plays the animation in reverse direction. |
| Play Animation - forward | Plays the animation. |
| Jump to Keyframe - next | Jumps to the keyframe after the current position. |
| Jump to Endpoint - end | Jumps to the last frame. |
| Cancel animation | Cancels the animation and returns to the original frame. |
| Current Frame | The edit box with the position of the current frame. Click at the value and type in another value to jump to another frame. |
Set Start Frame

Sets the current frame position as the start frame.
Use Preview Range
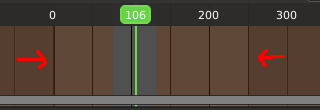
Toggle an alternative range used to preview animations. The Preview range works for the UI playback, but will not work for rendering an animation.
The preview range is displayed in orange color. The original playback range that is used for rendering is still displayed in grey underneath. When Use Preview Range is on, then the animation will loop between the Preview range.
| Property | What it changes |
|---|---|
| Start | The start frame for the animation in current mode. |
| End | The end frame for the animation in current mode. |
| Set End Frame | Sets the current frame position as the end frame. |
| Insert Keyframe | Inserts a keyframe. If you do not have a keying set assigned, this will default to the default keying set defined in the Preferences. |
| Delete Keyframe | Removes the keyframe at the current position in the current active keying set. |
Keyframing

All the keyframing buttons now sit together in one group, from left to right. The snapping buttons come right after them.
Insert Keyframe
Adds a keyframe on the current frame, for whatever you have selected. In the NLA editor it keys the active strip's action, so it does the right thing there too.
Delete Keyframe
Removes the keyframe on the current frame from whatever you have selected.
Auto Keying
The round button turns Auto Keying on. With it on, every change you make in the 3D View sets a keyframe on the current frame, or updates the one that's there. It works for transforms of objects and bones, not for things like colors in the Properties Editor.
Keying Set
The Keying Set field picks which channels get keyed, for example only Location, or Location and Rotation.
Keyframing settings
The last button, with the diamond, opens the Keyframing settings. Its icon shows the current keyframe type.
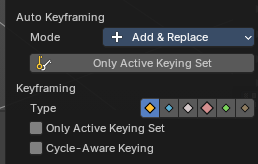
The popover has two parts. Auto Keyframing only shows while Auto Keying is on, and Keyframing is always there.
Auto Keyframing
- Mode chooses whether auto keying adds new keyframes and replaces existing ones (Add & Replace), or only replaces keyframes that already exist (Replace). Both have icons.
- Only Active Keying Set keys just the channels in the keying set you picked.
Keyframing
- Type sets the type, and with it the color, of new keyframes: Keyframe, Breakdown, Moving Hold, Extreme, Jitter or Generated. It is right at the top level, so you can pick it without digging.
- Only Active Keying Set inserts keyframes only into the active keying set.
- Cycle-Aware Keying keeps cyclic animations in sync. New keys on looping channels are mapped back into the loop.
- Layered Recording adds a new NLA track and strip for every pass you record over the animation, so you can tweak without destroying earlier passes. It only shows while Only Insert Available is off in the Preferences.
Playback Panel
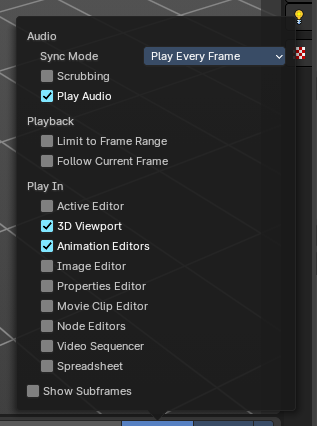
Here you can find various options for playback.
Sync Mode
How to synchronize playback.
| Property | What it changes |
|---|---|
| No Sync | Don't synchronize. Play every frame. |
| Frame Dropping | Drop frames if playback is too slow. |
| AV Sync | Drop frames to synchronize to Audio Playback. |
Audio Scrubbing
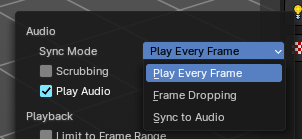
Play existing audio from sequence editor when scrubbing.
| Property | What it changes |
|---|---|
| Play Audio | Play back existing audio from sequence editor, otherwise mute the audio when deactivated. Use the Sequence Editor to add audio. |
| Sub frames | Show current scene sub frame and allow to set it by using interface tools. |
| Limit Playback to Frame Range | Don't allow frame selection with the mouse outside of the play range. |
| Follow Current Frame | Follow current frame in editors. |
Play in
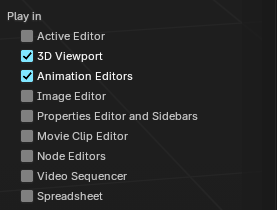
Plays the animation in the chosen editor types.
- Active Editor
- 3D Viewport
- Animation Editors
- Image Editor
- Properties Editor and Sidebars
- Movie Clip Editor
- Node Editors
- Video Sequencer
- Spreadsheet
Playhead Snapping
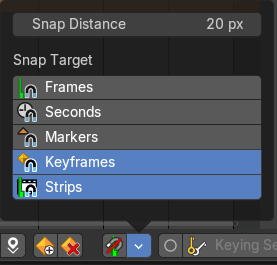
Playhead controls in animation editors help position the current frame indicator with precision, improving navigation and editing across the Timeline, Dope Sheet, Graph Editor, NLA, and Video Sequencer.
| Property | What it changes |
|---|---|
| Toggle Playhead Snapping On/Off | Toggles snapping behavior for the playhead with a visual indicator. When enabled, the playhead will snap to nearby time-based targets during scrubbing or dragging. Tip: You can temporarily enable/disable the playhead snapping by holding down Ctrl while dragging the playhead. |
| Distance | Sets the snapping threshold in pixels. Determines how close the playhead must be to a target for snapping to occur. |
| Snap Target | Frames: Snaps to whole frame numbers. Ideal for frame-accurate editing instead of sub-frame cursor placement. · Seconds: Snaps to time intervals measured in seconds. Useful for audio syncing or time-based pacing. · Markers: Snaps to the closest timeline marker. Great for aligning actions to scene events or beats. · Keyframes: Snaps to keyframe positions. Ensures precise alignment for editing and playback. · Strips: Snaps to the start or end of video/audio strips. Useful in the Video Sequencer and NLA editor. |
Frame Step
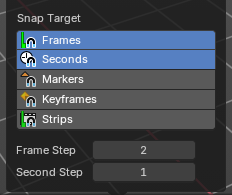
Defines the step size for frame-by-frame navigation. Controls how far the playhead moves when stepping through frames manually.
Note: Only available with Frames Snap Target
Second Step
Defines the step size for second-by-second navigation. Controls how far the playhead moves when stepping through the timeline manually.
Note: Only available with Second Snap Target
Options
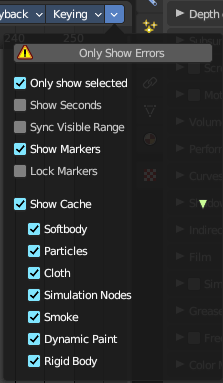
| Property | What it changes |
|---|---|
| Only show errors | Only include f-curves that are disabled or have errors. |
| Only show selected | Just show the keyframes from the selected object. |
Show Seconds
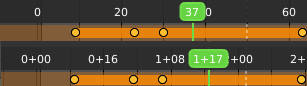
Show the timing in the timeline area in seconds instead of frames.
| Property | What it changes |
|---|---|
| Sync visible range | Synchronize the visible timeline range with other visible time based editors. When you zoom in or out in the one editor, then it zooms in or out in the other editor too. Each editor to sync needs to have Sync Visible Range ticked. |
| Show Markers | Display the markers row at the bottom of the view. |
| Lock Markers | Make the markers uneditable. |
| Show Cache | Show animation information for cached objects like Particles. · Softbody, Particles, etc.: Include or exclude what kind of cache types you want to display. |
Dope Sheet Overlays
Show Overlays
Shows the Dope Sheet Overlays.
Overlays
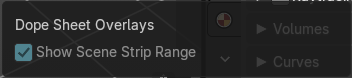
Show Scene Strip Range
When using Scene Time Synchronisation in the video sequence editor, then display the range of the current scene strip.
Quick menu
Shared section · Quick menu

The quick menu, or in long Quick Favorites menu, is a menu that can be customized to your needs. Here you can add operators for quick access.
It is located in the header. But it can be called by hotkey Q directly under the mouse. This hotkey works in other editors too.
When the menu is empty, then you will see the message "No Menu Items found". This means that you first have to add some tools to the menu. It is a user configurable menu.
Note that added operators in this menu does not have icons. Just text.
Adding an operator to the Quick menu
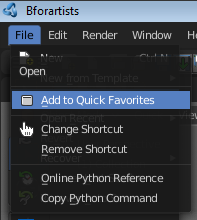
Open the panel or the menu where your operator is that you want to add.
Let's add the open command from the File menu. Open the File menu, right click at open, and choose Add to Quick Favorites.
Do the same with Save As. We should now have two new menu items in the Quick menu, which you can use now.
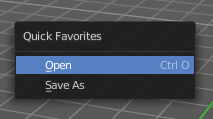
As a rule of thumb, when the right click menu has an Add to Quick Favorites, then you can add it to the quick menu.
Note that you can also add operators from the tool shelf at the left. And also operators from other editor types. Some other editors have their own quick menu though. The Image Editor for example. These operators gets added in the quick menu of the image editor then. And does not show in the quick menu in the header of the 3D view.
Adding a menu to the Quick menu
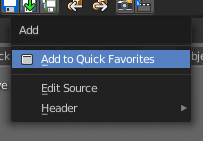
It is also possible to add a menu to the Quick menu. For example the whole Add menu. The way is the same. Right click at it, and choose Add to Quick Favorites.
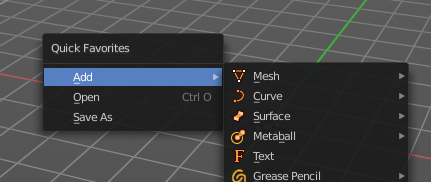
Order
You might notice that the add menu adds at the top of the menu, and not at the bottom as you would expect. First comes menus, then comes operators. And they get added in the order in which you add them.
Besides that, operators and menus gets added in the order that you add them. They cannot be sorted afterwards. So be careful how you add them. You can of course always remove operators and menus, and re-add them at the end of the list.
Removing an operator from the Quick menu
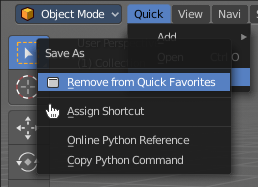
Removing is as simple as adding. Right click at the operators in the Quick menu, and choose Remove from Quick favorites.
Context and mode dependent content
The quick favorites. menu exists in nearly all editors. But it is just in the 3D view available in the header. So that you know this functionality exists. In the other editors you call it with hotkey Q.
The content of the quick favorites. menu changes, dependent over which editor you are, and in what mode you are. When you add for example an operator from the image editor, then this operator just shows in the quick menu when you call the menu from the image editor. Same goes for the modes. Edit mode tools will just show in edit mode. And so on.
View Menu
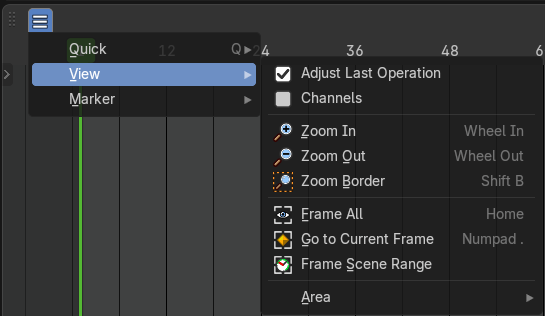
The View menu contains all View related tools.
Adjust Last Operation - View Menu
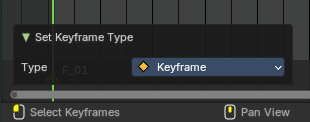
Shows the adjust last operation panel down left.
Channels
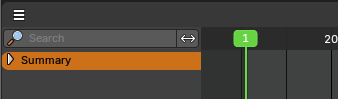
Shows the channels list at the left
| Menu entry | What it does |
|---|---|
| Zoom In | Zooms in. |
| Zoom Out | Zooms out. |
| Zoom Border | Draw a rectangle to zoom to the selection. |
| Frame All | Zooms in or out in the viewport until all objects in the scene are displayed fitting in the viewport. |
| Go to current Frame | Centers the view at the frame slider. |
| Frame Scene Range | With Use Preview Range off , reset the horizontal view to the current scene frame range. |
| Frame Preview Range | With Use Preview Range on , reset the horizontal view to the current preview frame range. |
Area submenu
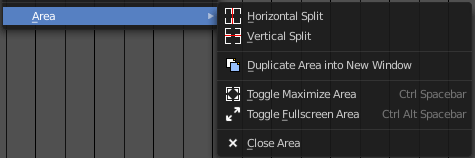
This menu contains general view functionality. And exists in most other editor types too.
| Menu entry | What it does |
|---|---|
| Horizontal Split | Splits the current view horizontally into two independent editor windows. |
| Vertical Split | Splits the current view vertically into two independent editor windows. |
Duplicate Area into New Window
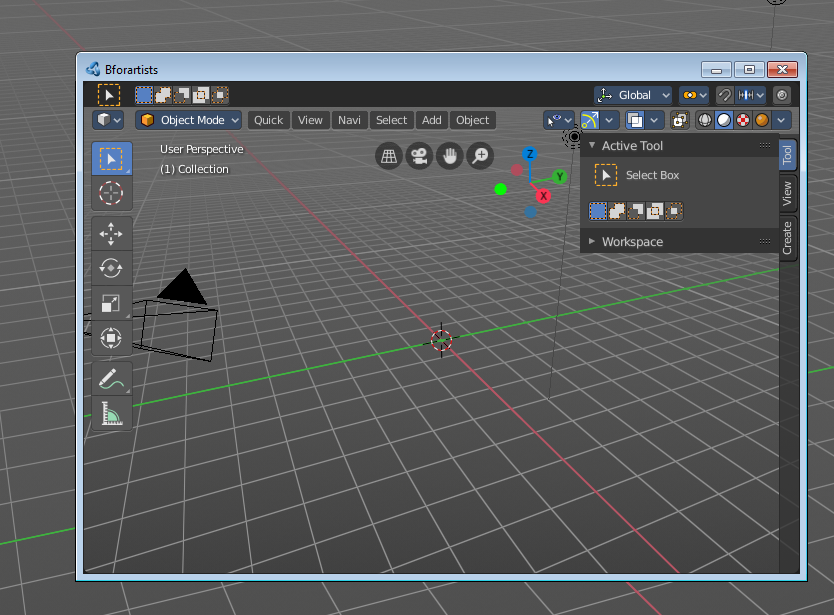
Duplicate Area into New Window opens this editor in a floating window. See Floating editor windows in the Interface chapter.
| Menu entry | What it does |
|---|---|
| Toggle Maximize Area | Displays the editor maximized with menus. To return from the maximized view press hotkey Ctrl + Space. Or reuse the menu item in the area menu. |
| Toggle Full screen Area | Displays the editor maximized without menus. To return from the full screen view press hotkey Ctrl + Alt + Space. |
| Close Area | Closes the area window. |
Marker menu
Shared section · Marker menu
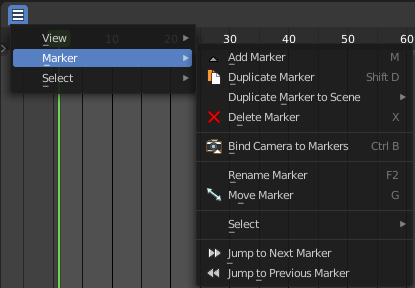
Markers are visual landmarks. They can mark a start of a specific animation sequence, the end of a camera movement, and so on.
When you add one then a marker area appears at the bottom of the timeline.
Markers can be pulled around by clicking at them and dragging them left or right. The active marker is yellow.
By holding down shift you can select more than one marker.
Add Marker
Adds a marker at the current frame position.
Duplicate Marker
Duplicates the selected marker(s). The duplicate(s) sticks at the mouse until you click to give it the target destination.
Duplicate Marker to Scene
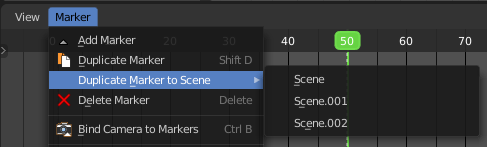
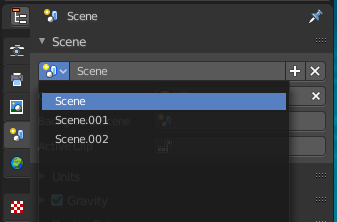
A blend file can contain more than one scene. See Scene Properties in the Properties editor. Here you can duplicate markers to other scenes.
Delete Marker
Deletes the selected marker(s).
Bind Camera to Markers
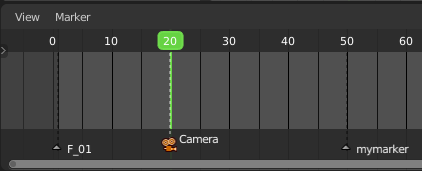
Bind camera to markers turns an object into a camera object. This can be any object in the scene. Not just camera objects.
When the current frame position does not have a marker yet, then it creates a marker at the current frame position.
By binding different objects or cameras at different marker locations you can switch cameras automatically.
The marker with a bind camera attached will show a camera icon.
Rename Marker
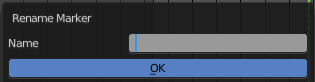
A menu will open up where you can rename the active marker.
Move Marker
Hotkey only functionality! This menu item exists to show the hotkey to move the marker.
Select sub menu
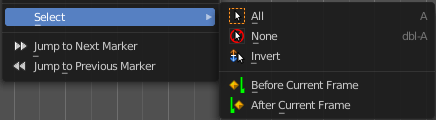
| Menu entry | What it does |
|---|---|
| All | Select all markers. |
| None | Deselect all markers. |
| Invert | Inverts the current selection. |
| Before Current Frame | Selects the markers before the current frame. |
| After Current Frame | Selects the markers after the current frame. |
Jump to Next Marker
Sets the frame position to the next marker.
Jump to Previous Marker
Sets the frame position to the previous marker.