







































Header
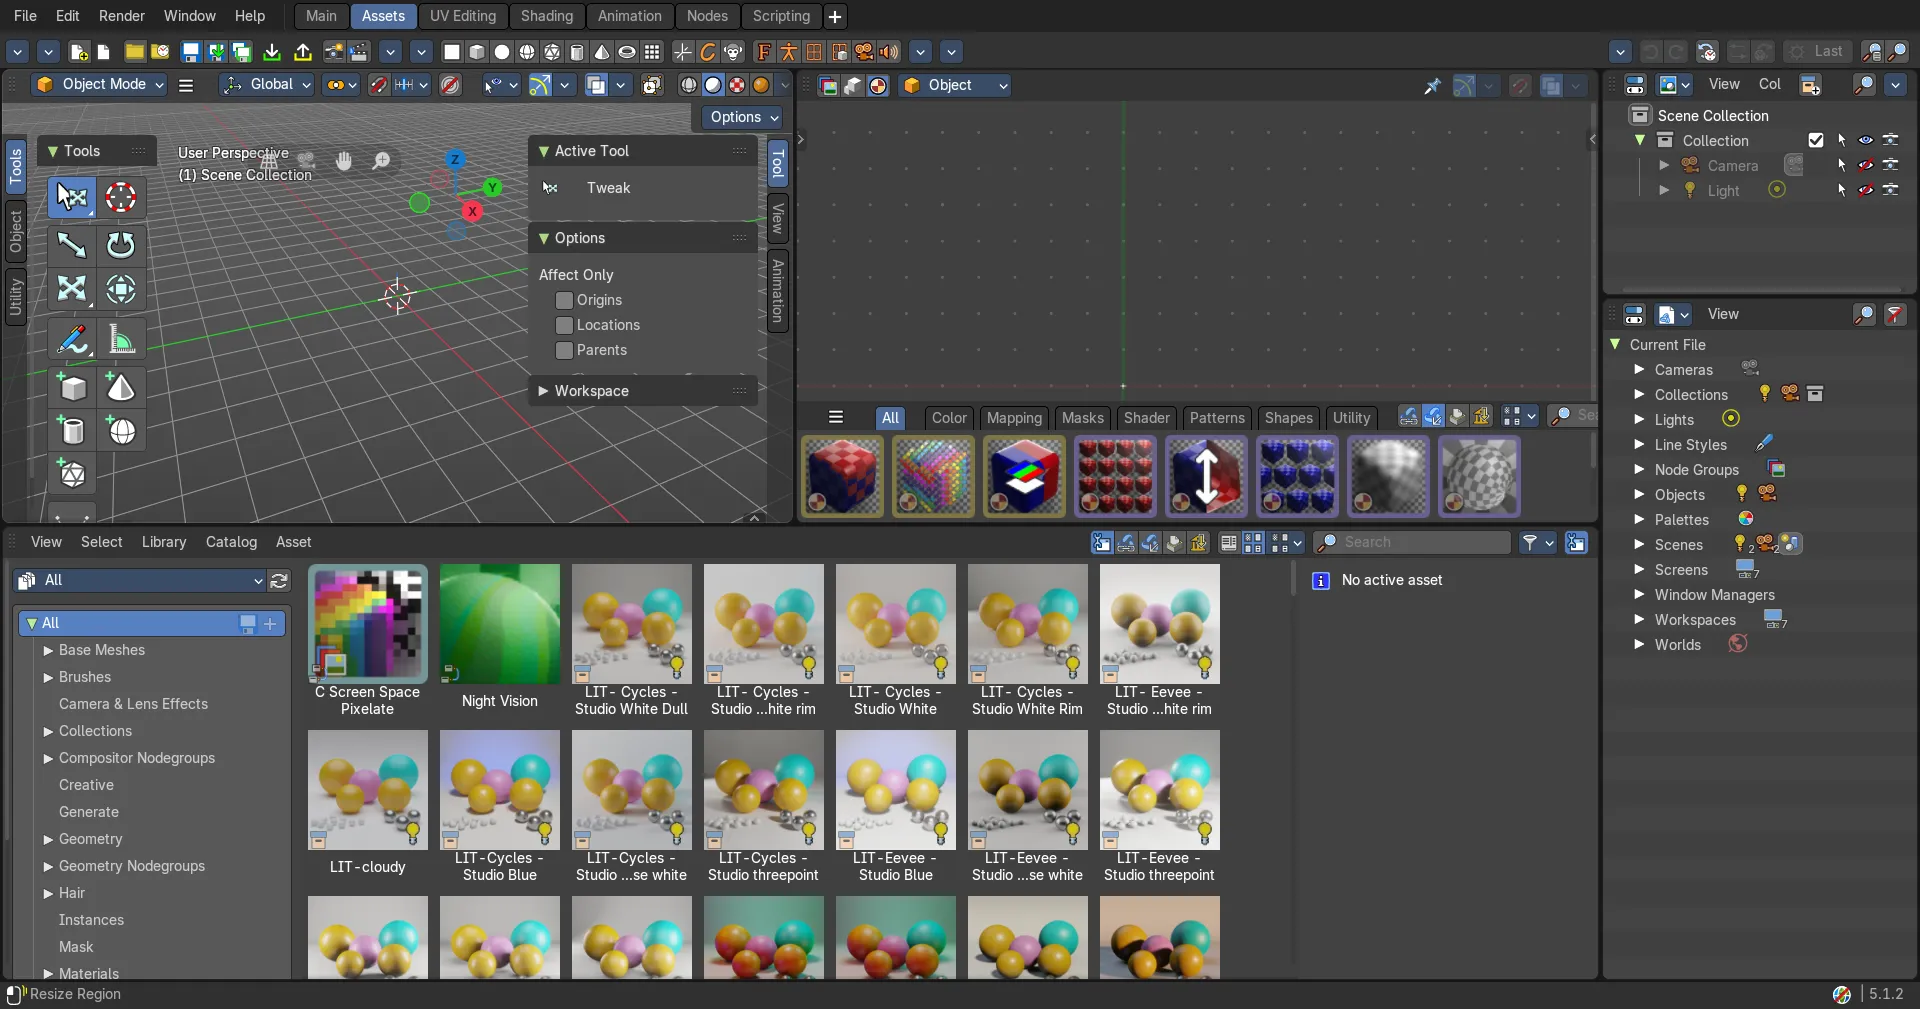
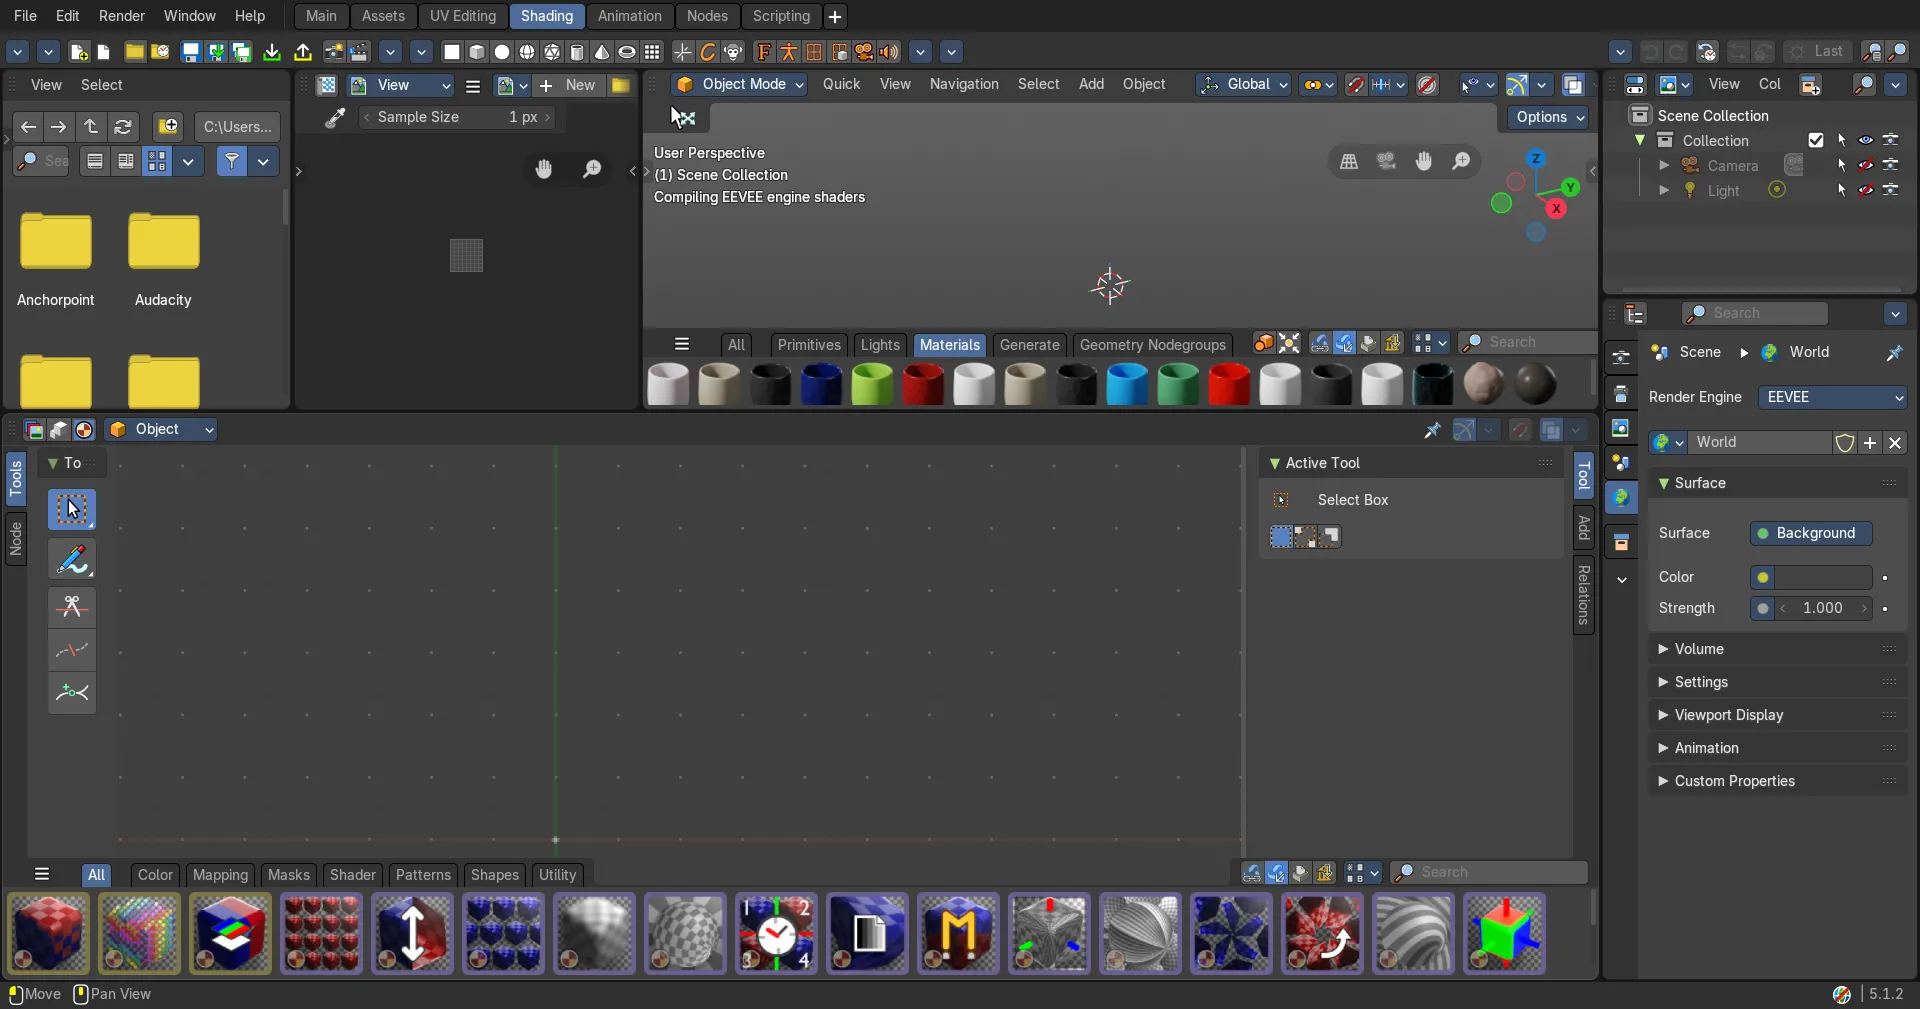
The Header contains various menus, navigation elements, settings and tools for the viewport.
Shader Editor - Header
The Header contains various menus, navigation elements, settings and tools for the viewport. This content differs, dependent of the sub mode. And the content of the menus may differ too, dependent of the chosen renderer.
The header is divided into two areas. Left mode and menus. Right settings.

Header Tabs

The tabs at the very left allows you to switch between the most important node editor types by one click. Compositor Editor, Geometry Nodes Editor and Shader Editor.
Header right click menus
The general right click menu functionality is explained in chapter 6 Editors introduction.
Editortype Menu
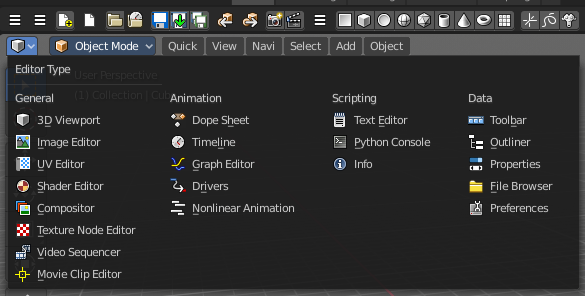
Bforartists is made of several editor types. Headers can display a menu where you can switch to other editor types.
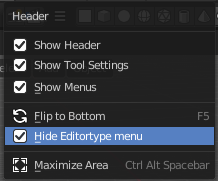
This menu is hidden by default. It is meant to edit the layouts, and should not be necessary for regular work. You can reveal it in the header right click menu.
Sub Modes
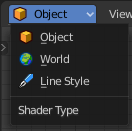
The Shader Editor has three shader type sub modes. Every sub mode has some different set of shaders for its own purpose.
| Entry | What it does |
|---|---|
| Object | The Object mode is for the scene objects. It shows materials and shader for the scene objects. |
| World | In the World mode you can change the shaders and materials for the world settings. It shows the world shaders and materials. |
| Line Style | The Line Style mode allows you to set up materials for the Freestyle renderer. Freestyle rendering must be active for this. It shows the Freestyle materials and shaders. |
Tools and Options
Introduction
The header in the Shader editor contains various menus and tools. This chapter here is about the tools, modes and options elements in the header.
The text menus are covered in a own chapter each. They vary too much, dependent of mode and object type.
Shader Type Drop-down Box
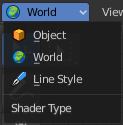
The Mode drop-down box allows you to switch between the different shader type modes. An object has a different set of available shaders than the world or a line style shading.
| Entry | What it does |
|---|---|
| Object | In this mode you work with the scene objects and its materials. |
| World | In this mode you work with the world settings. HDRI's for example. |
| Line Style | In this mode you work with Freestyle renderer materials. |
Object Context menu
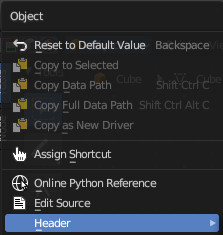
When you right click at the dropdown box then you will reveal the Object context menu.
Slot
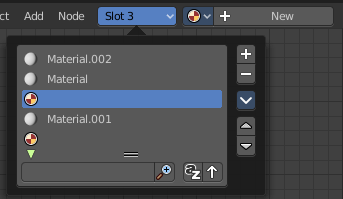
This element just exists in Object mode.
The Slot menu displays the assigned material(s) at the current active mesh. It can be used to select the active material on the active object. And to select or assign materials to different mesh parts of the same object.
When you add a material by clicking at the new button in the material prop, or by choosing another material from the materials browser, then it is usually also added or changed in the slot system in the current position.
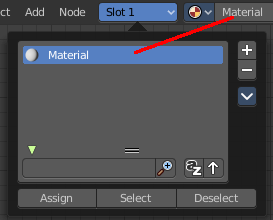
| Entry | What it does |
|---|---|
| List of materials | The list of materials in the slot list. |
| Add Material Slot | Adds a new material slot. When you do this manually then this slot will be empty. |
| Remove Material Slot | Remove the selected material slot. The removed material will not longer be part of the currently active mesh. |
Copy and Paste menu
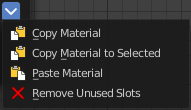
Copy and paste materials. But just at the current active mesh. Means in Edit Mode.
| Entry | What it does |
|---|---|
| Copy Material | Copies the currently selected material |
| Copy Material to Selected | Copies the currently selected material, and pastes it to the selection |
| Paste Material | Pastes the material. |
| Remove unused Slots | Clean up unused slots. |
| Entry | What it does |
|---|---|
| Move Material Up / Down | Moves the selected material up or down in the list. |
| Assign | This button appears when you are in Edit mode in the 3D view. Assign the selected material to the selected geometry. |
| Select | This button appears when you are in Edit mode in the 3D view. Select the geometry where this material is assigned to. |
| Deselect | This button appears when you are in Edit mode in the 3D view. Deselects the geometry where this material is assigned to. |
Search Field

When you click at the little triangle button below the list then you can reveal a search element. The buttons should be self explaining. So we won't go into detail here.
Material Prop

Create a new material, and see a list of the available materials in the scene.
Material Browser
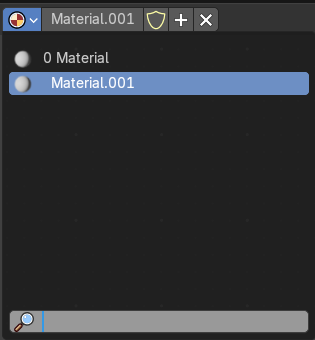
The list of available materials in the scene.
New
Creates a new material.
Material edit box
The name of the current active material. Here you can also rename the material.



Note that the name and available materials differs, dependent in which mode you are. In Object mode you will see the object materials. In World mode the world materials. And in Line Style mode the materials for Freestyle rendering.
| Entry | What it does |
|---|---|
| Fake User | Wit this button you assign a fake user to this selected image. Data, like images, that is not longer linked to anything else gets removed when you save and reload a scene. Bforartists has the concept of fake users to go around this behavior. An image with a fake user is in fact linked to something. And so it is not lost when you save and reload the scene. |
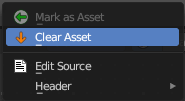
| Clear Asset | When you have marked the material as asset, then the fake user button is replaced by a Clear Asset button. It allows you to clear the asset. |
| New | Creates a new material. |
| Remove | Removes the material. To delete it completely you need to purge it. See Fake user. |
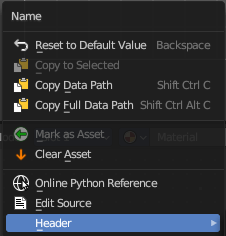
Right Click menus
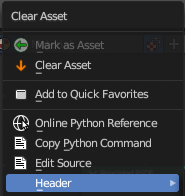
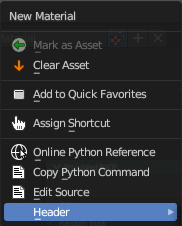
When you right click at the material property then you will reveal context menus with different content, dependant of where you click. Most of the content is explained in chapter 6, the general right click menu functionality. The rest should be self explaining.
Options

At the right side you will see some options.
Use Nodes

The Use Nodes setting is mostly a legacy setting. And displays just in Line Style mode.
| Entry | What it does |
|---|---|
| Pin (pin icon) | The pin button will keep the current material selection fixed. When a material is pinned, it will remain visible in the shader editor even when another object or material is selected elsewhere. |
| Snap | Activates snapping. |
Node Editor Overlays
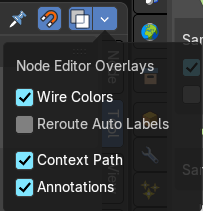
Activates the node editor overlays. When the tool is activated, then you will also overlays settings in the editor. The drop down arrow to the right shows different overlay types.
Show Overlays
Show or hide the overlays.
Wire Colors
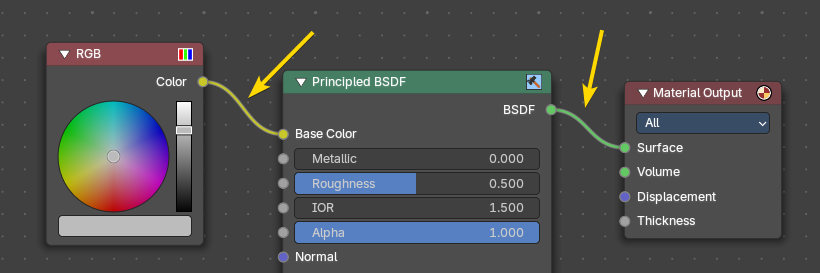
Color node links based on their connected sockets.
Example: The color RGB socket is yellow that makes a yellow line, and the Shader BSDF socket is green that makes a green line.
Reroute Auto Labels
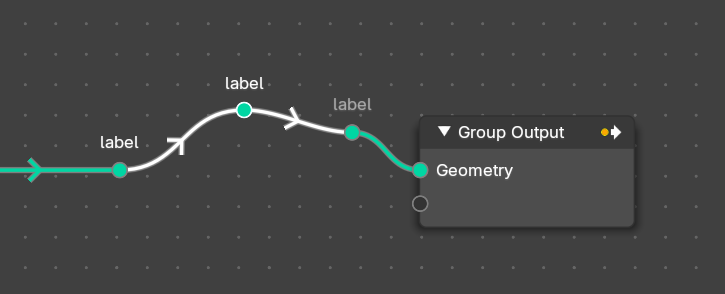
Label reroute nodes based on the label of connected reroute nodes.
Example: The first reroute label to the right has concurring reroute labels down the line. If you toggle this off, the concurring reroute labels down the line won’t contain labels.
Context Path
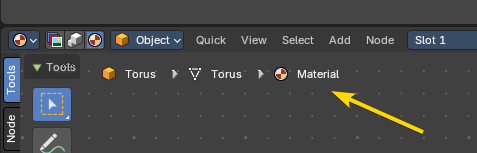
Display breadcrumbs for the editor’s context.
Annotations
Shows annotations for this editor view that have been drawn by the annotation tool.
Quick Menu
Quick Menu
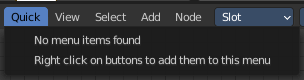
The quick menu, or in long Quick Favorites menu, is a menu that can be customized to your needs. Here you can add operators for quick access.
It is located in the header. But it can be called by hotkey Q directly under the mouse. This hotkey works in other editors too.
When the menu is empty, then you will see the message "No Menu Items found". This means that you first have to add some tools to the menu. It is a user configurable menu.
Note that added operators in this menu does not have icons. Just text.
Adding an operator to the Quick menu
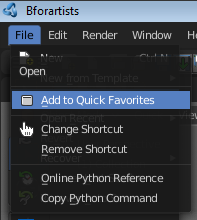
Open the panel or the menu where your operator is that you want to add.
Let's add the open command from the File menu. Open the File menu, right click at open, and choose Add to Quick Favorites.
Do the same with Save As. We should now have two new menu items in the Quick menu, which you can use now.
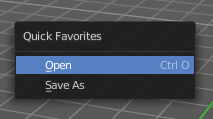
As a rule of thumb, when the right click menu has an Add to Quick Favorites, then you can add it to the quick menu.
Note that you can also add operators from the tool shelf at the left. And also operators from other editor types. Some other editors have their own quick menu though. The Image Editor for example. These operators gets added in the quick menu of the image editor then. And does not show in the quick menu in the header of the 3D view.
Adding a menu to the Quick menu
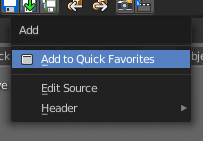
It is also possible to add a menu to the Quick menu. For example the whole Add menu. The way is the same. Right click at it, and choose Add to Quick Favorites.
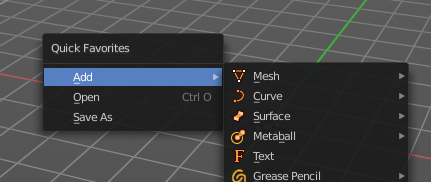
Order
You might notice that the add menu adds at the top of the menu, and not at the bottom as you would expect. First comes menus, then comes operators. And they get added in the order in which you add them.
Besides that, operators and menus gets added in the order that you add them. They cannot be sorted afterwards. So be careful how you add them. You can of course always remove operators and menus, and re-add them at the end of the list.
Removing an operator from the Quick menu
The Quick Favorites menu (Q) holds the tools and menus you add to it yourself. See Quick Favorites in the Interface chapter.
Context and mode dependent content
The quick favorites. menu exists in nearly all editors. But it is just in the 3D view available in the header. So that you know this functionality exists. In the other editors you call it with hotkey Q.
The content of the quick favorites. menu changes, dependent over which editor you are, and in what mode you are. When you add for example an operator from the image editor, then this operator just shows in the quick menu when you call the menu from the image editor. Same goes for the modes. Edit mode tools will just show in edit mode. And so on.
View Menu
View Menu
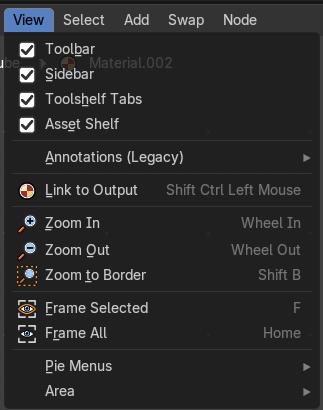
The View menu contains all View related tools.
The content is the same in all sub modes.
Toolbar
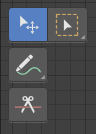
Shows or hides the toolbar at the left.
Sidebar
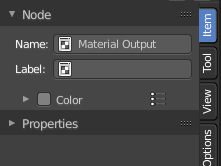
Shows or hides the sidebar at the right in the Shader Editor.
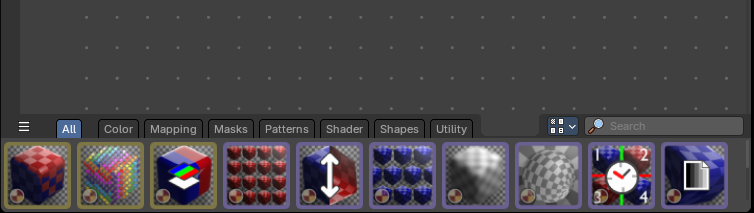
Asset Shelf
Shows or hides the Asset Shelf to the bottom of the Shader Editor.
Annotations (Legacy)
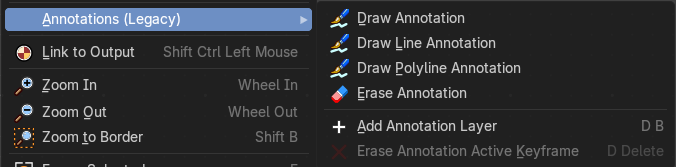
This group of operators is useful to take notes without changing tool-shelf operators. These notes can be colored in the View tab of the Property Shelf. Each layer is a single color. You can also animate the notes with keyframes, editable in the dopesheet.
Note: These are legacy operators, meaning they are equally available in the Toolshelf as a modal operator.
| Entry | What it does |
|---|---|
| Draw Annotation | Starts the annotation free hand draw tool in the editor. |
| Draw Line Annotation | Starts the annotation line draw tool to draw straight lines in the editor. |
| Draw Polyline Annotation | Starts the annotation Polyline draw tool in the editor which allows to draw multiple connected straight lines in the editor. |
| Erase Annotation | Starts the annotation erase tool in the editor which erases any strokes in the editor. |
| Add Annotation Layer | Starts a new annotation layer. |
| Erase Annotation Active Keyframe | Erases the active keyframe of the annotation. |
| Entry | What it does |
|---|---|
| Link to Output | Creates a temporary connection to the Output Node, allowing to quickly preview the output of any node within the shader editor by clicking on it. Note: This operator only works under the mouse cursor and is shown in this menu for discoverability purposes only. |
| Zoom In | Zooms into the viewport. |
| Zoom Out | Zooms out of the viewport. |
| Zoom Border | Draws a rectangle and zooms then to fit the size of this rectangle. Zooming in is done with drawing the rectangle with left mouse button. Zooming out is done with drawing the rectangle with middle mouse button. |
| Frame Selected | Zooms to the selection. |
| Frame All | View all zooms in or out in the viewport until all objects in the scene are displayed fitting in the viewport. |
Pie menus

Lists the available pie menus, and gives you the ability to read the hotkeys and assign own hotkeys.
Area
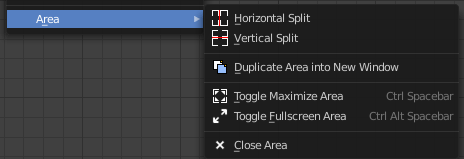
This menu contains general view functionality. And exists in most other editor types too.
Horizontal Split
Splits the current view horizontally into two independent editor windows.
Vertical Split
Splits the current view vertically into two independent editor windows.
| Entry | What it does |
|---|---|
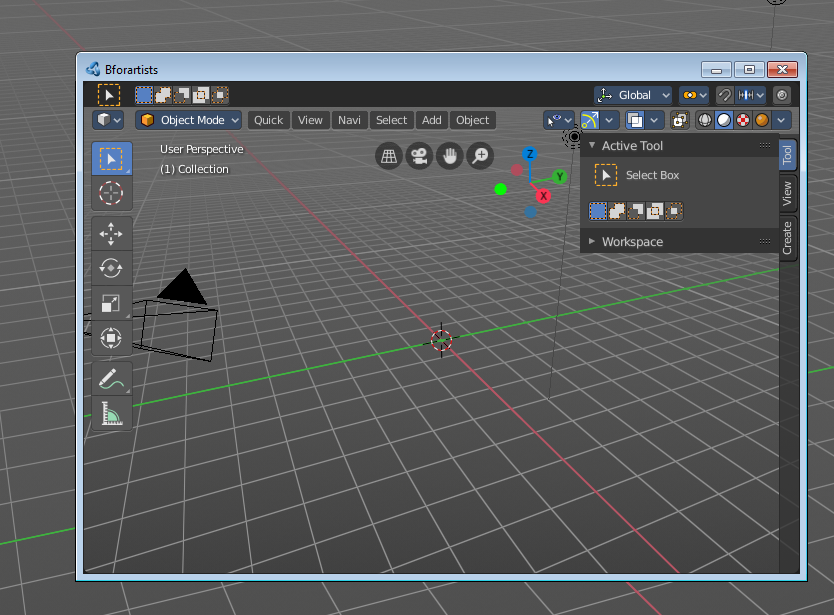
| Duplicate Area into New Window | Duplicate Area into New Window makes the selected editor window floating. You can then drag it around at the monitor. It is not connected with the rest of the UI anymore. A separated window cannot be merged into the main window again. You have to close it when not longer needed. |
| Toggle Maximize Area | Displays the editor maximized with menus. To return from the maximized view press hotkey Ctrl + Space. Or reuse the menu item in the area menu. |
| Toggle Full screen Area | Displays the editor maximized without menus. To return from the full screen view press hotkey Ctrl + Alt + Space. |
| Close Area | Closes the editor. |
Select Menu
Select menu
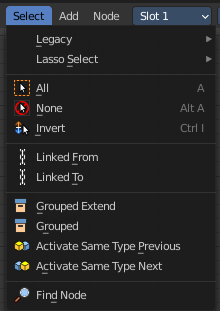
Here you will find the select functionality.
Legacy

The legacy sub menu contains tools that exists in the tool shelf already. It's the old way to do things. Different to the tools in the tool shelf, these tools are usually modal. And performs once. You have to call them again in case you want to repeat the tool.
| Entry | What it does |
|---|---|
| Box select | Draw a rectangle to select everything inside of the rectangle. It automatically adds to the current selection. Holding down shift subtracts from the selection. |
| Circle select | Brush select content. The radius of the brush can be adjusted by holding down left mouse button and using the scroll wheel or the + or - button at the numpad. It automatically adds to the current selection. Holding down shift subtracts from the selection. To exit the circle select tool click with the right mouse button. |
Lasso Select

A sub menu with the available lasso select modes.
| Entry | What it does |
|---|---|
| All | Select everything. |
| None | Select nothing. |
| Inverse | Invert the current selection. |
| Linked From | Select the nodes that are linked from the currently selected nodes. The nodes before in the hierarchy. |
| Linked To | Select the nodes that are linked to the currently selected nodes. The nodes behind in the hierarchy. |
| Grouped | Select grouped nodes. |
| Grouped Extend | Select grouped nodes, and extend from the current selection. |
| Activate same type previous | Activate same node type before the current selection, step by step. |
| Activate same type next | Activate same node type after the current selection, step by step. |
Find Node
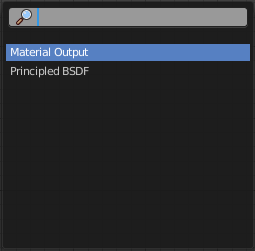
This button will open a search dialog where you can search for node types and select them in the current hierarchy.
Swap Menu
Swap
Replace the selected node by another node from the swap menu.
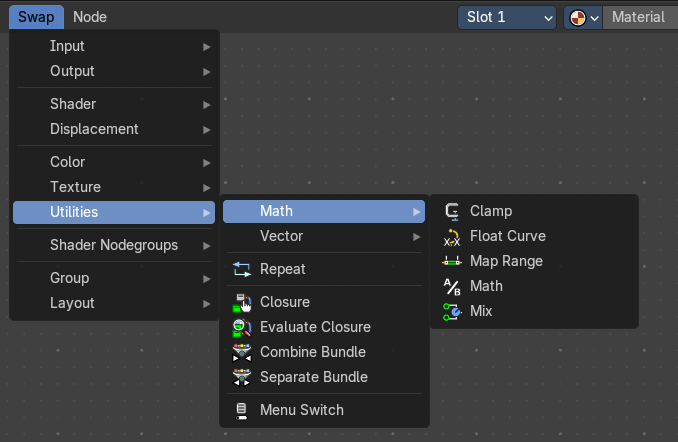
Node Menu
Node menu
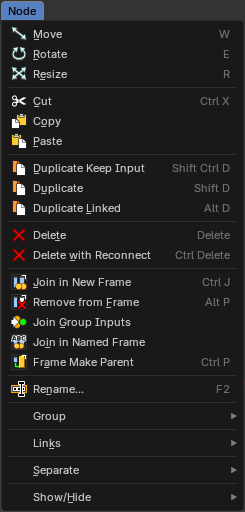
This menu contains further node functionality.
Move
Moves the selected nodes.
Rotate
You can't rotate single nodes, obviously. But when you have more than one selected then you can rotate them around their center point.
Resize
You can't resize single nodes, obviously. But when you have more than one selected then you can scale them around their center point.
Cut
Copies the selected nodes to the clipboard and removes them, keeping the links around them connected. Paste them back with Paste. Hotkey Ctrl + X, like in most programs.
Copy
Copies the selected node(s) to the clipboard, for reuse with the paste operator in the current or other instances of Bforartists that are open.
Paste
Pastes the selected node(s) from the above mention copy operator that are in the clipboard, in the current session of Bforartists or another instance that are open.
Duplicate Keep Input
This works at nodes that have a connected input. Duplicating will keep the input connections established in the duplicated node. The output connections will be removed.
Duplicate
Duplicates the selected node(s). All connections will be removed in the duplicated node.
Duplicate Linked
Duplicates the selected node(s). But not their node trees. And move them.
Delete
Deletes the selected node(s).
Delete with Reconnect
Deletes the selected node(s). When this node is in the middle of a connection, then the connections will be reconnected.
Join in new Frame
Frame node functionality. Adds the selected node to a frame.
Remove from Frame
Frame node functionality. Removes the selected node from a frame.
Join Group Inputs
Merge selected group input nodes into one if possible.
Join in Named Frames
Create a new frame node, and name it immediately.
Frame Make Parent
Frame node functionality. Adds the selected node to a frame.
Rename
Rename the selected node.
Group submenu

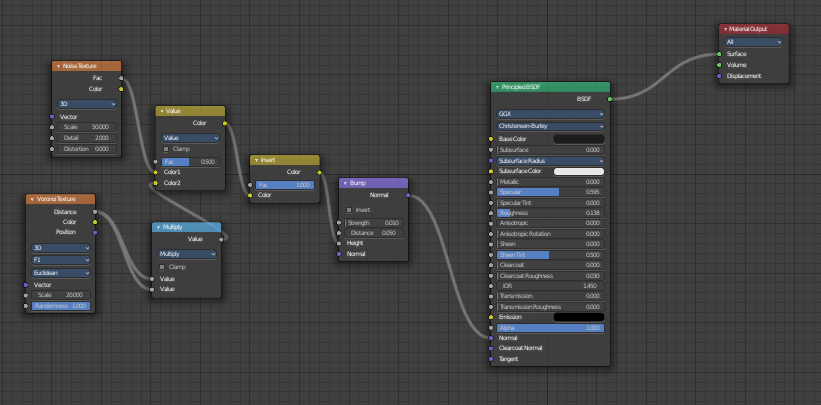
Make Group
Groups the selected nodes together.
Select the nodes that you want to group together. Choose Make Group. You will now see a green background. This indicates that the group is created, and that you are in edit mode for the group now.
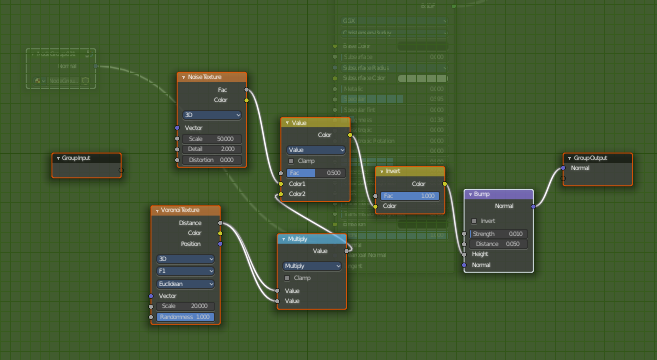
To exit the group edit mode press Tab key, or choose Toggle Edit Group menu item in the sidebar in the Relations tab in the Group panel. That way you can also enter the Group Edit mode again.
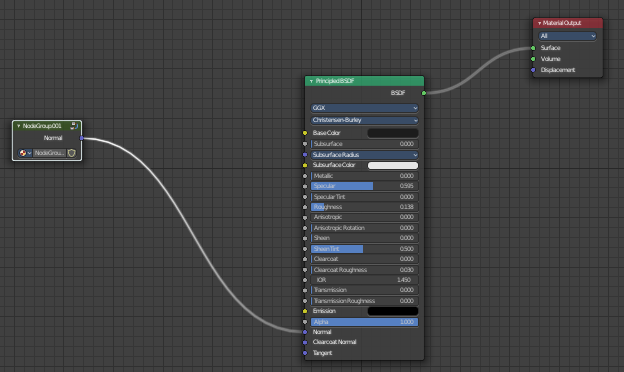
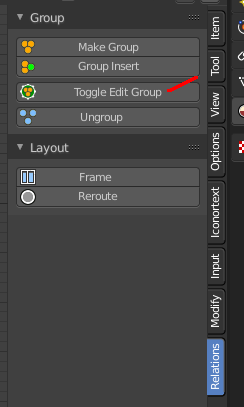
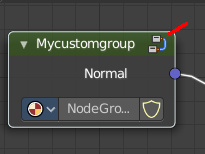
There is a third way to enter the group edit mode. Click at the right upper icon of the group node.
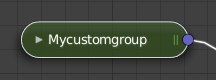
A group can be further collapsed by clicking at the triangle button in the upper left corner.
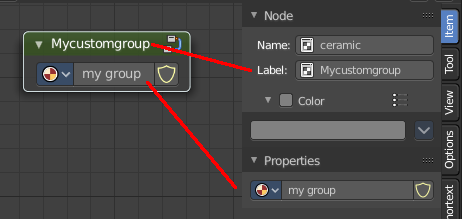
The group can be renamed in the sidebar in the Item tab and in the Properties tab in the Node panel.
| Entry | What it does |
|---|---|
| Insert into Group | Allows you to insert a node into a node group. Select the node, hold down Shift, then select the node group so that both are selected. Then perform the operator. |
| Ungroup | Ungroups an existing group. You need to be outside of the group edit mode. |
| Toggle Edit Group | Enters a node group for editing. Or when you are in a node group, exits the node group editing. |
Links submenu
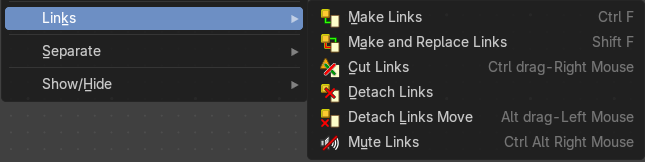
| Entry | What it does |
|---|---|
| Make Links | Tries to connect nodes where it makes sense. For example, the BSDF output of a Principled shader with the Surface input of the Material Output node. |
| Make and Replace Links | Same as Make Links. But it will replace existing links. |
| Cut Links | Cut the links under the mouse. |
| Detach Links | Removes all connections from the selected node, but tries to reconnect the remaining nodes. |
| Detach Links Move | Removes all connections from the selected node by dragging. |
| Mute Links | Mute the links under the mouse. |
Separate submenu

Node group functionality. You need to be in edit group mode.
| Entry | What it does |
|---|---|
| Copy | Copies the selected node, and pastes a copy of it outside of the node group. The node group remains unchanged. |
| Move | Moves the selected to outside of the node group, and removes it from the node group. |
Show/Hide submenu
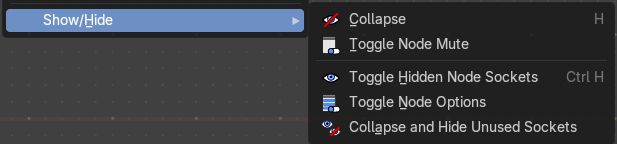
Here you find hide options to make the display of nodes more compact.
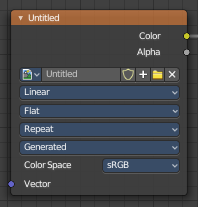
Demonstration happens at an image node.
Collapse
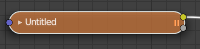
Hides everything but input and output dots. To view the full node again perform the operator again. It's a toggle. Or click at the triangle left besides the node name.
Toggle Node Mute
Deactivates the node.
Toggle hidden node sockets
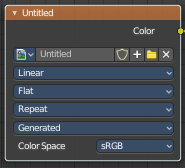
Toggles away the unused node sockets. In this case the vector input node socket and the alpha output node socket will be hidden.
Toggle Node Options
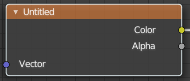
Hides away the properties.
Collapse and Hide Unused Sockets
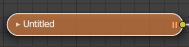
Like Hide. Hides everything but the node sockets. But it also hides the unused node sockets.
In this chapter
- Add Menu — Every node you can add, by category: open a category for its nodes.