










































Header
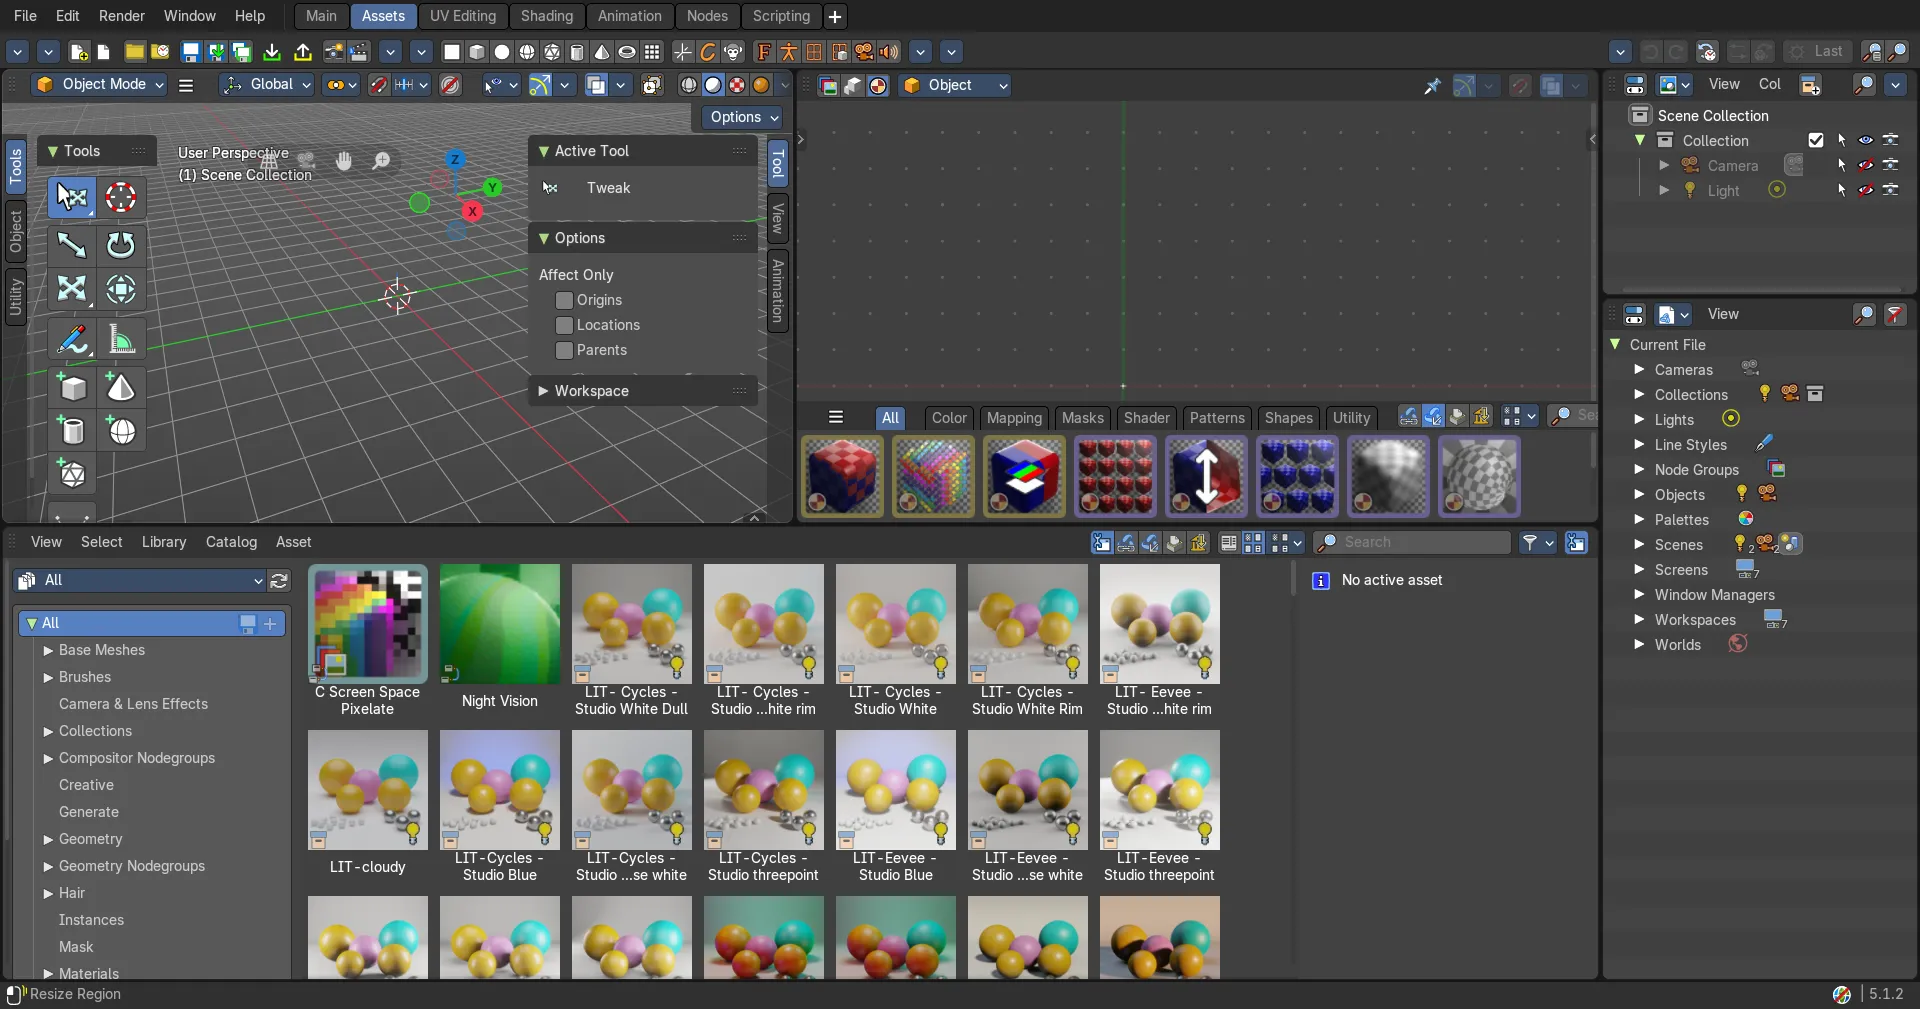
The header contains various menus and tools.
The pages of this part are listed in the sidebar under Header.
Header Tools and Options
Introduction
The header contains various menus and tools. This chapter here is about the tools, modes and options elements in the header.
The text menus are covered in an own chapter each.

Header Tabs

The tabs at the very left allows you to switch between the four most important editor types by one click. Dope sheet Editor, Graph Editor, Driver Editor, NLA Editor.
Tweak Mode
Tweak

The tweak mode allows you to edit the keyframe data within an Action clip while evaluating the full stack. The strip will turn green and in the Dope Sheet editor you will find the Action clip’s keyframes, which you can now tweak.
Playback will show a blend of all NLA tracks while you edit the Action clip.

Isolate
Tweak with the Isolate checkbox on allows editing of the animation data on only the selected and isolated Action Clip.
Playback will show only the keyframes of of the isolated Action clip.
Note: You can also isolate a clip by clicking on the star icon at the left.

There are similar Tweak mode tool in the Edit menu too where you can edit with the full stack, lower stack or isolated Action clips. Leaving the Tweak mode is for the first two methods evaluated in the header.
Show Hide elements

| Entry | What it does |
|---|---|
| Only Show Selected | Display only the data for the selected object in the list of elements. If off it displays all available animation data of the whole scene. |
| Show Hidden | Include channels from objects / bones that are not visible. This feature just works with Only Selected off. |
| Include Missing NLA | Include Animation data blocks without NLA data. |
Filters
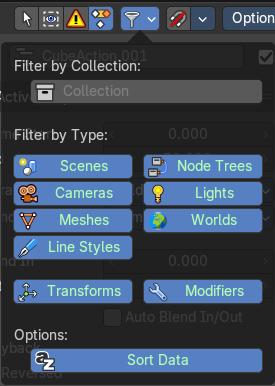
The show hide elements allows you to filter out the general elements. The Filters panel allows you to filter out further elements.
| Entry | What it does |
|---|---|
| Filter by Collection | Just display the content from the chosen collection in the list of elements. |
| Filter by Type | In this section you can choose what type of animation data should be displayed. The names should be self explaining. |
| Options | Sort Data Blocks: Alphabetically sort the data in the list of elements. |
Snapping
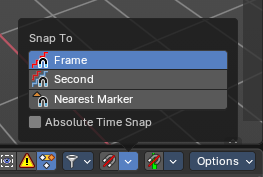
Snapping in animation editors helps align the playhead and keyframes to meaningful time-based elements, improving precision and workflow efficiency across the Timeline, Dope Sheet, Graph Editor, NLA, and Video Sequencer.
Note: This sub-subpanel is not available for Grease Pencil Dopesheet Mode
| Entry | What it does |
|---|---|
| Toggle Snapping On/Off | Toggles the snapping on or off with a visual indicator. |
| Snapping panel | Frame: Snaps to whole frame numbers. Ideal for frame-accurate editing instead of sub-frame timeline cursor placement. · Second: Snaps to time intervals measured in seconds. Useful for audio syncing or time-based pacing. · Nearest Market: Snaps to the closest timeline marker. Great for aligning actions to scene events or beats. · Absolute Time Snap: When enabled, snapping uses absolute time rather than relative pixel proximity. Ensures consistent snapping behavior regardless of zoom level or cursor position. |
Options
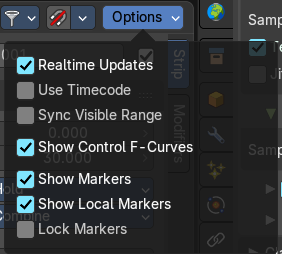
Real-time Updates
When transforming keyframes then this transformation is also immediately visible in other editors.
Show Seconds
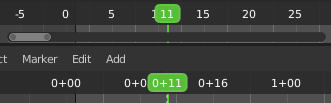
Show the timing in the timeline area in seconds instead of frames.
Sync visible range
Synchronize the visible timeline range with other visible time based editors. When you zoom in or out in the one editor, then it zooms in or out in the other editor too. Each editor to sync needs to have Sync Visible Range ticked.
Show Control F-Curves
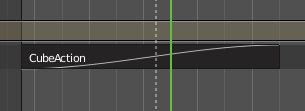
Shows existing f-curves in the action strip. Like for keyframed Animated influence.
| Entry | What it does |
|---|---|
| Show Markers | Display the markers. |
| Show Local Markers | Show action-local markers on the strips. |
| Lock Markers | Make the markers uneditable. |
Quick Menu
Quick Menu
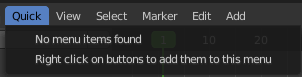
The quick menu, or in long Quick Favorites menu, is a menu that can be customized to your needs. Here you can add operators for quick access.
It is located in the header. But it can be called by hotkey Q directly under the mouse. This hotkey works in other editors too.
When the menu is empty, then you will see the message "No Menu Items found". This means that you first have to add some tools to the menu. It is a user configurable menu.
Note that added operators in this menu does not have icons. Just text.
Adding an operator to the Quick menu
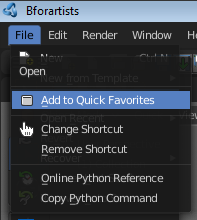
Open the panel or the menu where your operator is that you want to add.
Let's add the open command from the File menu. Open the File menu, right click at open, and choose Add to Quick Favorites.
Do the same with Save As. We should now have two new menu items in the Quick menu, which you can use now.
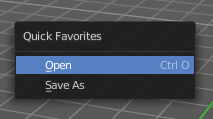
As a rule of thumb, when the right click menu has an Add to Quick Favorites, then you can add it to the quick menu.
Note that you can also add operators from the tool shelf at the left. And also operators from other editor types. Some other editors have their own quick menu though. The Image Editor for example. These operators gets added in the quick menu of the image editor then. And does not show in the quick menu in the header of the 3D view.
Adding a menu to the Quick menu
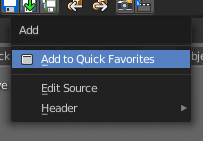
It is also possible to add a menu to the Quick menu. For example the whole Add menu. The way is the same. Right click at it, and choose Add to Quick Favorites.
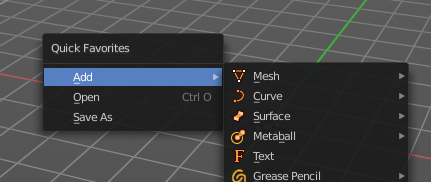
Order
You might notice that the add menu adds at the top of the menu, and not at the bottom as you would expect. First comes menus, then comes operators. And they get added in the order in which you add them.
Besides that, operators and menus gets added in the order that you add them. They cannot be sorted afterwards. So be careful how you add them. You can of course always remove operators and menus, and re-add them at the end of the list.
Removing an operator from the Quick menu
The Quick Favorites menu (Q) holds the tools and menus you add to it yourself. See Quick Favorites in the Interface chapter.
Context and mode dependent content
The quick favorites. menu exists in nearly all editors. But it is just in the 3D view available in the header. So that you know this functionality exists. In the other editors you call it with hotkey Q.
The content of the quick favorites. menu changes, dependent over which editor you are, and in what mode you are. When you add for example an operator from the image editor, then this operator just shows in the quick menu when you call the menu from the image editor. Same goes for the modes. Edit mode tools will just show in edit mode. And so on.
View Menu
NLA Editor - View Menu
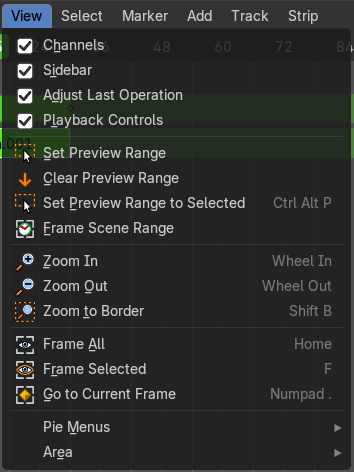
The View menu contains all View related tools.
Channels List
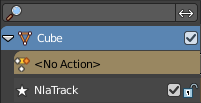
Shows or hides the Channels list at the left in the viewport.
Sidebar
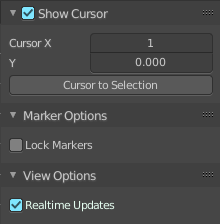
Shows or hides the sidebar at the right in the viewport.
Adjust Last Operation - NLA Editor - View Menu
Shows the adjust last operator panel down left.
Playback Controls
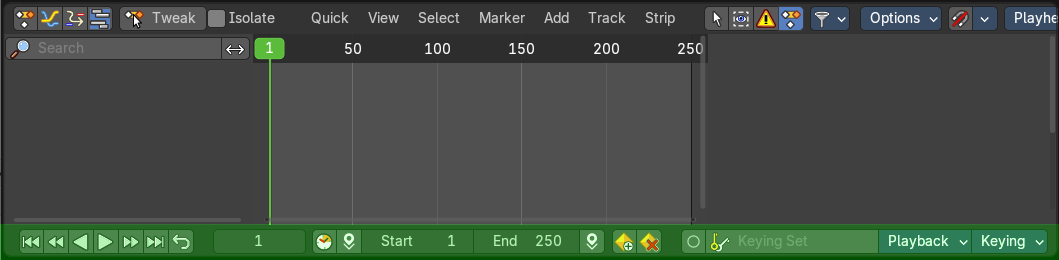
Reveals the footer with the playback controls.
Set Preview Range
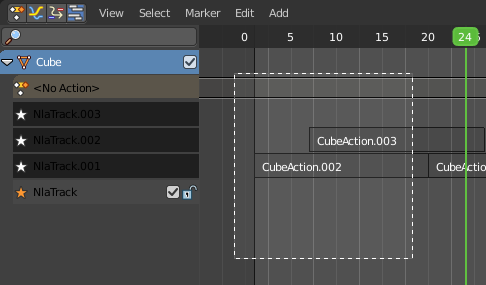
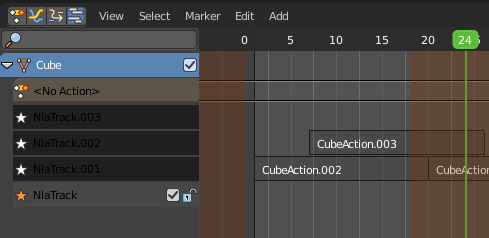
Rectangle select an area of the timeline that gets previewed. The playback now just happens in this marked area.
| Entry | What it does |
|---|---|
| Clear Preview Range | Clears an existing preview range. |
| Set Preview Range to selected | Sets the preview range to fit the first and last selected keyframe. |
| Frame Scene Range | With Use Preview Range off , reset the horizontal view to the current scene frame range. |
| Zoom In | Zooms into the viewport. |
| Zoom Out | Zooms out of the viewport. |
| Zoom to Border | Draws a rectangle and zooms then to fit the size of this rectangle. Zooming in is done with drawing the rectangle with left mouse button. Zooming out is done with drawing the rectangle with middle mouse button. |
| Frame All | Zooms in or out in the viewport until all objects in the scene are displayed fitting in the viewport. |
| Frame Selected | Centers the view at the currently selected keyframe(s). |
| Go to current Frame | Centers the view at the frame slider. |
Pie menus submenu

Lists the available pie menus, and gives you the ability to read the hotkeys and assign own hotkeys.
Area submenu
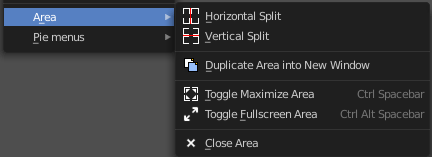
This menu contains general view functionality. And exists in most other editor types too.
| Entry | What it does |
|---|---|
| Horizontal Split | Splits the current view horizontally into two independent editor windows. |
| Vertical Split | Splits the current view vertically into two independent editor windows. |
Duplicate Area into New Window
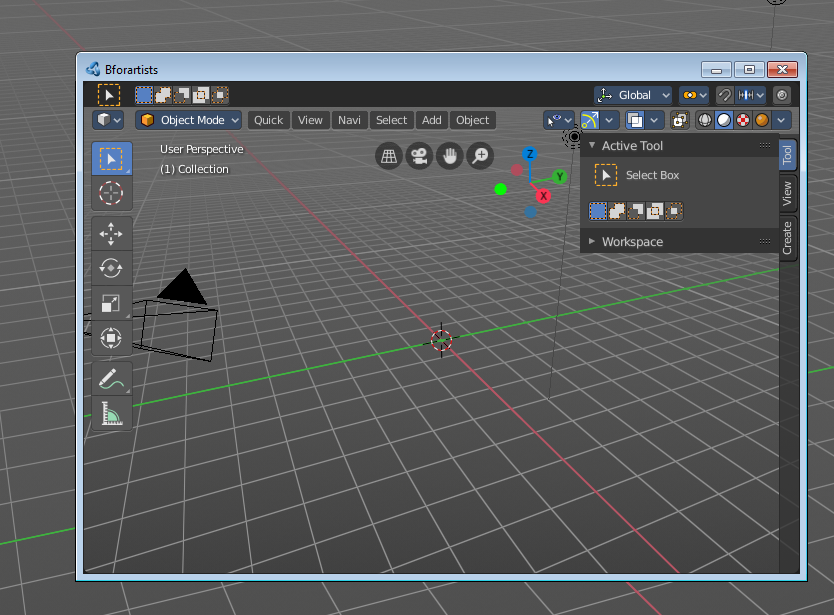
Duplicate Area into New Window opens this editor in a floating window. See Floating editor windows in the Interface chapter.
| Entry | What it does |
|---|---|
| Toggle Maximize Area | Displays the editor maximized with menus. To return from the maximized view press hotkey Ctrl + Space. Or reuse the menu item in the area menu. |
| Toggle Full screen Area | Displays the editor maximized without menus. To return from the full screen view press hotkey Ctrl + Alt + Space. |
| Close Area | Closes the area window. |
Select Menu
NLA Editor - Select Menu
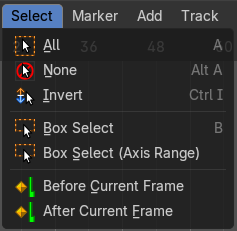
The Select menu contains various tools to select elements.
The content is the same in all modes. With one exception. Grease Pencil mode is missing the More / Less menu items.
| Entry | What it does |
|---|---|
| All | Select everything. |
| None | Select nothing. |
| Invert | Invert the current selection. |
| Box Select | Box select enters the Border Select mode. Select elements by dragging a rectangle around it. Just what's inside of the rectangle gets selected then. It adds to selection by default. To subtract from selection hold down Shift key. The selection gets applied when you release the mouse. You leave the mode automatically when you release the mouse. |
Box Select(Axis Range)
Box select enters the Border Select mode. Select elements by dragging a rectangle around it. And what's inside the horizontal range of the rectangle gets selected then. Even when the keyframes are outside of the rectangle.
It adds to selection by default. To subtract from selection hold down Shift key.
The selection gets applied when you release the mouse. You leave the mode automatically when you release the mouse.
Adjust Last Operation - Box Select
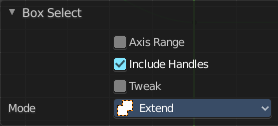
| Entry | What it does |
|---|---|
| Axis Range | What's inside the horizontal range of the rectangle gets selected. |
| Include Handles | Also select the curve handles. |
| Tweak | Operator has been activated using a tweak event. |
Mode
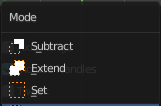
The selection mode to use.
| Entry | What it does |
|---|---|
| Circle Select | Circle select enters the Circle Select mode. This is a special select mode where you can select elements by moving with the mouse over it. It adds to selection by default. To subtract from selection hold down Shift key. To exit the Circle select click with the right mouse button. The pencil radius of the circle select tool can be adjusted with the scroll wheel. |
| Before current Frame | Select the keyframes before the current frame. |
After current Frame
Select the keyframes after the current frame.
Adjust Last Operation - Select Left/Right
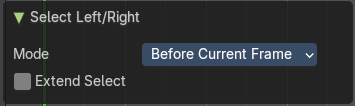
Mode
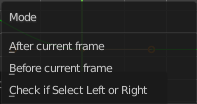
The selection mode to use.
Extend Select
Extend the current selection.
Marker Menu
NLA Editor - Marker Menu
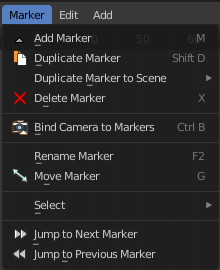
Markers are visual landmarks. They can mark a start of a specific animation sequence, the end of a camera movement, and so on.
When you add one then a marker area appears at the bottom of the timeline.
Markers can be pulled around by clicking at them and dragging them left or right. The active marker is yellow.
By holding down shift you can select more than one marker.
Add Marker
Adds a marker at the current frame position
Duplicate Marker
Duplicates the selected marker(s). The duplicate(s) sticks at the mouse until you click to give it the target destination.
Adjust Last Operation - Duplicate Time Marker
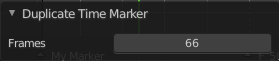
Frames
The target frame to position the duplicated marker.
Duplicate Marker to Scene

Duplicate markers to other scenes. A blend file can contain more than one scene. See Scene Properties in the Properties editor.
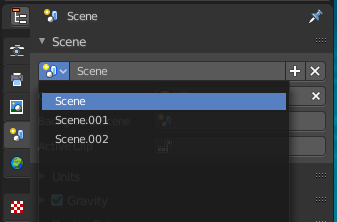
Adjust Last Operation - Make Links to Scene
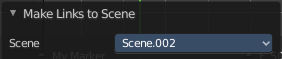
Scene
The target scene to duplicate the markers.
Delete Marker
Deletes the selected marker(s).
Bind Camera to Markers
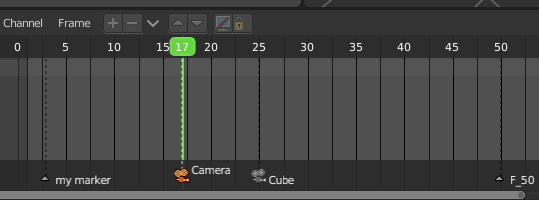
Bind camera to markers turns an object into a camera object. This can be any object in the scene. Not just camera objects.
When the current frame position does not have a marker yet, then it creates a marker at the current frame position.
By binding different objects or cameras at different marker locations you can switch cameras automatically.
The marker with a bind camera attached will show a camera icon.
Rename Marker
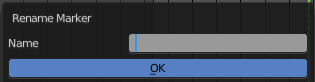
A menu will open up where you can rename the active marker.
Note that for the hotkey to work you need to hover over the Marker region. In the NLA viewport F2 will call the rename menu to rename the clip instead.
Adjust Last Operation - Rename Marker
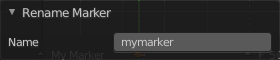
Name
Rename the active marker.
Move Marker
Hotkey only functionality! This menu item exists to show the hotkey to move the marker.
Select sub menu
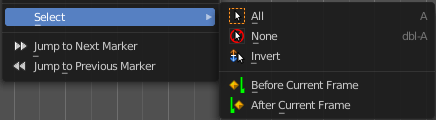
| Entry | What it does |
|---|---|
| All | Select all markers. |
| None | Deselect all markers. |
| Invert | Inverts the current selection |
| Before Current Frame | Selects the markers before the current frame. |
| After Current Frame | Selects the markers after the current frame. |
| Entry | What it does |
|---|---|
| Jump to Next Marker | Sets the frame position to the next marker. |
| Jump to Previous Marker | Sets the frame position to the previous marker. |
Add Menu
NLA Editor - Add Menu
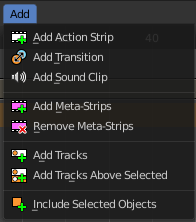
A menu where you can add various elements to the NLA.
Add Action Strip
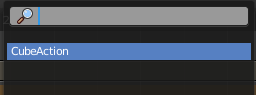
Adds an action strip. Opens a popup menu where you can choose what animation data this new action strip should contain.
Add Transition
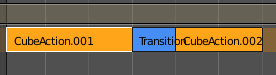
Adds a transition strip between two selected action strips.
Add Sound Clip
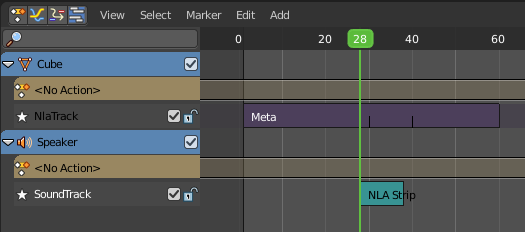
Adds a sound clip at the marker position.
A Sound Clip Controls when a speaker plays a sound. This strip type requires a Speaker object with a sound clip assigned. You can create a speaker object in the 3D view. The sample can be loaded in the Object Data Properties tab in the Properties editor then.
Add Meta Strips
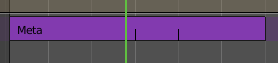
Turns selected strips into a meta strip. A group of strips.
| Entry | What it does |
|---|---|
| Remove Meta Strips | Ungroups the meta strips into its original action strips. |
| Add Tracks | Adds a new track in the Channel list. |
| Add Tracks Above Selected | Adds a new track in the Channel list. |
| Selected Objects | Objects without animation or a NLA strip will not appear in the channel list. With this command you can load selected objects into the NLA, regardless if they have animation yet or not. |
Track Menu
NLA Editor - Track Menu
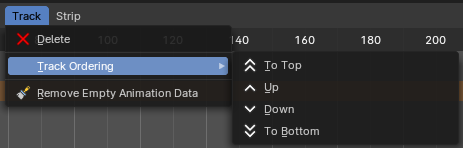
This menu contains functionality to manage the tracks.
| Entry | What it does |
|---|---|
| Delete | Deletes the selected track. |
| Track Ordering | Order the tracks. |
| Remove Empty Animation Data | Removes tracks that are empty. |
Strip Menu
NLA Editor - Strip Menu
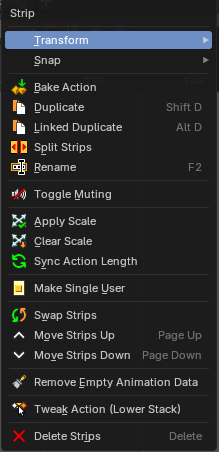
This menu contains functionality to manage the keyframes.
Transform

Grab/Move
Moves the selected keyframe(s).
Adjust Last Operation - Move
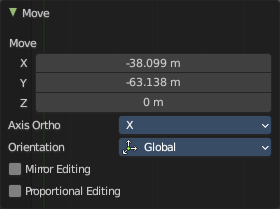
Move X, Y Z
The position. Attention, the actual world orientation and rotation does not matter here. It always starts with a value of zero, and moves relative to this zero then. For the actual location values have a look in the sidebar in the transform panel.
Orientation
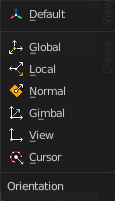
The widget can have different orientations. The menu items should be self explaining.
Mirror Editing
Enable Mirror editing
Proportional editing
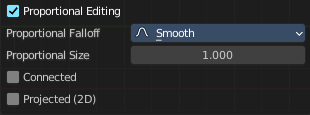
Proportional editing is not available for this mode.
Extend
Moves the last keyframes of the selection.
Adjust Last Operation - Transform
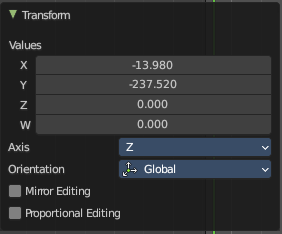
| Entry | What it does |
|---|---|
| Values X, Y Z, W | The new position. |
| Axis | Which axis to transform. |
Orientation
The widget can have different orientations. The menu items should be self explaining.
Mirror Editing
Enable Mirror editing
Proportional editing
Proportional editing is not available for this mode.
Scale
Scales the selected keyframes. You need to have more than one keyframe selected.
Adjust Last Operation - Resize
| Entry | What it does |
|---|---|
| Angle | The rotation. Attention, the actual world orientation and rotation does not matter here. It always starts with a value of zero, and rotates relative to this zero then. For the actual rotation values have a look in the sidebar in the transform panel. |
| Axis | Which axis to rotate. |
Orientation
The widget can have different orientations. The menu items should be self explaining.
Mirror Editing
Enable Mirror editing
Proportional editing
Proportional editing is not available for this mode.
Snap
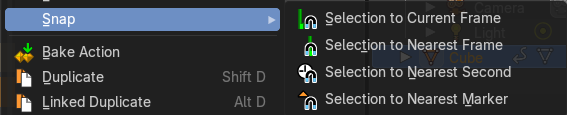
Snaps the selected keyframes by the chosen method.
| Entry | What it does |
|---|---|
| Bake Action | Bakes all selected objects locations/scale/rotation animations to an action. To use this operator, a dialogue will prompt to define the parameters before applying the bake action. The final animation of the selected objects or bones is computed with all modifiers, drivers, and constraints applied with keyed results per frame step in a range. |
| Duplicate | Duplicate selected keyframes. |
Linked Duplicate
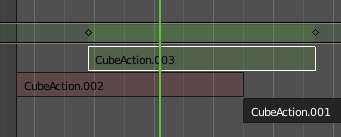
Duplicates the selected strip(s), and creates a new track for the duplicates. This copy is linked to the original action strip. Modifications at the original will also affect the linked action strip.
Linked strips are visually different from normal strips. And when you start to modify the linked duplicate, then the original strip will turn red.
Split Strips
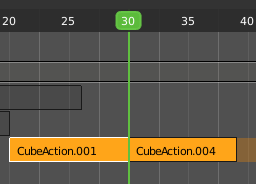
Splits the selected strip(s) at the marker position.
Rename
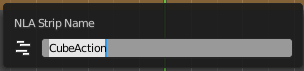
Allows you to rename the current NLA strip. The operator calls a rename popup.
| Entry | What it does |
|---|---|
| Toggle Muting | Disables the selected strips, so they no longer play. Be careful, there is no visual hint if a strip is muted or not. |
| Apply Scale | Applies the current scale of the clips to be 1. |
| Clear Scale | Resets the scale of the clip back to 1. |
| Sync Action Length | Synchronize the length of the action with the keyframe length used in the strip. |
| Make Single User | You can create linked duplicates. Make single user makes them into individual clips. |
| Swap Strips | Swaps the selected strips. |
| Move Strips Up | Moves the selected action strips upwards into the next track. |
| Move Strips Down | Moves the selected action strips downwards into the next track. |
| Remove Empty Animation Data | Removes animation data that holds no strips or keyframes. |
| Delete Strips | Deletes the selected strips. It sits at the bottom of the menu. To delete tracks, use . |
Tweak Action (Lower Stack)
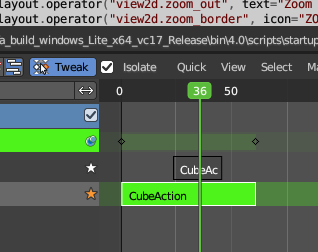
Allows you to edit the keyframe data within the Action strip while evaluating only Action clips located below the active track in the NLA stack. This mutes all tracks above the active Action clip track and only evaluates tracks below.
This tweak mode is similar to the one in the header but it allows you to insert keyframes and preserve the pose that you visually keyed while lower strips are evaluating only.
Note that Tweak Isolated Action and Tweak Action (Full Stack) is done from the header. And leaving the Tweak mode is for all methods evaluated in the header by clicking at the active Tweak button.