































Sidebar
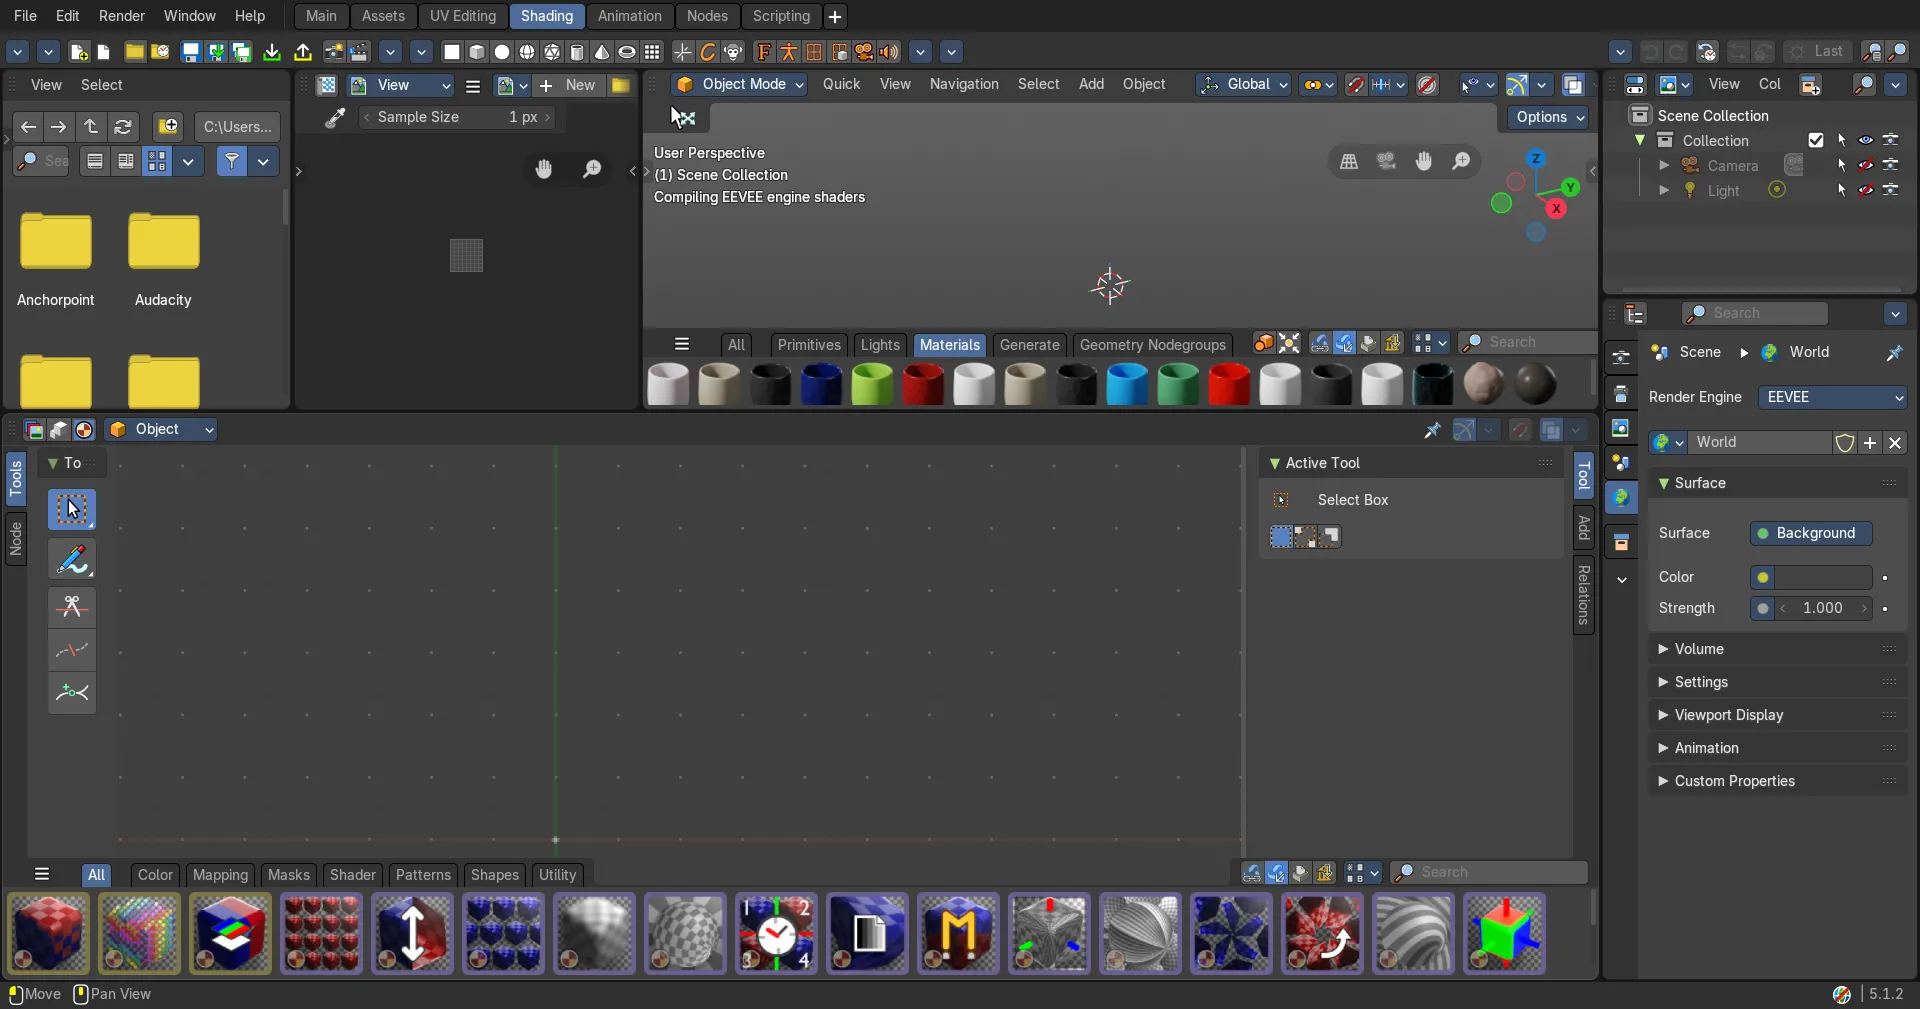
The Image Editor is made of several areas.
Introduction
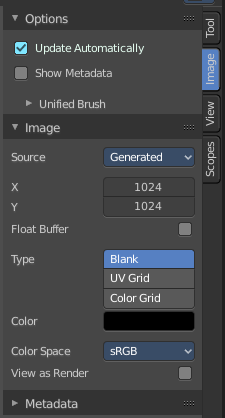
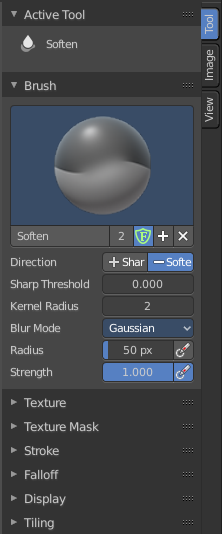
The Image Editor is made of several areas. At the right side you will find the sidebar. Here you will find further options and settings for the Image Editor and its tools.
The tools tab in paint mode contains several panels with functionality for the brushes. The Image tab contains image related settings. And so on.
The Scopes tab just appears with an image selected.
Right Click menus
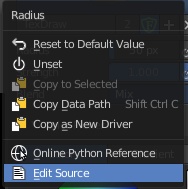
You will open the usual right click menus when clicking with the right mouse at elements in the sidebar. Its content is in big parts self explaining.
The right click menus are explained in the chapter 6 Editors Introduction.
Tool Tab in Paint Mode
Tool Tab
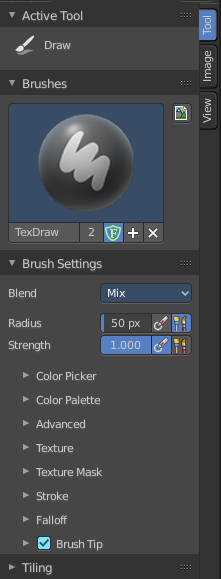
In View and Mask mode you don't have any further content in the Tool tab. But in Paint mode the tools tab contains several panels with functionality for the brushes. It is in big parts similar functionality to the paint tools in the 3D view.
The Brush panel shows different content, dependent of which brush is chosen in the tool shelf.
Save Image
A short warning. A modified image does NOT save with the scene. You have to save out the image when you want to save the changes at the texture. There is no warning. So DON'T FORGET TO SAVE THE IMAGE.
Brush Asset Panel
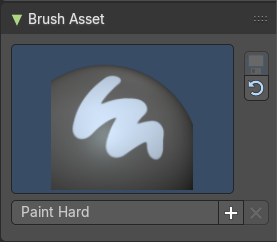
The Brush Asset Panel contains the different Brushes and some Brush settings. Choose and adjust your current active brush.
Browse Brush
The big image at the top is a dropdown box that allows you to choose a brush. Click at it, and you will see the different brushes. A click at one of the images will choose this brush then.

Brushes are assets. You can load them from different libraries if you want.
Brush Specials menu
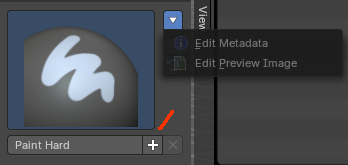
This menu becomes active when you create a new brush. Which can be done wiht the Plus button in the name property. This data cannot be changed for builtin system brushes.
Edit Metadata
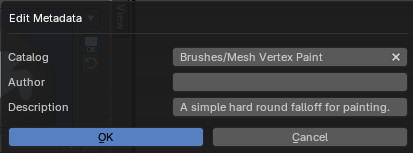
Calls a popup where you can adjust further informations and settings for the brush.
| Entry | What it does |
|---|---|
| Catalog | The asset catalog in which the brush is stored. |
| Author | The brush author. |
| Desctription | Add a description |
| OK / Cancel | Accept or decline the changes. |
| Edit Preview Image | Allows you to load a custom preview image. |
| Entry | What it does |
|---|---|
| Save Brush Asset | This button is just active with a custom brush. It saves all changes made at the brush settings into the current custom brush. |
| Revert Brush Asset | Reverts the brush settings to the default values of the brush in the asset library. |
Brush settings Panel
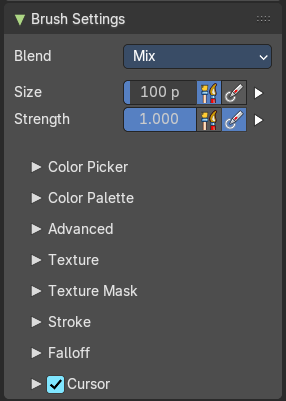
The Brush Panel contains the different paint brushes, a color dialog, and some brush settings.
Blend
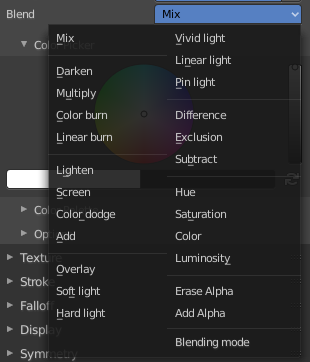
Define how the stroke will blend. You can choose between various blend modes.
Size
The Radius edit box allows you to adjust the radius of the brush. The button behind the edit box enables tablet pressure sensitivity for radius.
Size Pressure
The first button behind the edit box enables tablet pressure sensitivity for radius.
Pressure Size Curve
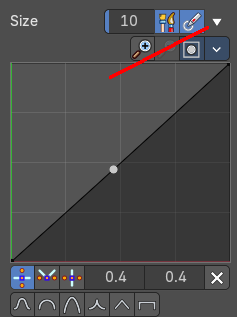
Behind the pressure size button there is a button to reveal the size pressure curve panel. When you activate Size Pressure for tablets, then the Size Pressure curve becomes active, and can be adjusted.
The pressure size curve allows you to adjust the falloff curve for the tablet pressure. It shows when Use Pressure is activated. The curve panel shows when clicking at the button.
Selecting Points
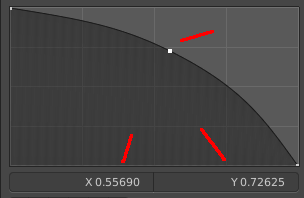
You can select curve points. This reveals two edit boxes for the x and y coordinate of this point.
Selected points can be moved around. Left click at them, hold the mouse button down and move them to a new location.
Adding Points
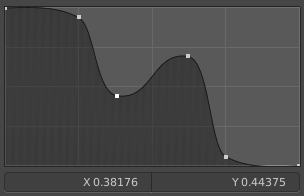
You can add new curve points by simply left clicking at the curve. Move the mouse to position them where you need it.
Navigation elements
| Entry | What it does |
|---|---|
| Zoom in | Zooms in. |
| Zoom out | Zooms out. |
Clipping options
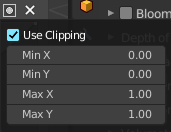
Set up clipping for the stroke.
Tools
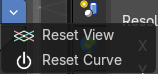
Tools is a menu where you can find some curve related tools.
| Entry | What it does |
|---|---|
| Reset View | Resets the curve windows zoom. |
| Reset Curve | Resets the curve to the initial shape. |
Handles

You can choose between Auto handle, Vector Handle and Auto Clamped.
Position X / Y
The position of the selectedc curve point.
Delete Points
Deletes the selected curve point.
Curve Presets

A curve preset to start with.
Use Unified Radius
The second button behind the edit box enables global radius size. Any modification at the radius will also modify the radius value for other paint tools.
Strength
The Strength edit box allows you to adjust the strength of the brush. The button behind the edit box enables tablet pressure sensitivity for strength.
Size Pressure
The first button behind the edit box enables tablet pressure sensitivity for radius.
Pressure Size Curve
Behind the pressure size button there is a button to reveal the size pressure curve panel. When you activate Size Pressure for tablets, then the Size Pressure curve becomes active, and can be adjusted.
The pressure size curve allows you to adjust the falloff curve for the tablet pressure. It shows when Use Pressure is activated. The curve panel shows when clicking at the button.
Selecting Points
You can select curve points. This reveals two edit boxes for the x and y coordinate of this point.
Selected points can be moved around. Left click at them, hold the mouse button down and move them to a new location.
Adding Points
You can add new curve points by simply left clicking at the curve. Move the mouse to position them where you need it.
Navigation elements
| Entry | What it does |
|---|---|
| Zoom in | Zooms in. |
| Zoom out | Zooms out. |
Clipping options
Set up clipping for the stroke.
Tools
Tools is a menu where you can find some curve related tools.
| Entry | What it does |
|---|---|
| Reset View | Resets the curve windows zoom. |
| Reset Curve | Resets the curve to the initial shape. |
Handles
You can choose between Auto handle, Vector Handle and Auto Clamped.
Position X / Y
The position of the selectedc curve point.
Delete Points
Deletes the selected curve point.
Curve Presets
A curve preset to start with.
Use Unified Radius
The second button behind the edit box enables global radius size. Any modification at the radius will also modify the radius value for other paint tools.
Brush Settings Panel - Color Picker Sub panel
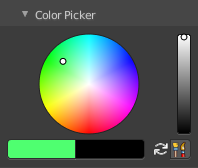
Define the color for your brush.
The active color is the left one. When you click the button with the two arrows down right then you can swap the color with the secondary color. Then this secondary color becomes the primary color, and is active.

A click at one of the color fields will open a more detailed color dialog, to set up the color by using rgb, hsv and hex colors and with value sliders.
| Entry | What it does |
|---|---|
| Brush colors flip | Flips the primary color with the secondary color. |
| Use unified Color | Choose if you want to use global colors or local color just for vertex painting. |
Brush Settings Panel - Color Palette Sub panel

Create a color palette for later reuse.
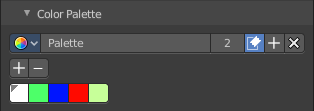
First create a new palette by clicking at New. Then adjust the color in the color picker. And then click at the add button to add this color to the palette.
To set the color picker to a palette color simply click at this palette color.
To remove a color from the palette, choose it, then click at the remove button. The active palette color that gets removed is the one with the triangle at it.
The color palette cannot be saved externally. It is part of the current blend file. You can however append color palettes from other blend files.
The elements are explained from left to right.
Palette browser
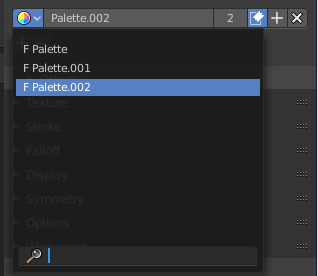
The button at the left opens a drop down list where you can choose between your palettes.
| Entry | What it does |
|---|---|
| Edit Box | Read the name of the currently active palette. You can also rename the palette here. A click into the edit box makes the name editable. |
| Number of users | See how many users the palette currently has. |
| Fake User | Fake User sets the element to have a fake user. Zero user data-blocks are normally not saved. But sometimes you want to force the data to be kept even when the data block has no user. |
| Add palette | Add a new palette. |
| Remove Palette | Clicking at this button removes the palette. Note that you need to save, close Bforartists and reload the blend file to remove the palette completely. |
Brush Settings Panel - Advanced Sub panel
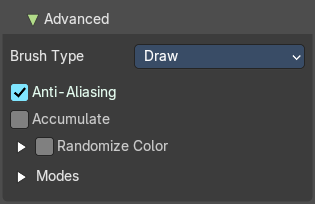
This sub panel contains brush specific settings.
Brush type Draw
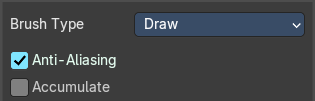

| Entry | What it does |
|---|---|
| Anti Aliasing | Smooths the edges of the strokes. |
| Accumulate | Accumulate stroke daubs on top of each other. |
Brush type Soften
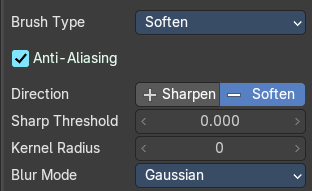

| Entry | What it does |
|---|---|
| Sharpen / Soften | Sharp Threshold: The threshold below which no sharpening is performed. · Kernel Radius: Radius of kernel used for soften and sharpen in pixels. |
| Blur Mode | Choose the blur method. Gaussian or Box. |
Brush type Smear
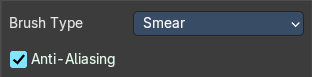

Anti Aliasing
Smooths the edges of the strokes.
Brush type Clone
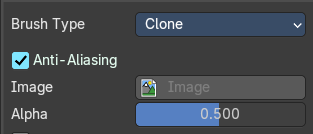

| Entry | What it does |
|---|---|
| Anti Aliasing | Smooths the edges of the strokes. |
| Image | Choose an image to clone from. · Alpha: The alpha value for the clone image. |
| Accumulate | Accumulate stroke daubs on top of each other. |
Brush type Fill
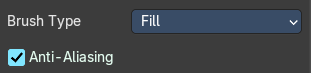

Anti Aliasing
Smooths the edges of the strokes.
Brush type Mask
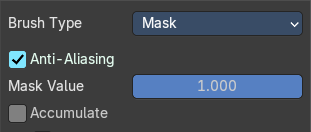

| Entry | What it does |
|---|---|
| Anti Aliasing | Smooths the edges of the strokes. |
| Mask Value | The vertex weight when brush is applied. |
| Accumulate | Accumulate stroke daubs on top of each other. |
Randomize Color subtab
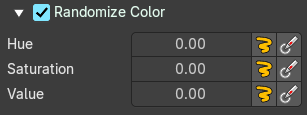
Jitter the brush color.
| Entry | What it does |
|---|---|
| Hue | Hue Jitter: The amount to jitter the Hue value. · Stroke Random: Activate the Jitter. · Use Pressure: Use tablet pressure when drawing. |
| Saturation | Saturation Jitter: The amount to jitter the Saturation value. · Stroke Random: Activate the Jitter. · Use Pressure: Use tablet pressure when drawing. |
| Value | Value Jitter: The amount to jitter the Value value. · Stroke Random: Activate the Jitter. · Use Pressure: Use tablet pressure when drawing. |
Brush Settings Panel - Texture Sub panel
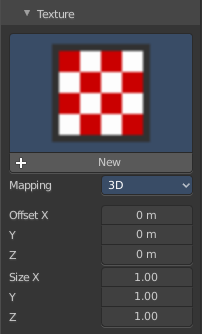
Texture Panel
The Texture panel allows you to paint with textures. This allows you for example to grab a photo from some fish scales, and simply paint them onto the mesh by using this image as a pencil. Or as a blueprint where you calk through ( Stencil method ).
Browse Texture to be linked
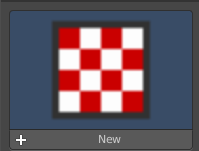
The image at the top of the panel is an image browser. Choose a texture that you can choose for painting then. You can also have more than one image loaded at once.
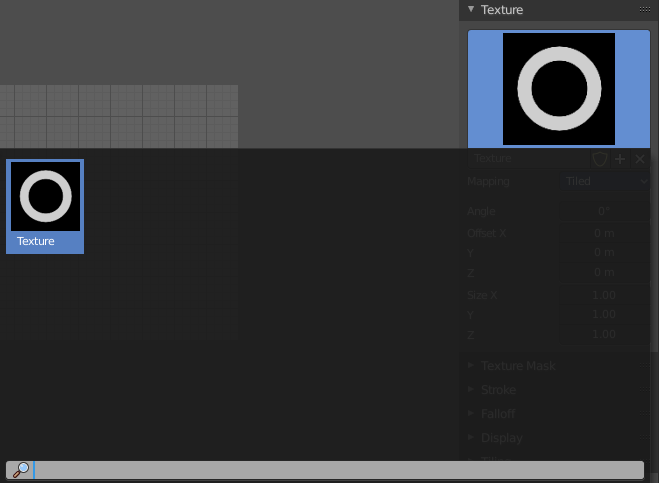
In this shot there is already a texture added. The way to add the texture here is a bit more complicated. And not done with clicking at the New button.
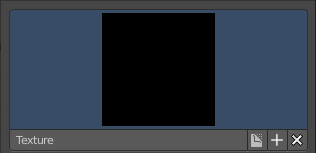
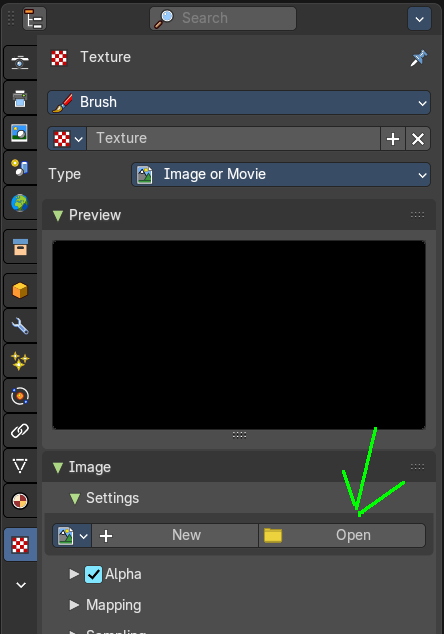
First click at the New button below the image. This will create a new texture slot. This slot is still empty, it displays black.
We need to load a texture in this slot. This must be done in the Properties editor in the Textures tab.
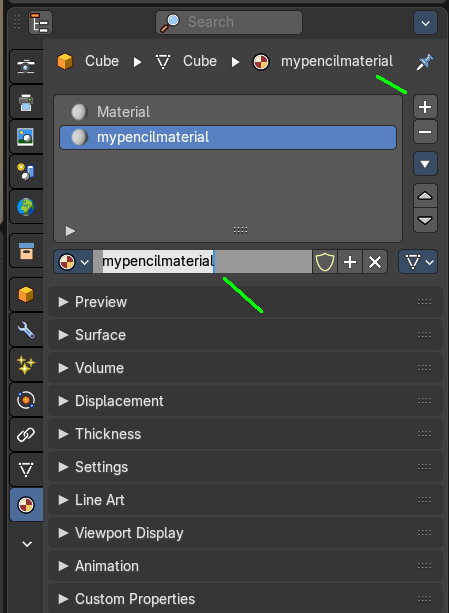
The problem is, we have most probably an object with a material and a texture already selected. And when we change this texture , then we don't get the pencil texture loaded. But we change the texture at our mesh.
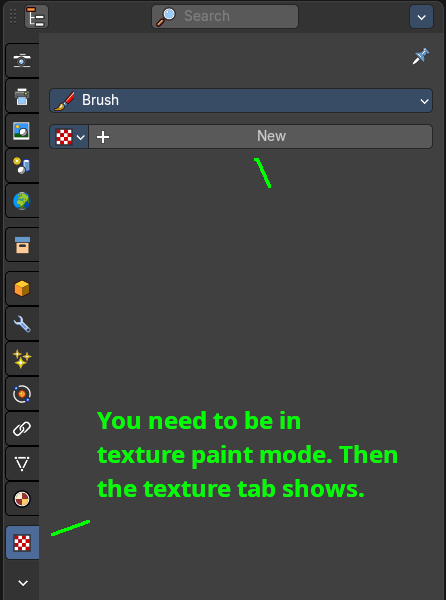
What we need to do is to create a material first. And in this material we load our pencil texture then. And then this texture becomes available in the image browser of the Texture panel. Note that you need to be in texture paint mode to see the texture tab in the properties editor. It does not show in object mode.
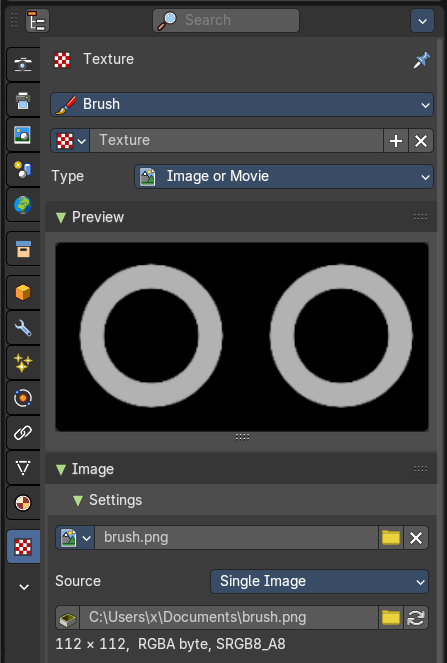
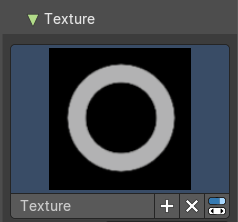
And when we go back to the texture panel, then the texture should be loaded here. And we can work with this texture.
| Entry | What it does |
|---|---|
| Texture Edit box | The Texture edit box is the edit box below the Image browser. When there's no image loaded then it displays the New button. When there's an image (or more) loaded, then you will see the name of the current texture. · New Texture: Creates a duplicate of the current texture. · Remove: Removes the current texture. · Show Texture in Texture tab: Reveals the current texture in the texture tab in the properties editor. |
| Brush Mapping | Our texture can be mapped in different methods. The Brush mapping is a drop down box where you can choose this different brush mapping methods. The settings vary. So we will go through them by the different brush mapping methods. |
Brush Mapping with mapping method Tiled
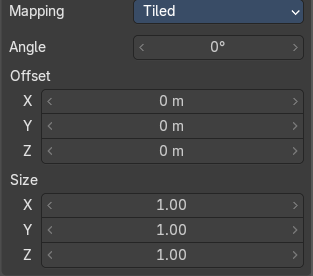
The brush mapping method Tiled tiles the brush stroke at the surface. The mapping happens from the current view. The result may be distorted when the view does not align with the surface of the object.
Angle
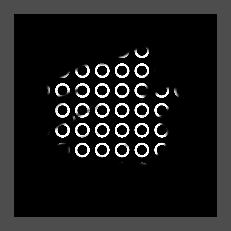
The angle of the brush.
| Entry | What it does |
|---|---|
| Offset | The offset of the texture in the brush. |
| Size | The size of the texture in the brush. |
Brush Mapping with mapping method View Plane
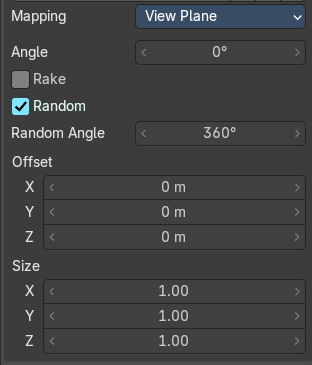
The brush mapping method View Plane simply paints onto the surface. The mapping happens from the current view. The result may be distorted when the view does not align with the surface of the object.
Angle
The angle of the brush.
Rake
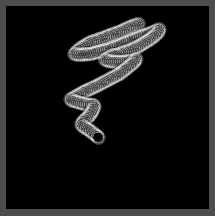
The angle follows the direction of the brush stroke.
Random
The brush angle gets set random.
Random Angle
Brush texture random angle.
| Entry | What it does |
|---|---|
| Offset | The offset of the texture in the brush. |
| Size | The size of the texture in the brush. |
Brush Mapping with mapping method 3D
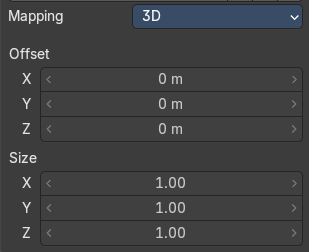
The brush mapping method 3D paints the texture at the surface, by tiling it 1/1 at the object surface.
Offset
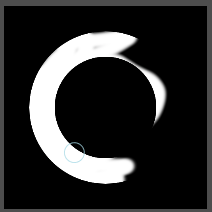
The offset of the texture in the brush.
Size
The size of the texture in the brush.
Brush Mapping with mapping method Random
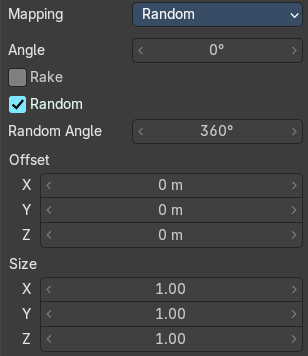
The brush mapping method Random paints onto the surface, and randomizes the texture position in the brush while that. The mapping happens from the current view. The result may be distorted when the view does not align with the surface of the object.
Angle
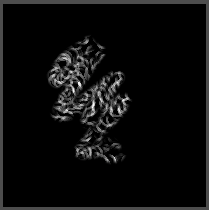
The angle of the brush.
| Entry | What it does |
|---|---|
| Rake | The angle follows the direction of the brush stroke. |
| Random | The brush angle gets set random. · Random Angle: Brush texture random angle. |
Brush Mapping with mapping method Stencil
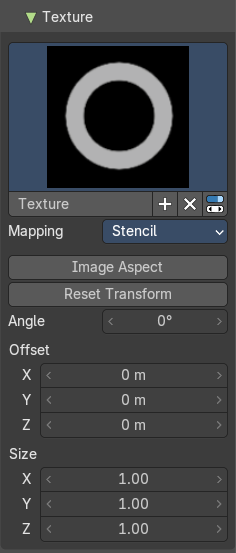
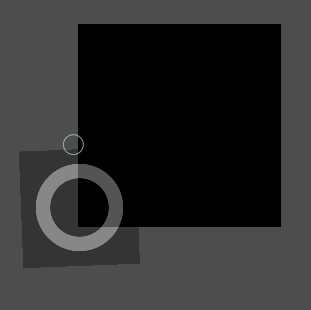
The former methods uses the textures for the brush. The method Stencil works different. You have your texture displayed in the workspace above the object, and you paint this texture onto your object with your pencil strokes.
Note that the texture in the 3d space is just visible when you are with the mouse over the viewport.
The stencil map gets by default displayed down left in the 3d view. You have to position it where you need it.
Hotkeys ctrl right mouse, shift right mouse and alt right mouse.
| Entry | What it does |
|---|---|
| Image Aspect | Adjust the stencil size to fit to the image aspect ratio. |
| Reset Transform | Resets the stencil image to be down right in the 3D view. |
| Angle edit box | Adjust the angle of the brush. |
| Offset | Fine tune the offset of the texture in the brush. |
| Size | Fine tune the size of the texture in the brush. |
Brush Settings Panel - Texture Mask Sub panel
Texture Mask Panel
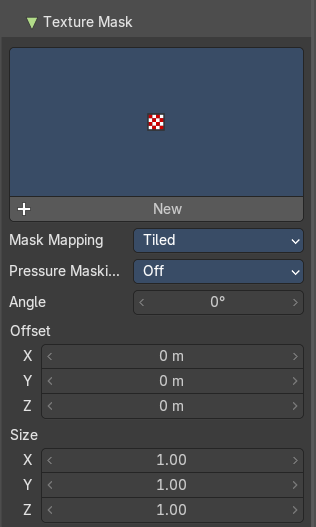
The texture mask panel allows you to use a texture as a mask to define the strength of painting. It paints just where the mask texture is bright. You can also use gradients to define the paint strength.
Browse Texture to be linked
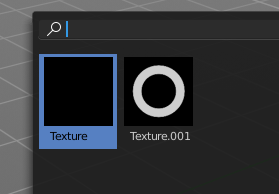
The image at the top of the panel is an image browser. Choose a texture that you can choose for painting then. You can also have more than one image loaded at once.
In this shot there is already two textures added. The way to add the texture here is a bit more complicated. And not done with clicking at the New button.
First click at the New button below the image. This will create a new texture slot. This slot is still empty, it displays black.
We need to load a texture in this slot. This must be done in the Properties editor in the Textures tab.
The problem is, we have an object with a material and a texture already selected. And when we change this texture , then we don't get the pencil texture loaded. But we change the texture at our mesh.
What we need to do is to create a material first. And in this material we load our pencil texture then. And then we can choose this texture in the image browser of the texture.
And when we switch back to the tools tab, then the texture is loaded. And we can work with this texture.
Make sure that you use another texture in the Texture panel than in the Texture Mask panel, or no texture at all. When both is the same then you will get the same result with all Mask Mapping methods since they overlap each other at the very same positions.
Brush Mapping with mapping method View Plane
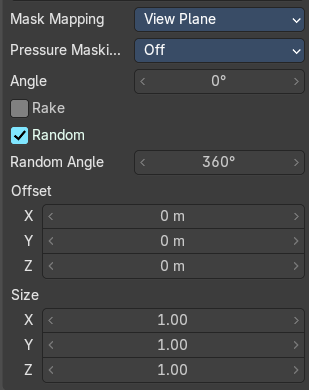
The brush mapping method View Plane simply paints onto the surface. The mapping happens from the current view. The result may be distorted when the view does not align with the surface of the object.
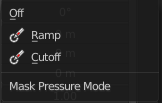
Pressure Masking
Enable pressure masking when you use a tablet.
Angle
The angle of the brush.
Rake
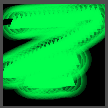
The angle follows the direction of the brush stroke.
Random
The brush angle gets set random.
Random Angle
Brush texture random angle.
| Entry | What it does |
|---|---|
| Offset | The offset of the texture in the brush. |
| Size | The size of the texture in the brush. |
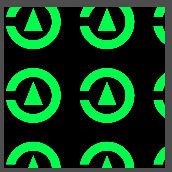
Brush Mapping with mapping method Tiled
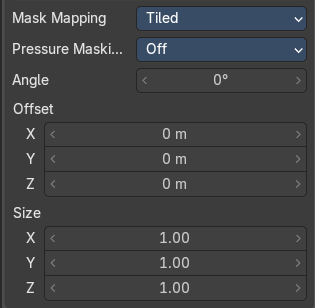
The brush mapping method Tiled tiles the brush stroke at the surface. The mapping happens from the current view. The result may be distorted when the view does not align with the surface of the object.
Pressure Masking
Enable pressure masking when you use a tablet.
Angle
The angle of the brush.
| Entry | What it does |
|---|---|
| Offset | The offset of the texture in the brush. |
| Size | The size of the texture in the brush. |
Brush Mapping with mapping method Random
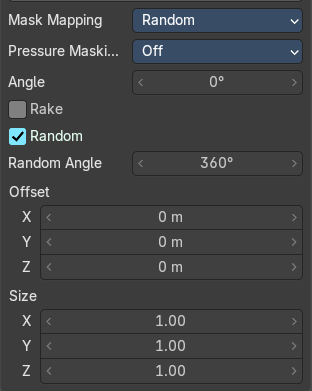
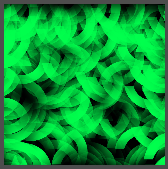
The brush mapping method Random paints onto the surface, and randomizes the texture position in the brush while that.
Pressure Masking
Enable pressure masking when you use a tablet.
Mask Pressure Mode
A drop down box to choose the mask pressure mode for tablets.
Angle
The angle of the brush.
| Entry | What it does |
|---|---|
| Rake | The angle follows the direction of the brush stroke. |
| Random | The brush angle gets set random. · Random Angle: Brush texture random angle. |
| Entry | What it does |
|---|---|
| Offset | The offset of the texture in the brush. |
| Size | The size of the texture in the brush. |
Brush Mapping with mapping method Stencil
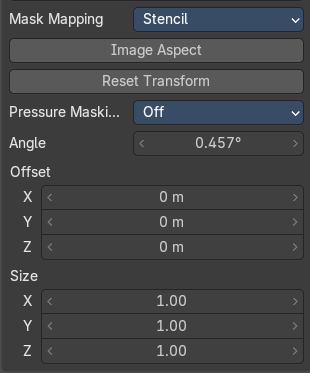
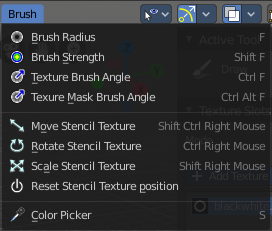
The former methods uses the textures for the brush. The method Stencil works different. You have your texture displayed in the workspace above the image, and you paint this texture onto your object with your pencil strokes.
Note that the stencil texture is just visible when you are with the mouse over the viewport. It gets by default displayed down left. You have to position it where you need it. See Brush menu, Stencil Texture controls.
| Entry | What it does |
|---|---|
| Image Aspect | Adjust the stencil size to fit to the image aspect ratio. |
| Reset Transform | Resets the stencil image to be down right in the 3D view. |
Pressure Masking
Enable pressure masking when you use a tablet.
Angle edit box
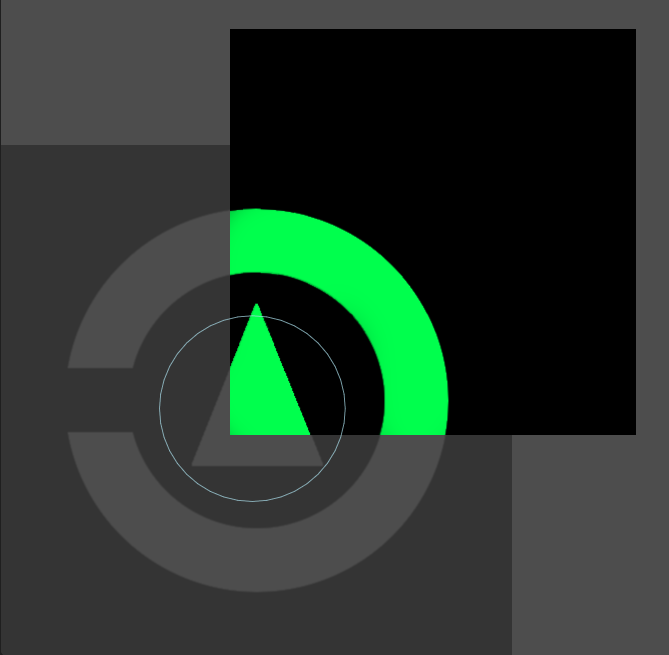
Adjust the angle of the brush. The button at the end allows you to set the radius by dragging the mouse. This should be done in the viewport and with the hotkey. This button is just a visible reminder.
| Entry | What it does |
|---|---|
| Offset | Fine tune the offset of the texture in the brush. |
| Size | Fine tune the size of the texture in the brush. |
Stroke Panel
Stroke Panel
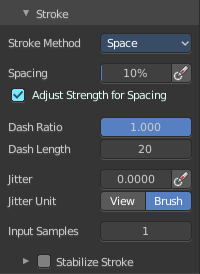
The Stroke panel contains settings to influence the behavior of the brush stroke. There are various stroke methods available. We will go through them one by one.
Stroke method Space
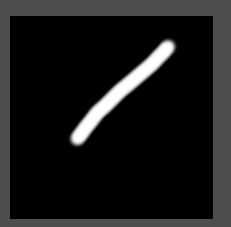
This is the default Stroke method. The stroke gets added continuously with given settings.
Spacing Edit Box
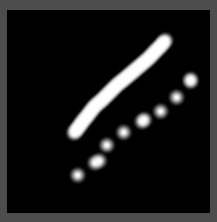
The sculpt drawing happens by mapping the pencil onto the mouse position. And when you move the mouse then the next mapping happens. Adjust the spacing after what mouse movement the next mapping should happen. The lower the value, the lower the distance between the single dots.
Spacing Pressure
The icon behind the edit box enables tablet pressure sensitivity for tablets.
| Entry | What it does |
|---|---|
| Adjust Strength for Spacing | Automatically adjust strength to give consistent results for different spacing. |
| Dash Ratio | Ratio of samples in a cycle that the brush is covering. |
| Dash Length | Length of a dash cycle measured in stroke samples. |
Jitter Edit Box
Add Jitter to the brush while painting.
| Entry | What it does |
|---|---|
| Spacing Pressure | The icon behind the edit box enables tablet pressure sensitivity for tablets. |
| Jitter Unit | Jitter in screen space, or relative to the brush size. |
| Input Samples Edit Box | Average multiple input samples together to smooth the brush stroke. |
Stabilize Stroke subpanel
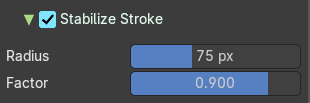
The brush lags behind the mouse position, and produces a much smoother stroke by that.
| Entry | What it does |
|---|---|
| Radius | Adjust the radius of the smoothing. |
| Factor | Adjust the factor of the smoothing. |
Stroke method Curve
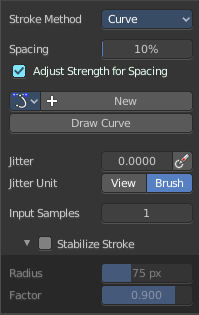
The Stroke method curve doesn't simply influence the way how the stroke is painted. It is a special method.
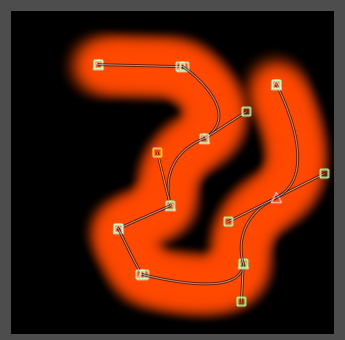
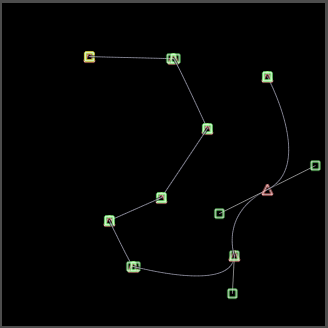
First you draw a curve object by holding down ctrl and clicking with right mouse button. Then you tweak the curve. You can click at the curve point, and drag out handlers to make the curve points smooth. This way you get one handler. When you click and drag then you will get two handlers at the curve point.
When done you hit the Draw Curve button or click left outside of the image. And the curve gets drawn onto the surface.
Spacing Edit Box
The drawing happens by mapping the pencil onto the mouse position. And when you move the mouse then the next mapping happens. Adjust the spacing after what mouse movement the next mapping should happen. The lower the value, the lower the distance between the single dots.
The icon behind the edit box enables tablet pressure sensitivity for tablets.
Paint Curve edit box
Here you set the active curve.
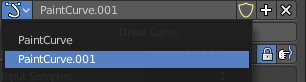
The first element is a drop down box where you will find your curves objects. You can have more than one.
The second element is the edit box that displays the active curve.
The number right of it, in this case 2, indicates how much number of users ( internally ) this brush uses. This means that this data block (the brush) shares currently settings with at least one other object. Most probably the parent brush where we have created it from. Click at the value to make this brush a single user. The button will vanish then.
F set the brush to have a fake user. Zero user data-blocks are normally not saved. But sometimes you want to force the data to be kept even when the data block has no user.
The + button allows you to add a new pencil with the current settings. Note that the brushes are NOT saved when you close Bforartists. You can save them into the current blend file. Or you can save the startup file. But be careful here. This saves everything else of the current state of Bforartists too.
The X button deletes the brush as the active one. It does NOT delete it from the brushes list.
| Entry | What it does |
|---|---|
| Draw Curve Button | A click at it to turns the curve into curve. |
| Jitter Edit Box | Add Jitter to the brush while painting. |
| Jitter Pressure | The icon behind the edit box enables tablet pressure sensitivity for tablets. |
| Jitter Unit | Jitter in screen space, or relative to the brush size. |
| Input Samples Edit Box | Average multiple input samples together to smooth the brush stroke. |
Stabilize Stroke subpanel
The brush lags behind the mouse position, and produces a much smoother stroke by that.
| Entry | What it does |
|---|---|
| Radius | Adjust the radius of the smoothing. |
| Factor | Adjust the factor of the smoothing. |
Stroke method Line
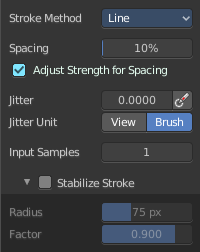
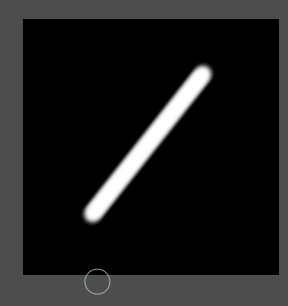
With Stroke method line you draw a line between a starting point and an endpoint. And when you release the mouse then the line gets drawn.
Spacing Edit Box
The drawing happens by mapping the pencil onto the mouse position. And when you move the mouse then the next mapping happens. Adjust the spacing after what mouse movement the next mapping should happen. The lower the value, the lower the distance between the single dots.
The icon behind the edit box enables tablet pressure sensitivity for tablets.
Jitter Edit Box
Add Jitter to the brush while painting.
| Entry | What it does |
|---|---|
| Jitter Pressure | The icon behind the edit box enables tablet pressure sensitivity for tablets. |
| Jitter Unit | Jitter in screen space, or relative to the brush size. |
Input Samples Edit Box
Average multiple input samples together to smooth the brush stroke.
Stabilize Stroke subpanel
The brush lags behind the mouse position, and produces a much smoother stroke by that.
| Entry | What it does |
|---|---|
| Radius | Adjust the radius of the smoothing. |
| Factor | Adjust the factor of the smoothing. |
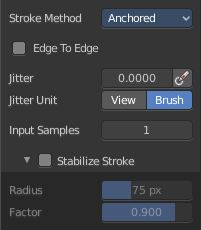
Stroke method Anchored
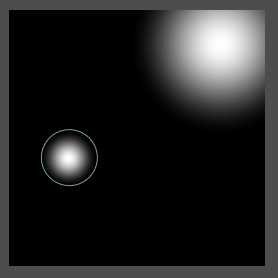
Click and drag to place a dot and to scale it.
Edge to edge
Drag Anchor Brush from edge to edge.
Jitter Edit Box
Add Jitter to the brush while painting.
| Entry | What it does |
|---|---|
| Jitter Pressure | The icon behind the edit box enables tablet pressure sensitivity for tablets. |
| Jitter Unit | Jitter in screen space, or relative to the brush size. |
| Input Sample Edit Box | Average multiple input samples together to smooth the brush stroke. |
Stabilize Stroke subpanel
The brush lags behind the mouse position, and produces a much smoother stroke by that.
| Entry | What it does |
|---|---|
| Radius | Adjust the radius of the smoothing. |
| Factor | Adjust the factor of the smoothing. |
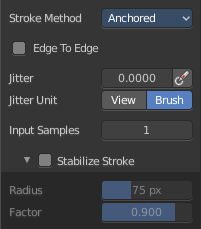
Stroke method Airbrush
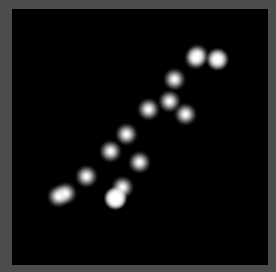
The stroke acts like an airbrush pencil. The dots gets placed randomly.
| Entry | What it does |
|---|---|
| Rate Edit Box | Define the rate of the drawing. |
| Jitter Edit Box | Add Jitter to the brush while painting. · Jitter Pressure: The icon behind the edit box enables tablet pressure sensitivity for tablets. · Jitter Unit: Jitter in screen space, or relative to the brush size. |
Input Samples Edit Box
Average multiple input samples together to smooth the brush stroke.
Stabilize Stroke subpanel
The brush lags behind the mouse position, and produces a much smoother stroke by that.
| Entry | What it does |
|---|---|
| Radius | Adjust the radius of the smoothing. |
| Factor | Adjust the factor of the smoothing. |
Stroke method Drag Dot
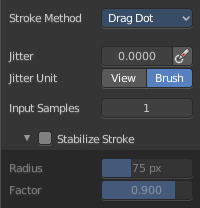
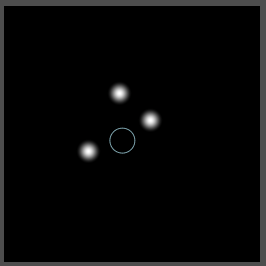
Paint a dot and drag it around. The actual painting happens then at releasing the mouse.
Jitter Edit Box
Add Jitter to the brush while painting.
| Entry | What it does |
|---|---|
| Jitter Pressure | The icon behind the edit box enables tablet pressure sensitivity for tablets. |
| Jitter Unit | Jitter in screen space, or relative to the brush size. |
Input Samples Edit Box
Average multiple input samples together to smooth the brush stroke.
Stabilize Stroke subpanel
The brush lags behind the mouse position, and produces a much smoother stroke by that.
| Entry | What it does |
|---|---|
| Radius | Adjust the radius of the smoothing. |
| Factor | Adjust the factor of the smoothing. |
Stroke method Dots
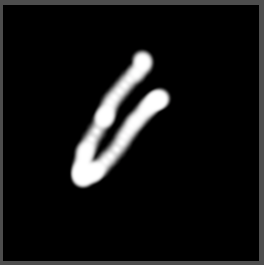
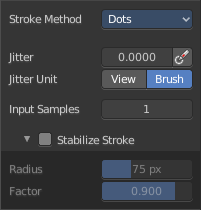
The stroke method Dots draws dots of the pencil onto the surface. The mapping happens from the current view. Means you will get distortions when your view is not aligned with the surface of the object.
Jitter Edit Box
Add Jitter to the brush while painting.
| Entry | What it does |
|---|---|
| Jitter Pressure | The icon behind the edit box enables tablet pressure sensitivity for tablets. |
| Jitter Unit | Jitter in screen space, or relative to the brush size. |
Input Samples Edit Box
Average multiple input samples together to smooth the brush stroke.
Stabilize Stroke subpanel
The brush lags behind the mouse position, and produces a much smoother stroke by that.
| Entry | What it does |
|---|---|
| Radius | Adjust the radius of the smoothing. |
| Factor | Adjust the factor of the smoothing. |
Brush Settings Panel - Falloff Sub panel
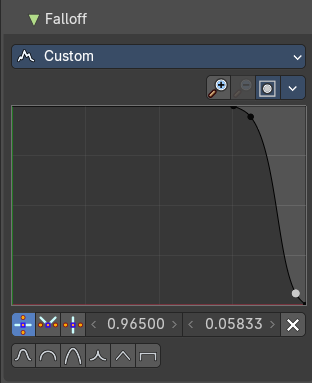
The curve panel allows you to define different falloffs methods for the border of the brush.
Selecting Points
You can select curve points. This reveals two edit boxes for the x and y coordinate of this point.
Selected points can be moved around. Left click at them, hold the mouse button down and move them to a new location.
Adding Points
This setting uses the curve widget: click to add points, drag to move them. See Curve Widget in the Interface chapter.
Navigation elements
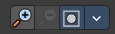
The navigation elements at the top are described from left to right.
Zoom in and out
The two buttons with the magnifying glass at it zooms in and out in the curve window.
Use Clipping
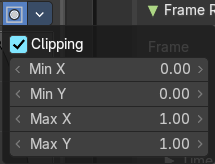
Clipping options. Set up clipping for the stroke.
Tools
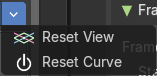
Tools is a menu where you can find some curve related tools.
| Entry | What it does |
|---|---|
| Reset View | Resets the curve windows zoom. |
| Reset Curve | Resets the curve to the initial shape. |
| Entry | What it does |
|---|---|
| Curve window | Tweak and adjust the falloff curve by clicking at a curve point and dragging it around. Double click adds a new point. Holding down ctrl activates temporary snapping. Holding down shift enables slower movement, which allows more accurate setting. |
| Vector Handle | Set handle type to Vector. |
| Auto Handle | Set handle type to Auto. |
| X / Y values | The position of the currently selected curve point. |
| Auto Clamped Handle | Set handle type to Auto Clamped. |
| Delete Points | Deletes selected curve points. |
Curve Presets
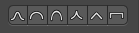
Predefined curve presets.
Brush Settings Panel - Brush Tip Sub panel
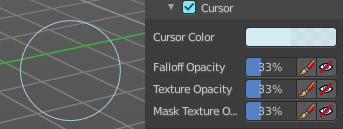
Adjust the color and appearance of the brush cursor to custom values.
Brush Tip Checkbox
Activate the custom settings.
Cursor Color
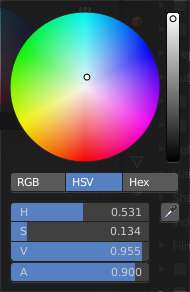
Choose another color for the brush cursor. Double clicking at the color field will open a color picker.
Falloff Opacity
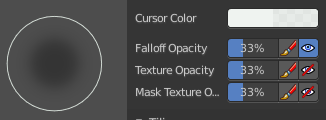
You can turn on the cursor overlay with the eye button at the end. The falloff opacity slider allows you to adjust the opacity of this cursor overlay.
| Entry | What it does |
|---|---|
| Override Overlay | Hide the Cursor Overlay when painting. |
| Use Cursor Overlay | Turn on Cursor Overlay. |
Texture Opacity
This is for the case when you paint with a texture brush. You can turn on the Texture overlay with the eye button at the end. The falloff opacity slider allows you to adjust the opacity of this cursor overlay.
| Entry | What it does |
|---|---|
| Override Overlay | Hide the Texture Overlay when painting. |
| Use Cursor Overlay | Turn on Texture Overlay. |
Mask Texture Opacity
This is for the case when you mask paint with a texture brush. You can turn on the Texture overlay with the eye button at the end. The falloff opacity slider allows you to adjust the opacity of this cursor overlay.
| Entry | What it does |
|---|---|
| Override Overlay | Hide the Texture Overlay when painting. |
| Use Cursor Overlay | Turn on Texture Overlay. |
Tiling panel
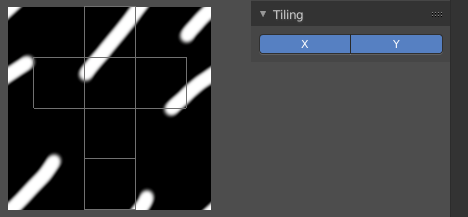
Tiling allows you to draw over the borders and continue the stroke at the other side of the image. You can tile in X and Y direction.
Image Tab
Introduction
In the Image tabs you can find further options and image settings. These settings changes, dependent of what you have selected. And in what mode you are.
Image Panel
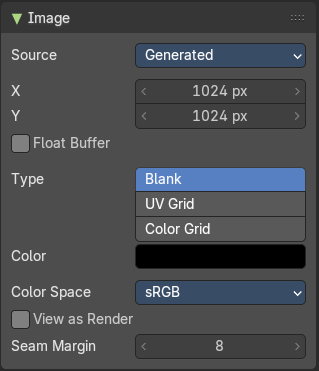
Find image related settings. Size, type, and so on.
Source
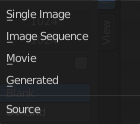
Choose the image type. This type gets usually automatically set. When you create a new image, then this image is generated. When you load an image then the Source switches to Single Image.
Generated images does not have a path.
Source Type Single Image
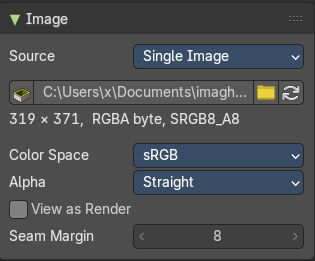
Path edit box

| Entry | What it does |
|---|---|
| Pack | With this button you can pack the movie or the image sequence into the blend file. It gets packed when you save the blend file the next time. |
| Path edit box | See and edit the path to your movie or image sequence files. |
| Open | Open a new movie or image sequence files. A file dialog will appear. |
| Refresh | Reread the movie or image sequence files. |
Color Space
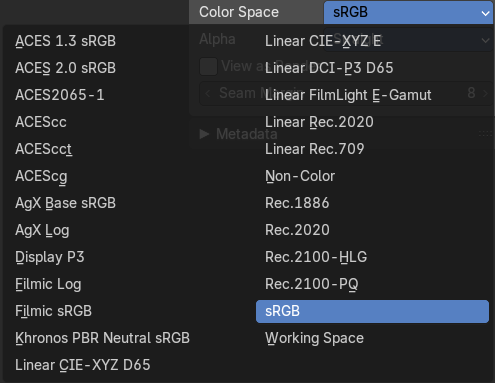
The color space for the image.
Alpha
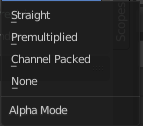
How to calculate the alpha channel.
Half Float Precision
Just with image material that uses 32 bit float. Use just 16 Bit per channel instead of the full 32 bit. This lowers the memory usage while rendering.
View as Render
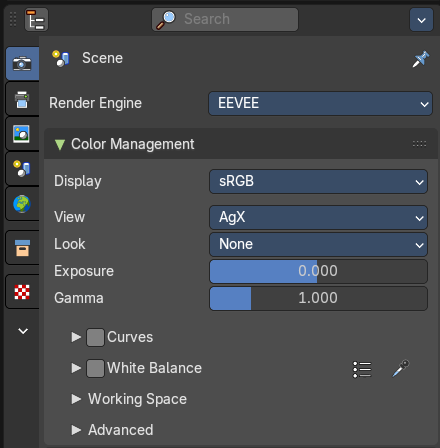
Display the image with using the color management settings. The color management can be adjusted in the properties editor in the Render tab.
Seam Margin
This option belongs to the UV Editor, and has no effect in the Image editor. Take a margin into account when fixing UV seams during painting.
Source Type Movie + Image Sequence
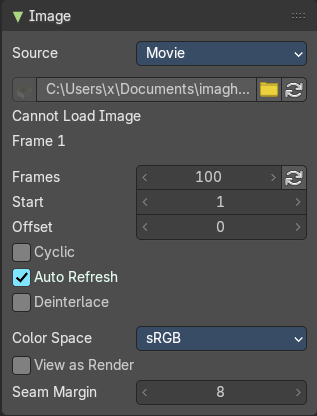
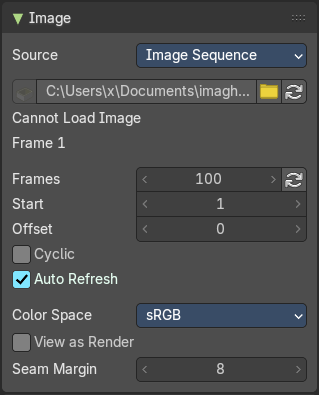
Path edit box

| Entry | What it does |
|---|---|
| Pack | With this button you can pack the movie or the image sequence into the blend file. It gets packed when you save the blend file the next time. |
| Path edit box | See and edit the path to your movie or image sequence files. |
| Open | Open a new movie or image sequence files. A file dialog will appear. |
| Refresh | Reread the movie or image sequence files. |
| Entry | What it does |
|---|---|
| Info string | Some information about the currently loaded movie. Frames, resolution and color space. |
| Frames | The number of frames of the movie or image sequence. · Match Movie Length: Set Users Image Length to the one of this video. |
| Start | The start frame of the movie or image sequence |
| Offset | Offset the number of the frame to use in the animation. -1 means off. |
| Cyclic | Cycle the images in the movie. |
| Auto Refresh | Always refresh image on frame changes. |
| Deinterlace | Deinterlace the movie file on load. |
Color Space
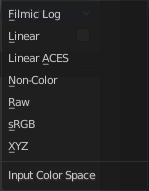
Choose the color space type for the movie or image sequence files.
Alpha
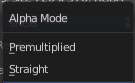
Choose the alpha channel mode. Straight or Premultiplied.
Half Float Precision
Just with image material that uses 32 bit float. Use just 16 Bit per channel instead of the full 32 bit. This lowers the memory usage while rendering.
View as Render
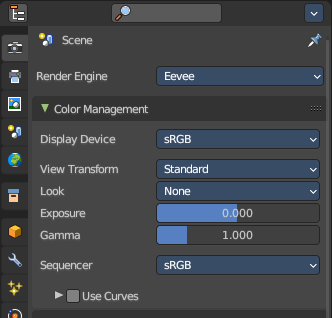
Display the image with using the color management settings. The color management can be adjusted in the properties editor in the Render tab.
Seam Margin
This option belongs to the UV Editor, and has no effect in the Image editor. Take a margin into account when fixing UV seams during painting.
Source Type Generated
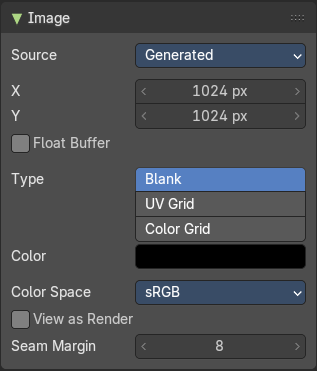
X / Y
The image width and height.
Float Buffer
Use a floating point buffer. 8 Bit images uses integers. 32 Bit works with floats.
Generated Type Blank
This type displays an image with one blank color
Color
The color of the blank image.
Generated Type UV Grid
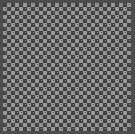
This type displays a with a black and white checker texture but colored dots.
Generated Type Color Grid
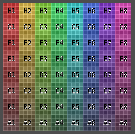
This type displays a with a colored checker texture with numbers.
Color Space
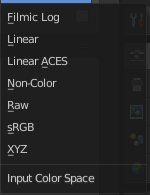
Choose the color space type for the image.
Half Float Precision
Just with image material that uses 32 bit float. Use just 16 Bit per channel instead of the full 32 bit. This lowers the memory usage while rendering.
View as Render
Display the image with using the color management settings. The color management can be adjusted in the properties editor in the Render tab.
Seam Margin
This option belongs to the UV Editor, and has no effect in the Image editor. Take a margin into account when fixing UV seams during painting.
Source Type Udim
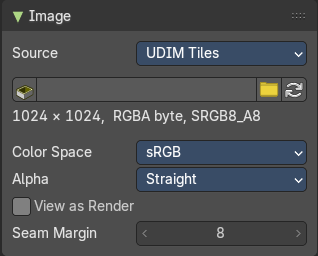
UDIM is an enhancement to the UV mapping and texturing workflow. And does not belong here. But in the UV Editor. It is just in the list because it shares the same menus with the UV Editor.
Info string
Some information about the currently loaded image. Resolution and color space.
Color Space
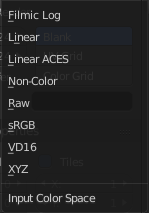
Choose the color space type for the movie or image sequence files.
Alpha
Choose the alpha channel mode. Straight or Premultiplied.
Half Float Precision
Just with color space sRGB. Use just 16 Bit per channel instead of the full 32 bit. This lowers the memory usage while rendering.
View as Render
Display the image with using the color management settings. The color management can be adjusted in the properties editor in the Render tab.
Seam Margin
This option belongs to the UV Editor, and has no effect in the Image editor. Take a margin into account when fixing UV seams during painting.
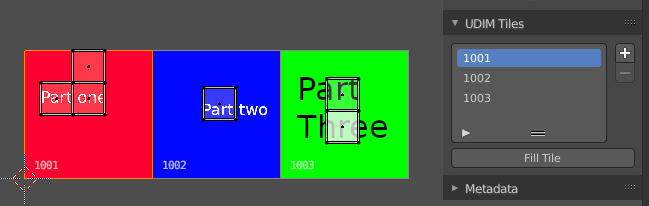
UDIM Tiles Panel
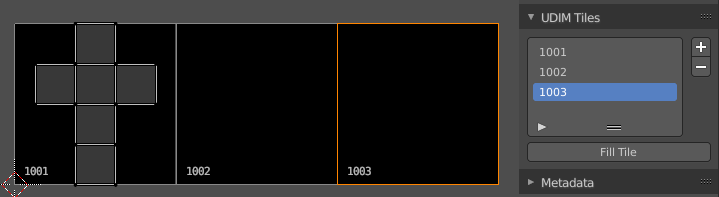
Manage UDIM tiles. This panel shows with source type UDIM.
UDIM Tile List
List all UDIM tiles associated with the main index (1000 tile). Double clicking on the tile name allows renaming.
| Entry | What it does |
|---|---|
| Number | The starting tile index number. UDIMs must start with the 1001 tile and typically increase in incremental order. |
| Drag Handler | The two vertical lines at the end is a handler with which you can expand the list. |
| Search Field | You can expand a search field at the bottom of the list. Type in your term and hit enter to filter for your term. · Invert: Exclude the search term instead of searching for it. · Sort by Name: Sort the List by name. |
Add Tile
Adds new UDIM tiles to the group.
Add Tile dialog
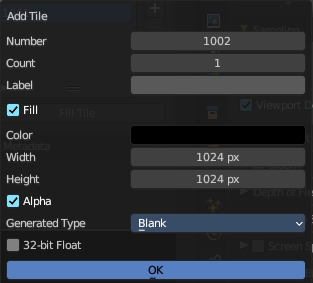
| Entry | What it does |
|---|---|
| Number | The UDIM tiles are identified by the number. It is four digits, and with increasing number. |
| Count | How many tiles to add. |
| Label | Leave blank to use the Number as the name in the list. |
| Fill | Fill the new tile with a generated image. |
| Color | The fill color for generated type Blank. |
| Width / Height | The dimensions of the image. |
| Alpha | Does the image have an alpha channel. |
Generated Type
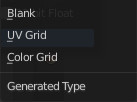
The generated texture type.
32 bit float
Generate an image with 32 bit floating point bit depth.
Remove Tile
Remove the selected UDIM tile. Note that the place in the texture will then be blank. The tiles does not resort. The next created UDIM tile will then be placed in this gap.
Fill Tile
Occupy the UDIM tile with a Generated Image. You can change the fill type and texture tile size of a UDIM tile also afterwards with this fill tool. Note that this overwrites the settings of the currently active UDIM tile.
Warning: If a tile is not filled, it will not be saved with the image.
Fill tile dialog
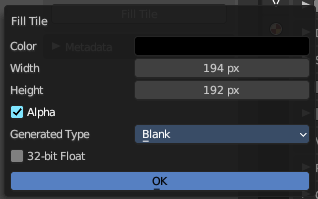
| Entry | What it does |
|---|---|
| Color | The fill color for generated type Blank. |
| Width / Height | The dimensions of the image. |
| Alpha | Does the image have an alpha channel. |
Generated Type
The generated texture type.
32 bit float
Generate an image with 32 bit floating point bit depth.
UDIM Workflow
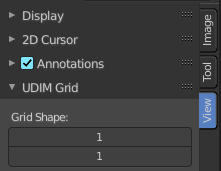
First set up the grid shape for the UDIM tiles.
This panel is in the View tab. And will vanish in the moment you add any texture. So do this setup beforehand. There is no way to show and change this grid panel afterwards.
Unwrap your mesh.
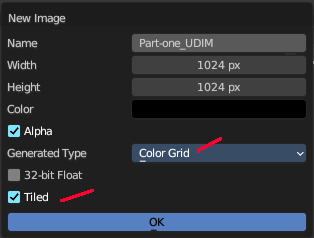
Add a generated texture, with generated type Color Grid (optional ), and Tiled ticked.
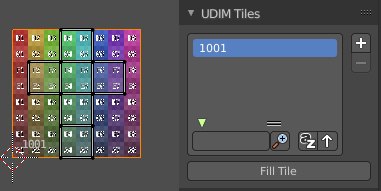
In the viewport you will now see one square UV space again, with the colored background image. And we have our first UDIM tile in the UDIM Tile list.
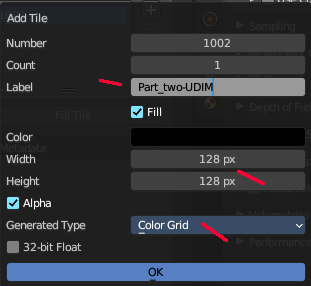
In the Tile list click at the Add button. And add another image. This time with another resolution.
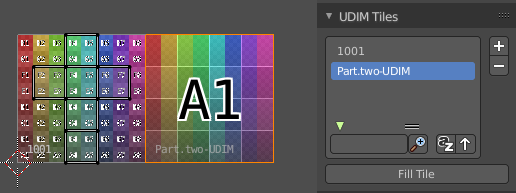
The result is that we have two tiles besides each other, with different resolution.
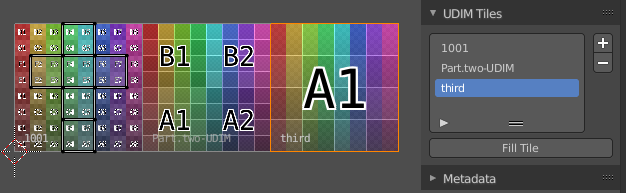
Create a third one. Or as much as you need.
Next move the UV parts to the texture areas where you need them.
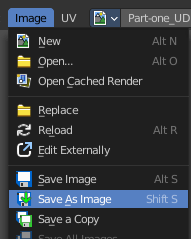
Now save the image. And by saving the one UDIM image all the sub images of this UDIM texture gets saved too.

Save the blend file. Modify the textures to your needs.
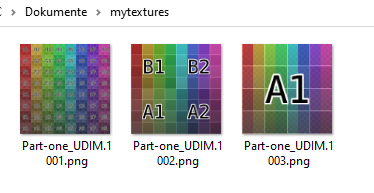
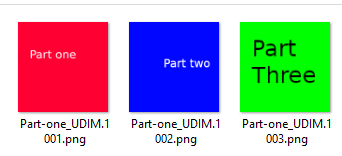
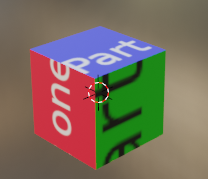
To reload the modified textures either save, close and open Bforartists and reload the scene. Or use Open Image to open the first image of the UDIM textures. The rest will load automatically.
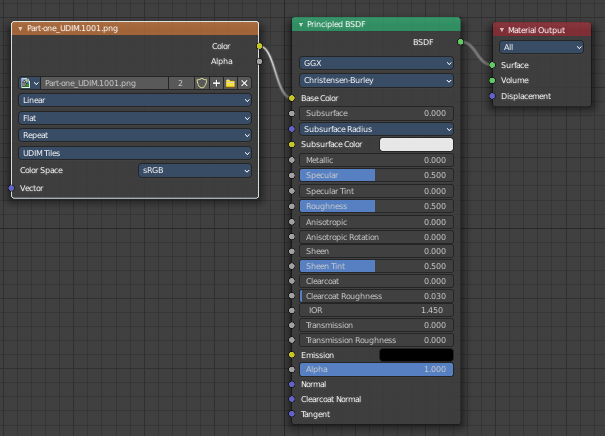
Next create a material. Add a texture. Choose the UDIM texture. And the material will now render with the UDIM textures applied.
Metadata Panel
Displays existing meta data of the image file.
View Tab
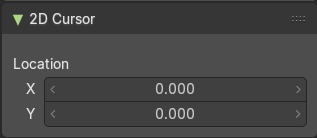
See and set the 2D cursor location.
This panel is just visible in Mask mode.
Introduction
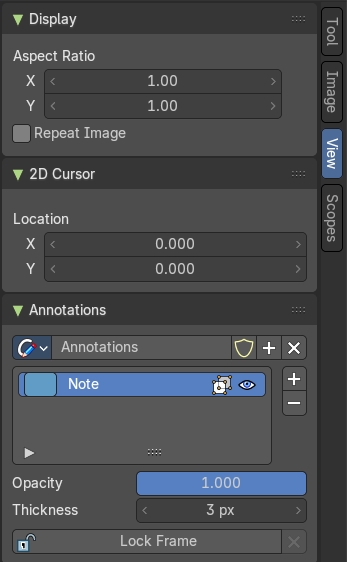
The View tab contains some view related settings. And it contains the annotation panel.
Display Panel
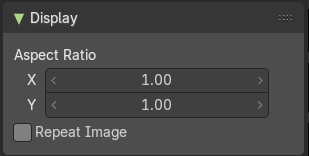
| Entry | What it does |
|---|---|
| Aspect Ratio X , Y | Set the aspect ratio of the image. |
| Repeat | With this ticked the image is repeated in the UV Image canvas. |
Annotations Panel
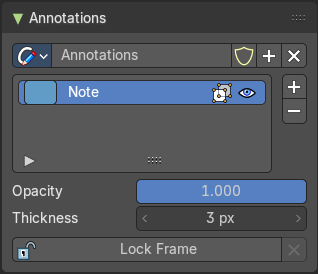
Manage the Annotation layers and materials.
When you don't have drawn an annotation yet then the panel just contains a New button.
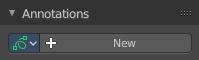
Annotations prop
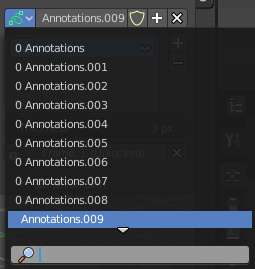
Add, remove and rename new annotations.
Drop down box
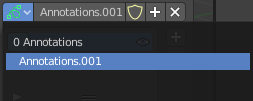
A list of the available annotation layers.
| Entry | What it does |
|---|---|
| Edit Box | The name of the current annotation. You can rename the annotation to your needs here. |
| Fake User | Assign a fake user to this annotation. Fake users is an odd concept to keep data in the scene even if it has no user somewhere. The fake user is then a dummy user so that the object is not deleted when saving the scene. |
| Add Annotation | Add a new annotation. |
| Delete Annotation | Delete the annotation. |
List of Annotation Strokes

Here you see your Annotation layers for the current Annotation. Every layer can have an own color.
At the right side you find buttons to sort them and to add and remove new Annotation layers.
You can change the color by clicking at the color field. A color dialog will pop up. You can rename annotation layers by double clicking at it.
The eye icon allows you to make it invisible And it has a search field.
| Entry | What it does |
|---|---|
| Opacity | The annotation layer opacity. |
| Thickness | The thickness of the annotation stroke. |
| Frame Locked/Unlocked | Lock frame displayed by current layer. This toggles whether the active layer is the only one that can be edited. · Delete active frame: Delete the active frame from the active annotation layer. |
Scopes Tab
Scopes Tab
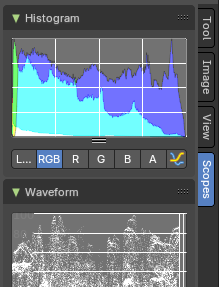
The Scopes tab contains several panels with analytic tools.
Histogram
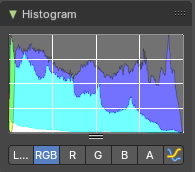
Histogram is a graph that displays the color distribution of the pixels in the image. The range from left to right goes from 0, which represents black, to 255, which represents white. And the height represents how much pixels in the image have this specific color.
The different display modes are:
| Entry | What it does |
|---|---|
| Luma | Shows the luminosity of an image. |
| RGB | Shows the RGB channels. |
| R/G/B/A | Shows the R, G, B, A channels. |
| Show line | Displays lines instead of filled shapes. |
Waveform
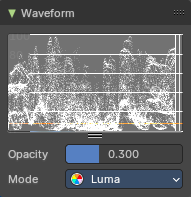
The waveform graph is another way to display the color information of the image.
Waveform Opacity
Adjust the opacity of the pixels in the waveform histogram.
Waveform Mode
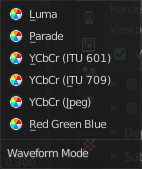
This is a drop down box menu where you can choose further options.
| Entry | What it does |
|---|---|
| Luma | Shows the luminosity of an image. |
| Parade | The RGB channels are shown side-by-side. |
| YCbCr (jpeg) | Displays the channels in the YCbCr standard, fitting to Jpg. |
| YCbCr (ITU 709) | Displays the channels in the YCbCr standard, fitting to ITU 709 standard. |
| YCbCr (ITU 601) | Displays the channels in the YCbCr standard, fitting to ITU 601 standard. |
| Red Green Blue | Shows the RGB channels overlaid as a “Full color” waveform. |
Vectorscope
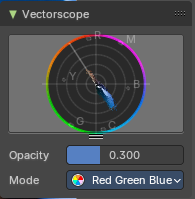
This is a graph to display the pixel color distribution in the image in a radial way. The radial arrangement allows to display data that is behind the maximum 255 of the normal histogram. This can happen with 32 bit float images for example.
Vectorscope Opacity
Adjust the opacity of the pixels in the waveform histogram.
Vectorscope Mode
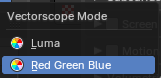
How to display the vectoscope.
Sample Line
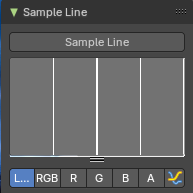
The Sample Line scope is a graph that allows you to get the sample data from a line.
Click at the Sample Line button above the histogram to draw a line. The pixels under this line will then be used to read the sample data from.
The different display modes are:
| Entry | What it does |
|---|---|
| Luma | Shows the luminosity of an image. |
| RGB | Shows the RGB channels. |
| R/G/B/A | Shows the R, G, B, A channels. |
| Show line | Displays lines instead of filled shapes. |
Samples
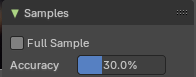
The general sample settings for the above histograms. More accurate or more fast.
| Entry | What it does |
|---|---|
| Full Sample | Sample every pixel of the image. |
| Accuracy | Proportion of original image source pixel lines to sample. |
Mask Tab
Introduction
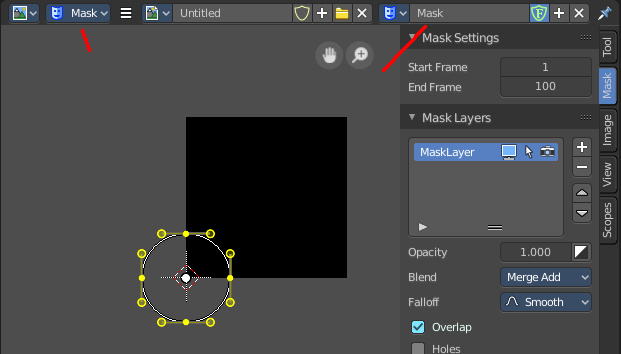
The mask tab just shows in Mask mode and with an existing mask.
It contains tools and settings for the mask mode. Like a layer system.
Mask Settings Panel
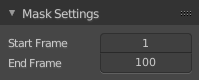
This values are of interest for the Sequencer, where you work with movies and image sequences.
| Entry | What it does |
|---|---|
| Start Frame | Set the first Frame of the mask. |
| End Frame | Set the last Frame of the mask. |
Mask Layers Panel
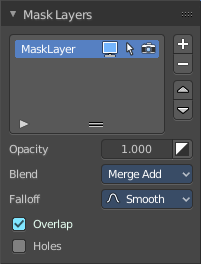
When you add a spline, a circle or a square or a freehand one, then a Mask Layer gets created.
You can create several mask layers and work with them in the sequencer or the Node editors. They can be used to create complex shapes, and define how the splines interact with each other. Splines at the same layer can be animated together.
Splines can be copied and pasted from one layer to another.
Mask Layer List
The list of available mask layers.
Restrict View
Don't show this mask layer in the viewport.
Restrict Select
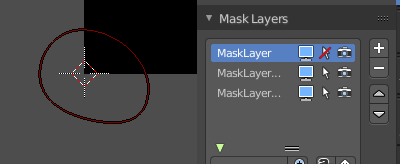
Selection in the viewport is enabled or disabled. The spline handlers becomes invisible.
Restrict Render
Don't render this mask layer for the final image(s).
Drag Handler

The two vertical lines at the end is a handler with which you can expand the list.
Search Field
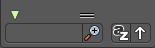
You can expand a search field at the bottom of the list. Type in your term and hit enter to filter for your term.
| Entry | What it does |
|---|---|
| Invert | Exclude the search term instead of searching for it. |
| Sort by Name | Sort the List by name. |
| Revert | Revert the list. The last list item becomes the first, and vice versa. |
Add Mask Layer
Add a new mask layer to the list.
Adjust Last Operation - Add Mask Layer
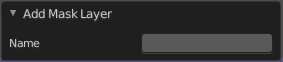
Name
Rename the new created mask layer.
Note that you can also rename it in the list.
| Entry | What it does |
|---|---|
| Remove Mask Layer | Remove the currently selected mask layer from the list. |
| Move Layer | Move the selected layer up or downwards in the list. |
Opacity
Set the opacity of the mask layer.
Invert
Inverts the values (colors) in the mask layer.
Blend
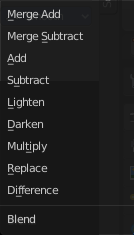
Adjust the layer blending.
Note, Merge add and Merge subtract should be used with a Feather on overlapping masks to get a better result.
Falloff
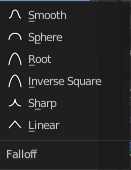
Adjust the Feather falloff
Overlap
Fill self-intersecting areas.
Holes
Overlapping splines from the same layer will generate holes in the mask.
Mask Layers Panel
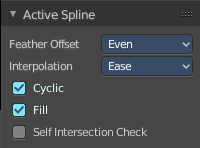
When there is a spline in the current mask layer, then the Active Spline Panel shows. Adjust some settings for the currently active spline.
Feather Offset
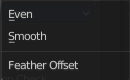
The method to calculate the feather offset.
Interpolation
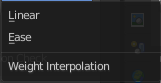
The weight interpolation method.
| Entry | What it does |
|---|---|
| Cyclic | Make the spline closed or open. |
| Fill | Fill the spline. |
| Self Intersection Check | Prevent feather from self intersecting. |
Active Point Panel
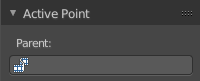
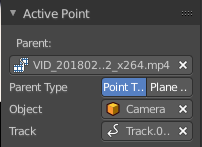
When you select a point of one of the splines, then the Active Point Panel will show up.
This panel is of interest for motion tracking. Control Points can be parented to motion tracks. And this allows to mask out parts of the motion tracked footage.
The masking happens at the Viewer Node.
| Entry | What it does |
|---|---|
| Parent | Choose the motion track that you want to parent the control point to. |
| Parent Type | Choose between the methods Point Track or Plane Track. |
| Object | The parent object. Usually the camera where you track from. |
| Track | Choose the tracking point that you want to follow with the mask. |