

































Header
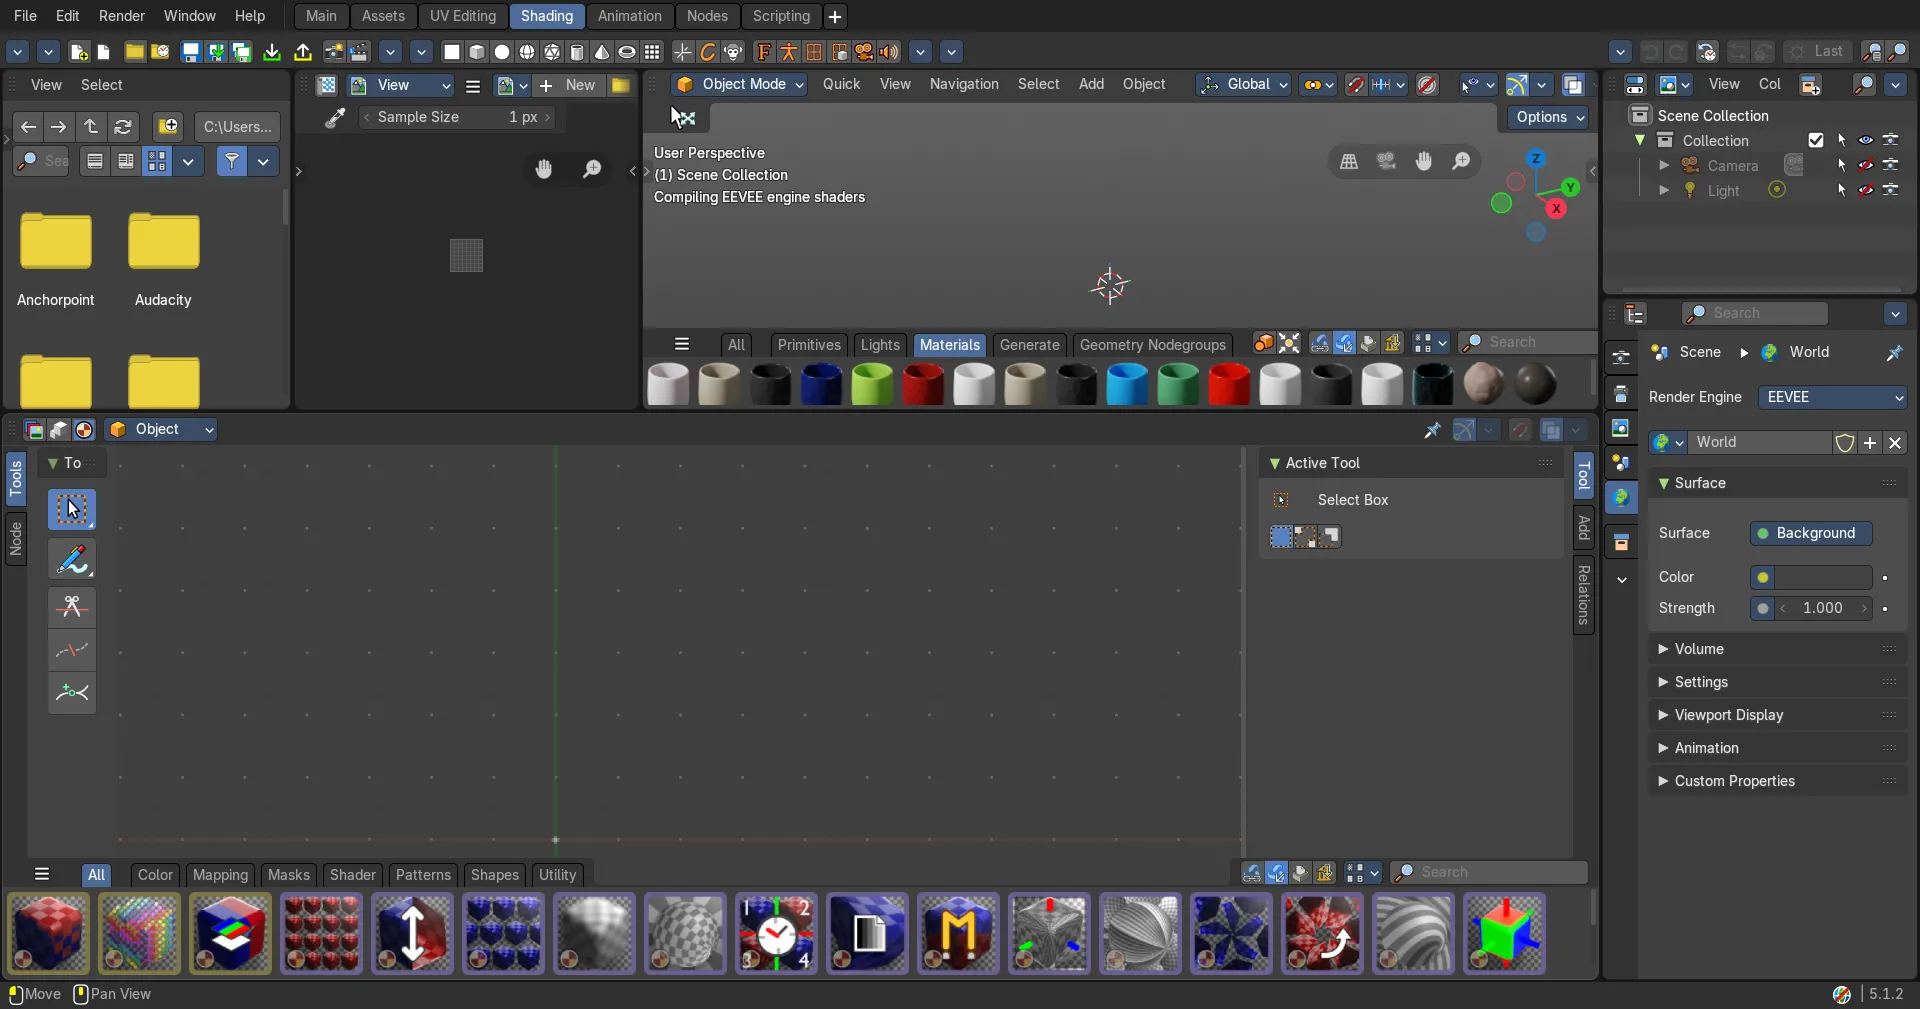
The Header contains various menus, navigation elements, settings and tools for the viewport.
Image Editor - Header
The Header contains various menus, navigation elements, settings and tools for the viewport. This content differs, dependent of the sub mode.
The header is divided into two areas. Left mode and menus. Right settings.

Switch to UV / Image editor

Sometimes you want to switch from the UV Editor to the Image Editor. Or vice versa. To continue at the unwrap or to paint a texture.
This two editors are connected by a menu that allows exactly that. A button in each header that switches to the other editor.
Header right click menus
The general right click menu functionality is explained in chapter 6 Editors introduction.
Editortype Menu
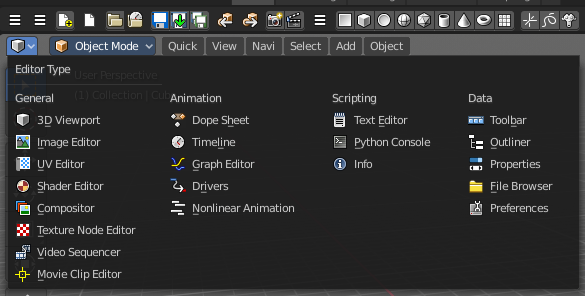
Bforartists is made of several editor types. Headers can display a menu where you can switch to other editor types.
This menu is hidden by default. It is meant to edit the layouts, and should not be necessary for regular work. You can reveal it in the header right click menu.
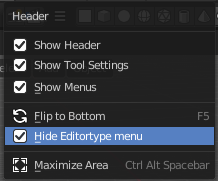
Sub Modes
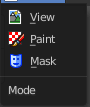
The Image Editor has three sub modes. View, Paint and Mask.
View Mode
It is as the name says a pure view mode. You can view your content.
Paint Mode
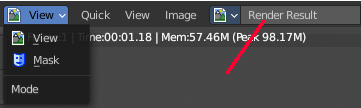
Paint mode allows to paint at your image material. The Paint mode is not available when you have a render result selected. You cannot paint at a render result. The render result is a special kind of image in this regards.
Mask Mode
This mode comes with masking functionality. You can mask out parts of the image.
Header Tools and Options
Image Editor - Header Tools
The header contains several tools, depends on what you do and what toolset is selected. The render result has some additional functionality.





Image Prop

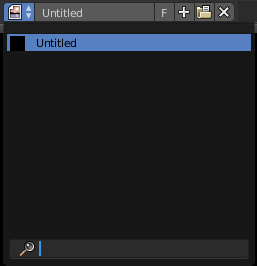
This property contains the list of loaded images. When no image is loaded then it displays the New and Open Buttons. When an image exists then it displays the name of the currently selected image.
From left to right ...

| Entry | What it does |
|---|---|
| List of images in the scene | This is a list of the images in the scene. This list allows you to switch to other images. |
| Image Edit Box | Read the name of the currently selected image. And you can rename the image here too. |
| Fake User | Wit this button you assign a fake user to this selected image. Data, like images, that is not longer linked to anything else gets removed when you save and reload a scene. Bforartists has the concept of fake users to go around this behavior. An image with a fake user is in fact linked to something. And so it is not lost when you save and reload the scene. |
Search form
Search for specific images.
New Image
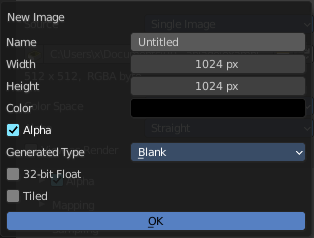
Create a new image.
Creates a new image. You will get a dialog where you can define settings for the new image.
| Entry | What it does |
|---|---|
| Name | The name of the new image |
| Width | The width of the new image. |
| Height | The height of the new image. |
Color
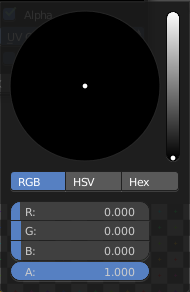
Adjust the color of the new image. A click will call a color picker.
Alpha
Check this checkbox if the new image should have an alpha channel.
Generated Type
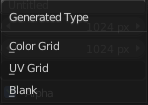
Here you can define what kind of texture you want to create.
Blank is one plain color.
UV Grid is a checker texture in black and white.
Color Grid is a colored checker texture.
32 Bit Float
Check this checkbox if the image should be in 32 Bit floating point bit depth per channel. Else it is in 8 bit per channel.
Duplicate
Not supported here.
Unlink Datablock
This deletes the selected image. Unfortunately not immediately. You need to save the scene and to reload it.
And you need to make sure that it is not linked to anything else. A mesh or a fake user for example. Have a look if there is a number besides the F button. When this is the case then the image has still a user, and so still loads with loading the scene.
| Entry | What it does |
|---|---|
| Fake User | Wit this button you assign a fake user to this selected image. Data, like images, that is not longer linked to anything else gets removed when you save and reload a scene. Bforartists has the concept of fake users to go around this behavior. An image with a fake user is in fact linked to something. And so it is not lost when you save and reload the scene. |
| Open Image | Opens the file browser to load an image. |
| Unpack | Unpack packed files to a directory. |
| User | The number of users that uses this data. Data with a user number of 0 will be removed with closing Bforartists. |
Use Image Pin

When you select another object. for UV mapping for example, then usually the connected images for this object gets displayed. Use image pin nails the currently selected image so that it stays displayed.
Mask Prop

When you are in Mask mode then you can create a new mask, and work with this mask then.
Masks have many purposes. They can be used to mask out, or influence a particular object in the footage in Motion tracking. They can be used for manual rotoscoping to pull a particular object out of the footage. They can be used as a rough matte for green-screen keying.
Masks are independent from a particular image of movie clip, and so they can also be used for creating motion graphics or other effects in the compositor.
Masks can be driven over the time so that they follow some object from the footage. For example a running actor. This can be achieved with shape keys or parenting the mask to tracking markers.
List of Masks

This is a list of the masks in the scene. Here you can switch to other masks.
Mask Edit Box
Read the name of the currently selected mask. And you can rename the image mask too.
Fake User
Wit this button you assign a fake user to this selected mask. Masks gets created with a fake user already. Means when you save the scene and reopen it, then this mask will still be there.
Data, like images, that is not longer linked to anything else gets removed when you save and reload a scene. Bforartists has the concept of fake users to go around this behavior. An image with a fake user is in fact linked to something. And so it is not lost when you save and reload the scene.
| Entry | What it does |
|---|---|
| Search form | Search for specific images. |
| Create Mask | Adds a new mask. |
Unlink Datablock
This deletes the selected mask. Unfortunately not immediately. You need to save the scene and to reload it.
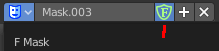
And you need to make sure that it is not linked to anything else. A mesh or a fake user for example. Have a look if there is a number besides the F button. When this is the case then the image has still a user, and so still loads with loading the scene.
Pivot
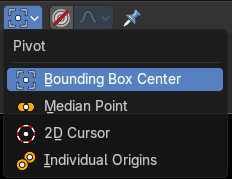
In Mask mode. Adjust what pivot point the mask uses for transformation.
Proportional Editing
In Mask mode. Enable proportional editing.
Proportional Editing Settings
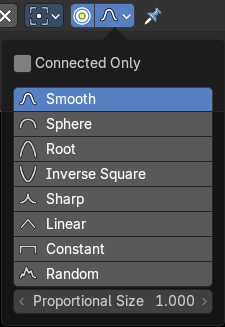
Proportional Editing is a way of transforming selected elements (such as vertices) while having that transformation affect other nearby elements with a falloff. For example, moving a single vertex will move unselected vertices within a given range. And the falloff means that selected vertices that are closer to the selected vertex will move more than those farther from it.
Proportional Size
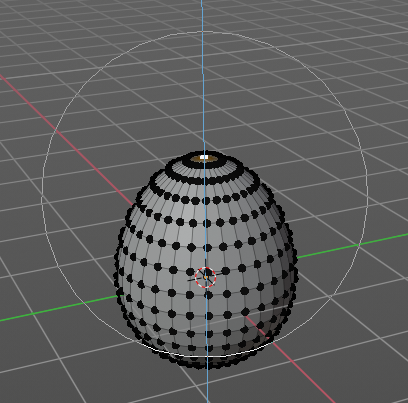
The influence of the proportional editing is defined by a radius. It is by default one standard unit.
You can change the influence radius for proportional editing with the mouse wheel or the Page up Page down arrows while keeping the mouse button pressed down and do the translation.

The exact radius value can be read in the header while transformation.
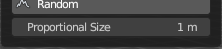
And it can also be read and edited at the Proportional Size slider in the Proportional Editing panel.
Show Gizmos
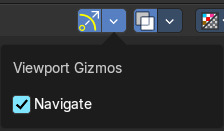
Display the viewport gizmos.
Navigate
Display the navigation gizmos in the Image Editor
Overlays
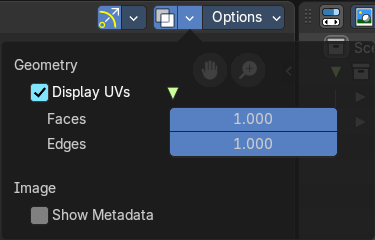
Display the overlays in the viewport.
Overlays settings
Geometry
Display UV’s
Display overlay of UV layer.
| Entry | What it does |
|---|---|
| Faces | The opacity of the faces of the UV layer. |
| Edges | The opacity of the edges of the UV layer. |
Image
Show Metadata
Display existing metadata in the viewport.
In Mask mode
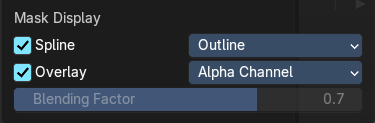
Spline
Edge Display type
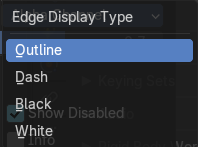
How to display the spline.
Overlay
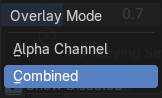
Alpha Channel
Show the alpha channel of the mask.
Display Channels
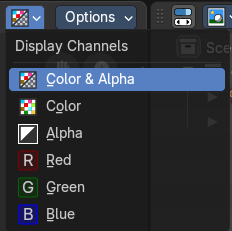
Adjust what channels of the image gets displayed.
| Entry | What it does |
|---|---|
| Color and Alpha | Displays the whole image, including alpha channel. |
| Color | Displays the whole image, but without alpha channel. |
| Alpha | Displays the alpha channel of the image. |
| Red | Displays the red channel of the image. |
| Green | Displays the green channel of the image. |
| Blue | Displays the blue channel of the image. |
Mask Display
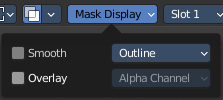
In Mask mode and with a Render result. Adjust the display of the mask.
Smooth
Smoothens the outline of the mask curve.
Overlay
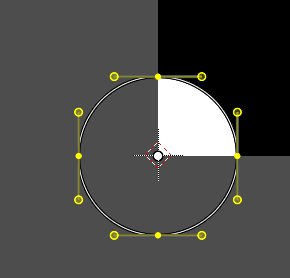
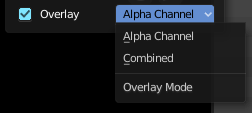
When it's a closed curve then this closed area gets displayed as filled where it covers the image. When you tick Overlay then the drop down box becomes active where you can choose the overlay method.
Edge Display Type
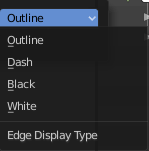
The mask curve can be displayed in different styles.
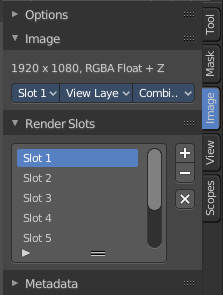
Slot
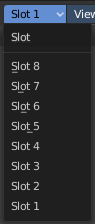
Just with a render result. Here you can render a new image into a new slot, which allows you to compare the two images then.
You need to render into this slot. So you need to choose it beforehand. Slots without a render result does not show the Render and Pass drop down boxes.

Layers
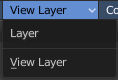
Here you can choose in which layer the render result is.
Renders can be separated into layers. This allows you to composite them back together afterwards.
For example blurring the background and foreground layers separately for depth of field, or rendering different lighting variations of the same scene.
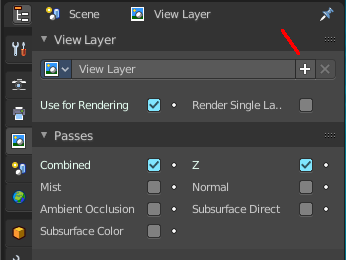
Using View Layers can also save you from having to re-render your entire image each time you change something, allowing you to instead re-render only the layer(s) that you need.
You can create more View Layers in the Properties editor. In the View Layer Tab.
Pass
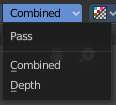
Here you can set the pass mode. Combined or Depth.
| Entry | What it does |
|---|---|
| Combined | The final combination of render passes with everything included. |
| Depth | Just the Depth render pass. |
Show Stereo

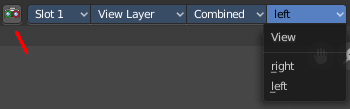
Just with stereoscopy enabled. Shows either the stereoscopic image. Or a single image from one of the cameras.
View
Show the image from one of the cameras in the list.
Options Panel
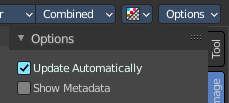
In View and Mask mode
| Entry | What it does |
|---|---|
| Update Automatically | Update other editor windows simultaneously with the changes in the Image Editor. |
| Show Metadata | Draw Metadata properties of the image. |
In Paint Mode
Update Automatically
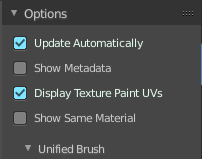
Update other editor windows simultaneously with the changes in the Image Editor.
Show Metadata
Draw Metadata properties of the image.
Display Texture Paint UV's
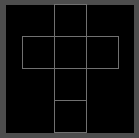
Display the UV wire from the active mesh. It needs to be in edit mode.
Show same material
This is for the case that you work at a texture for the current mesh. Just show faces of the mesh where the material with this texture is assigned to.
Quick Menu
Quick Menu
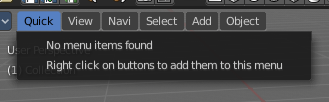
The quick menu, or in long Quick Favorites menu, is a menu that can be customized to your needs. Here you can add operators for quick access.
It is located in the header. But it can be called by hotkey Q directly under the mouse. This hotkey works in other editors too.
When the menu is empty, then you will see the message "No Menu Items found". This means that you first have to add some tools to the menu. It is a user configurable menu.
Note that added operators in this menu does not have icons. Just text.
Note also that the Quick menu for the Image editor shares the content with the Quick menu from the UV editor.
Adding an operator to the Quick menu
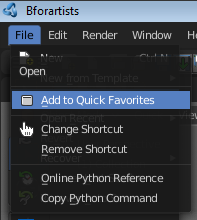
Open the panel or the menu where your operator is that you want to add.
Let's add the open command from the File menu. Open the File menu, right click at open, and choose Add to Quick Favorites.
Do the same with Save As. We should now have two new menu items in the Quick menu, which you can use now.
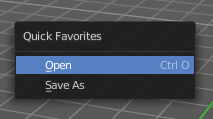
As a rule of thumb, when the right click menu has an Add to Quick Favorites, then you can add it to the quick menu.
Note that you can also add operators from the tool shelf at the left. And also operators from other editor types. Some other editors have their own quick menu though. The Image Editor for example. These operators gets added in the quick menu of the image editor then. And does not show in the quick menu in the header of the 3D view.
Adding a menu to the Quick menu
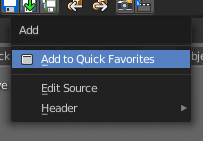
It is also possible to add a menu to the Quick menu. For example the whole Add menu. The way is the same. Right click at it, and choose Add to Quick Favorites.
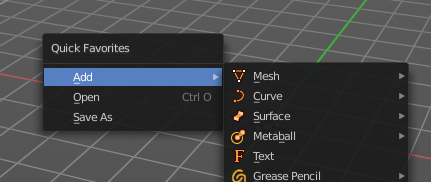
Order
You might notice that the add menu adds at the top of the menu, and not at the bottom as you would expect. First comes menus, then comes operators. And they get added in the order in which you add them.
Besides that, operators and menus gets added in the order that you add them. They cannot be sorted afterwards. So be careful how you add them. You can of course always remove operators and menus, and re-add them at the end of the list.
Removing an operator from the Quick menu
The Quick Favorites menu (Q) holds the tools and menus you add to it yourself. See Quick Favorites in the Interface chapter.
Context and mode dependent content
The quick favorites. menu exists in nearly all editors. But it is just in the 3D view available in the header. So that you know this functionality exists. In the other editors you call it with hotkey Q.
The content of the quick favorites. menu changes, dependent over which editor you are, and in what mode you are. When you add for example an operator from the image editor, then this operator just shows in the quick menu when you call the menu from the image editor. Same goes for the modes. Edit mode tools will just show in edit mode. And so on.
View Menu
Image Editor - View Menu
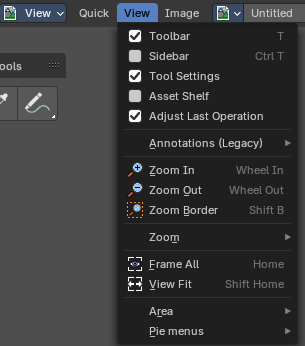
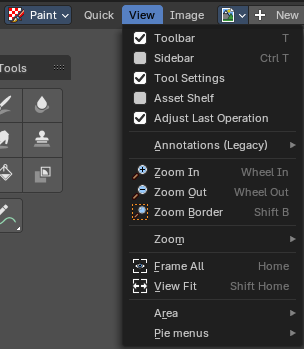
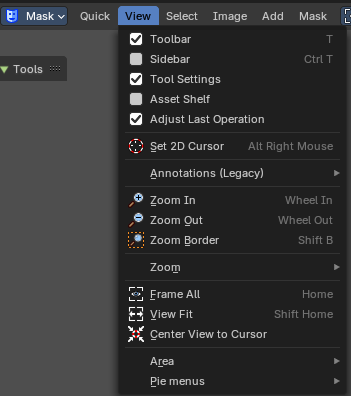
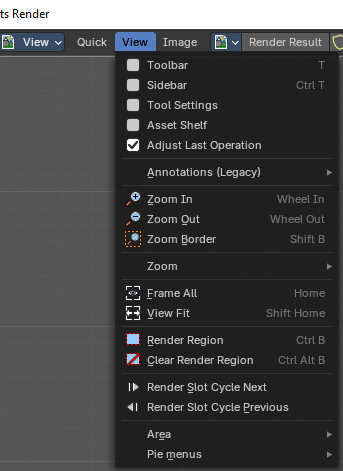
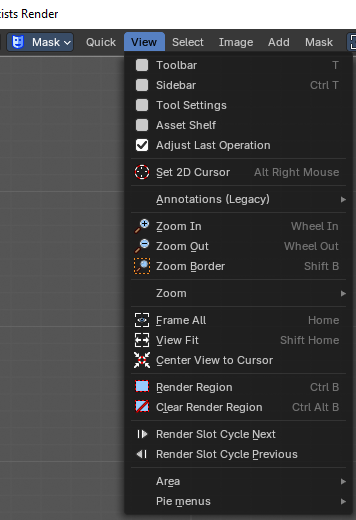
The View menu contains all View related tools.
It is available in all sub modes. With a render result the view image shows a different content. And in mask mode it shows one more item. Set 2D cursor.
Toolbar

Shows or hides the toolbar at the left.
Sidebar
Shows or hides the sidebar at the right in the viewport.
Tool Settings
Shows or hides the tool settings above the header in the 3D view.
Asset Shelf
Not yet. The asset shelf is planned but not implemented yet.
Adjust Last Operation - Image Editor - View Menu
Shows or hides the Adjust Last Operation panel down left.
Note that the Adjust Last Operation menu item in the Edit menu in the main header and the Last button in the toolbar are not related and not functional with this last operator panel. It is an independent element.
Legacy submenu

This menu contains legay operators that are now available in the tool shelf.
Set 2D Cursor
Mask mode only. Set the 2D cursor position. Hotkey only tool! Please use the hotkey!
Annotations (Legacy) submenu
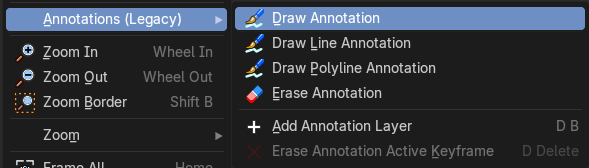
This group of operators is useful to take notes without changing tool-shelf operators. These notes can be colored in the View tab of the Property Shelf. Each layer is a single color. You can also animate the notes with keyframes, editable in the dopesheet.
Note: These are legacy operators, meaning they are equally available in the Toolshelf as a modal operator.
| Entry | What it does |
|---|---|
| Draw Annotation | Starts the annotation free hand draw tool in the editor. |
| Draw Line Annotation | Starts the annotation line draw tool to draw straight lines in the editor. |
| Draw Polyline Annotation | Starts the annotation Polyline draw tool in the editor which allows to draw multiple connected straight lines in the editor. |
| Erase Annotation | Starts the annotation erase tool in the editor which erases any strokes in the editor. |
| Add Annotation Layer | Starts a new annotation layer. |
| Erase Annotation Active Keyframe | Erases the active keyframe of the annotation. |
| Entry | What it does |
|---|---|
| Zoom In | Zooms into the viewport. |
| Zoom Out | Zooms out of the viewport. |
| Zoom Border | Draws a rectangle and zooms then to fit the size of this rectangle. Zooming in is done with drawing the rectangle with left mouse button. Zooming out is done with drawing the rectangle with middle mouse button. |
Zoom submenu
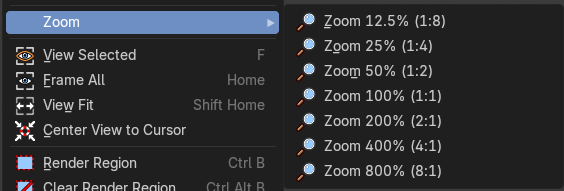
A sub menu where you can choose between predefined zoom factors.
| Entry | What it does |
|---|---|
| View Selected | Mask menu. View all selected UV’s. |
| Frame All | Zooms in or out in the viewport until all objects in the scene are displayed fitting in the viewport. |
| View Fit | Zooms out or in to fit the image to the viewport. |
| Center View to Cursor | Center the view to the cursor in the middle of the view. |
| Render Region | Render result only. Allows you to draw a rectangle. And when you re-render the image, just the content in this rectangle region gets rendered. This tool does, different from the 3d view, not draw a permanent red rectangle to define the render region area. You will see what you have chosen when you render the image. |
| Clear Render Region | Render result only. Removes any existing render region rectangle. |
| Render Slot Cycle Next | Render result only. Cycle through the Render slots. |
| Render Slot Cycle Previous | Render result only. Cycle through the Render slots. |
Area submenu
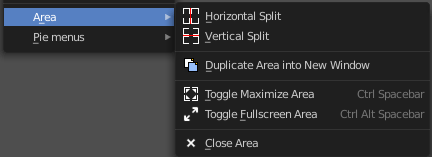
This menu contains general view functionality. And exists in most other editor types too.
| Entry | What it does |
|---|---|
| Horizontal Split | Splits the current view horizontally into two independent editor windows. |
| Vertical Split | Splits the current view vertically into two independent editor windows. |
Duplicate Area into New Window
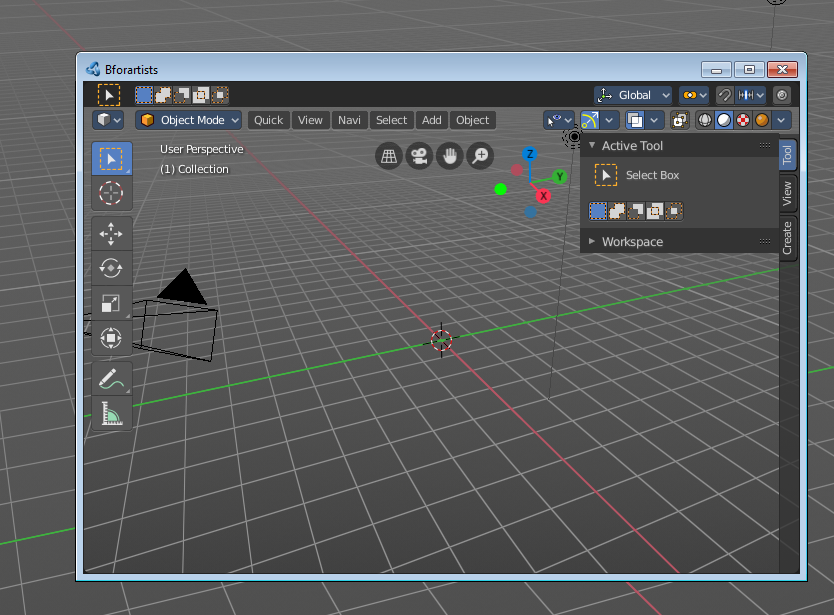
Duplicate Area into New Window opens this editor in a floating window. See Floating editor windows in the Interface chapter.
| Entry | What it does |
|---|---|
| Toggle Maximize Area | Displays the editor maximized with menus. To return from the maximized view press hotkey Ctrl + Space. Or reuse the menu item in the area menu. |
| Toggle Full screen Area | Displays the editor maximized without menus. To return from the full screen view press hotkey Ctrl + Alt + Space. |
| Close Area | Closes the area window. |
Pie menus submenu
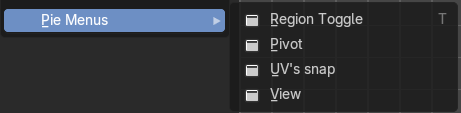
Lists the available pie menus, and gives you the ability to read the hotkeys and assign own hotkeys.
Image Menu
Image Editor - Image Menu
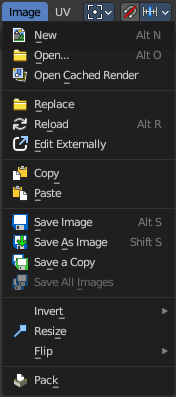
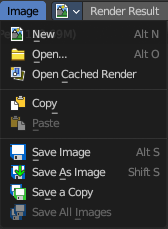
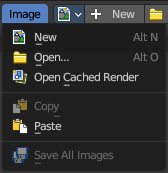
The Image menu contains the load and save functionality.
It is available in all sub modes. But not all content shows in all combinations.
New
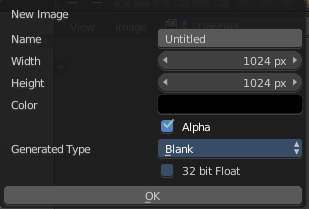
Creates a new image. You will get a dialogue where you can define settings for the new image.
| Entry | What it does |
|---|---|
| Name | The name of the new image |
| Width | The width of the new image. |
| Height | The height of the new image. |
Colour
Adjust the colour of the new image. A click will call a colour picker.
Alpha
Check this checkbox if the new image should have an alpha channel.
Generated Type
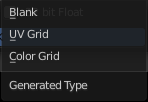
Define what kind of texture you want to create.
Blank is one plain colour.
UV Grid is a checker texture in black and white.
Colour Grid is a coloured checker texture.
32 Bit Float
Check this checkbox if the image should be in 32 Bit floating point bit depth per channel. Else it is in 8 bit per channel.
Open Image
Opens the file browser to load an image.
Open Cached Render
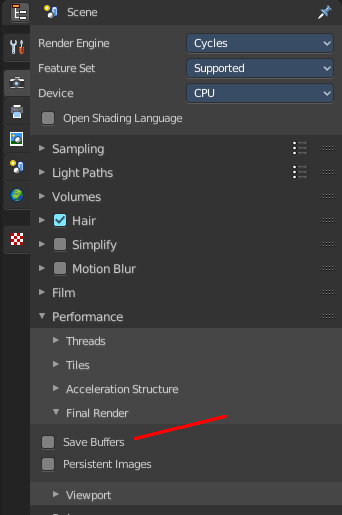
To get it to work you need to have Cycles as the renderer selected. This feature does not work with Eevee or Workbench renderer.
Read all the current scene's render layers from cache, as needed. For this feature to work save Buffers needs to be activated in the Performance tab in the render settings.
This feature can be be used to save RAM while rendering because the render layers do not have to be saved in RAM. It can also be used to recover some information from a fail render.
| Entry | What it does |
|---|---|
| Copy | Copy the image to the clipboard. |
| Paste | Paste an image from the clipboard. |
| Replace Image | Replaces the currently active image by an image that you load. |
| Reload Image | Reloads the currently selected image. Note that the images must already exist somewhere at your hard disk. When you create a new image in Bforartists, then this image isn't saved yet, and so you cannot reload it. |
| Edit Externally | Open the image in a defined external image editor like The Gimp or Photoshop. The image must be saved. And the image editor must be defined in the User Preferences. |
| Save Image | Saves the currently selected image without any further questions. Note that the images must already exist somewhere at your hard disk. |
| Save As Image | Saves the currently selected image. |
| Save Copy | Saves a copy of the currently selected image. This will save the file to a specified name, but will keep the old one open in the Image editor. |
| Save all Images | Saves all images. Note that the images must already exist somewhere at your hard disk so that they can be saved. The item is greyed out as long as the image is not saved to disk. |
Invert
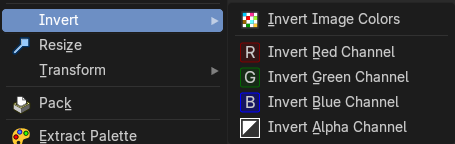
Invert is a sub menu where you can invert the colors of the whole image, or just specific colors.
Note: This only shows when in the when not viewing the Viewer or Render Result.
Resize
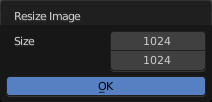
Allows you to change the dimensions of the image. The tool calls a resize panel.
Note: This only shows when in the when not viewing the Viewer or Render Result.
Transform
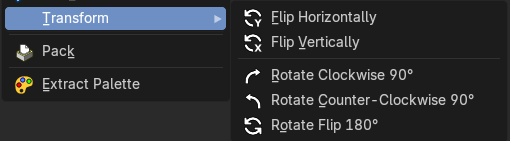
Note: These only shows when in the when not viewing the Viewer or Render Result.
| Entry | What it does |
|---|---|
| Flip Horizontally | Flip the image horizontally around it’s central axis. |
| Flip Vertically | Flip the image vertically around it’s central axis. |
| Rotate Clockwise 90° | Rotate the image to the right by 90 degrees. |
| Rotate Counter-Clockwise 90° | Rotate the image to the left by 90 degrees. |
| Rotate Flip 180° | Rotate the image to the right by 180 degrees and flip the image upside down. |
Pack Image / Pack as PNG

Packs the currently active image into the blend file. When you save the blend file the next time, then this image will be embedded. The Pack menu item turns into an Unpack menu item with packed textures.

Packed images are marked with a pack icon. A click at this icon will unpack the texture, and try to save it to file. Usually to the last existing location before it was packed.
Warning: You cannot modify packed images. Changes at the image will not be saved. You need to unpack the image when you want to modify it. And repack it after you have done the changes.
Extract Palette
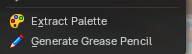
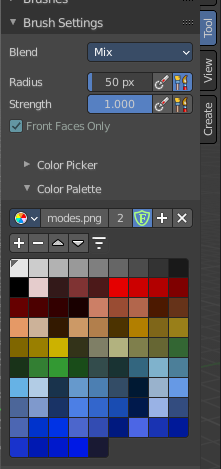
Allows you to extract a color palette from a loaded image, useful for brush based tools. The result can then be found in the Color Palette panel in the Tools tab in the sidebar with the correct object and being in the right mode, for example in texture painting mode in the 3D View editor.
Note: This only shows when your in the Image Editor, it won’t show if you in the UV Editor!
Select Menu
Image Editor - Select menu
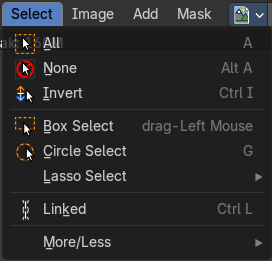
This menu just appears when you are in Mask mode. And you need to create a new mask layer to set all items active. The select functionality in this menu covers the mask geometry. The splines.
| Entry | What it does |
|---|---|
| All | Toggles between select all and deselect all. |
| None | Select nothing. |
| Inverse | Inverts the current selection. |
| Box Select | Border select enters the Border Select mode. This is a special select mode where you can select elements by dragging a rectangle. And what's inside of the rectangle gets selected then. It adds to selection by default. To subtract from selection hold down Shift key. The selection gets applied when you release the mouse. You leave the mode automatically when you release the mouse. |
| Circle Select | Circle select enters the Circle Select mode. This is a special select mode where you can select elements by moving with the mouse over it. It adds to selection by default. To subtract from selection hold down Shift key. To exit the Circle select click with the right mouse button. The pencil radius of the circle select tool can be adjusted with the scroll wheel. |
Lasso Select submenu

A sub menu with the available lasso select modes.
Linked
Select all vertices linked to the active spline(s). The previous selection gets cleared.
More / Less submenu

| Entry | What it does |
|---|---|
| More | Select more from the current active spline(s). |
| Less | Select less from the current active spline(s). |
Add Menu
Image Editor - Add menu
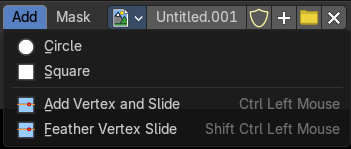
This menu just appears when you are in Mask mode.
In this menu you can create circle or square spline curves to use them for masking. They appear at the 2D cursor, and have four handlers.
They can be moved, rotated and resized with the usual W E R keys. See also mask menu, Transform. The handlers allows to change the shape and size too.
You can add multiple spline curves to a mask layer.
Circle
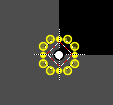
Adds a circle shaped spline curve.
Adjust Last Operation - Add Circle
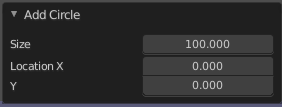
| Entry | What it does |
|---|---|
| Size | The size of the circle spline curve. |
| Location X Y | The location of the circle spline curve. Calculation happens from the center of the spline. 0 / 0 is down left. |
Square
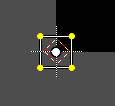
Adds a square shaped spline curve.
Adjust Last Operation - Add Square
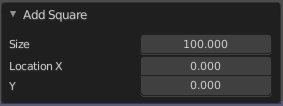
| Entry | What it does |
|---|---|
| Size | The size of the square spline curve. |
| Location X Y | The location of the square spline curve. Calculation happens from the center of the spline. 0 / 0 is down left. |
Add Vertex and Slide
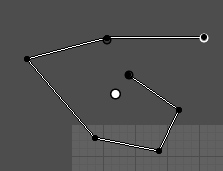
Allows you to draw freehand curves by holding down shift and clicking into the viewport. Hotkey only functionality!
Adjust Last Operation - Add Vertex and Slide
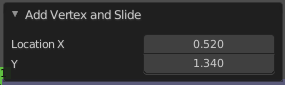
Location X / Y
Adjust the location of the last created curve point.
Feather vertex slide
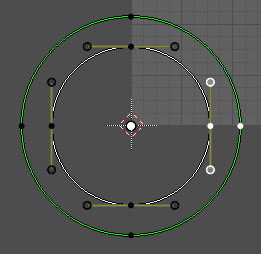
Create and define a feathering outline curve.
Usage: Hold down shift + control, click at a vertex, and pull outwards. This will create the feathering outline curve, displayed in green.
Adjust Last Operation - Add Feather Vertex and Slide
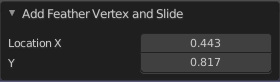
Location X / Y
Adjust the location of the last created feather curve point.
Mask Menu
Image Editor - Mask menu
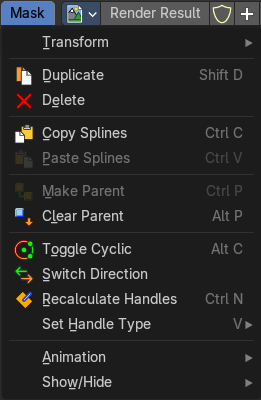
This menu appears when you are in Mask mode. It contains further functionality to modify the masking spline curves.
Transform submenu
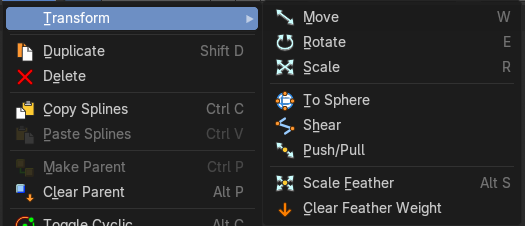
This is a sub menu with some transform menu items. This menu items are hotkey tools!
Translate
Move the selection.
Adjust Last Operation - Move
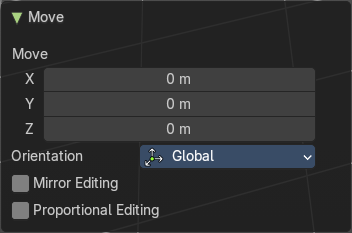
Move X, Y Z
The position. Attention, the actual world orientation and rotation does not matter here. It always starts with a value of zero, and moves relative to this zero then. For the actual location values have a look in the sidebar in the transform panel.
Orientation
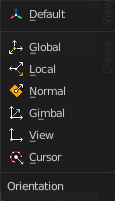
The widget can have different orientations. The menu items should be self explaining.
Mirror Editing
Enables mirror editing.
Proportional editing
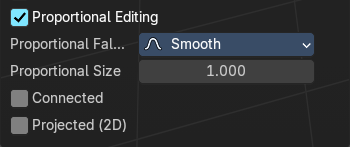
Enables proportional editing. Activating proportional editing reveals further settings.
| Entry | What it does |
|---|---|
| Proportional Falloff | Adjust the falloff methods. |
| Proportional Size | See and adjust the falloff radius. |
| Connected | The proportional falloff gets calculated for connected parts only. |
| Projected(2D) | The proportional falloff gets calculated in the screen space. Depth doesn't play a role. When it's in the radius, then it gets calculated. |
Rotate
Rotate the selection.
Adjust Last Operation - Rotate
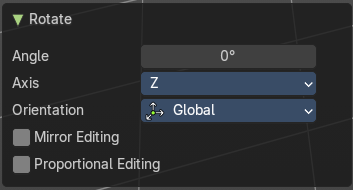
| Entry | What it does |
|---|---|
| Angle | The rotation. Attention, the actual world orientation and rotation does not matter here. It always starts with a value of zero, and rotates relative to this zero then. For the actual rotation values have a look in the sidebar in the transform panel. |
| Axis | Which axis to rotate. |
Orientation
The widget can have different orientations. The menu items should be self explaining.
Mirror Editing
Enables mirror editing.
Proportional editing
Enables proportional editing. Activating proportional editing reveals further settings.
| Entry | What it does |
|---|---|
| Proportional Falloff | Adjust the falloff methods. |
| Proportional Size | See and adjust the falloff radius. |
| Connected | The proportional falloff gets calculated for connected parts only. |
| Projected(2D) | The proportional falloff gets calculated in the screen space. Depth doesn't play a role. When it's in the radius, then it gets calculated. |
Scale
Scale the selection.
Adjust Last Operation - Resize
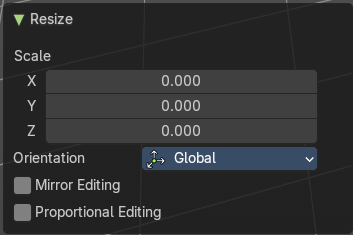
| Entry | What it does |
|---|---|
| Angle | The rotation. Attention, the actual world orientation and rotation does not matter here. It always starts with a value of zero, and rotates relative to this zero then. For the actual rotation values have a look in the sidebar in the transform panel. |
| Axis | Which axis to rotate. |
Orientation
The widget can have different orientations. The menu items should be self explaining.
Mirror Editing
Enables mirror editing.
Proportional editing
Enables proportional editing. Activating proportional editing reveals further settings.
| Entry | What it does |
|---|---|
| Proportional Falloff | Adjust the falloff methods. |
| Proportional Size | See and adjust the falloff radius. |
| Connected | The proportional falloff gets calculated for connected parts only. |
| Projected(2D) | The proportional falloff gets calculated in the screen space. Depth doesn't play a role. When it's in the radius, then it gets calculated. |
To Sphere
Shapes a selection of objects into the shape of a sphere. The calculation happens with the object origins.
In Object mode this tools requires to have more than one object selected.
Usage
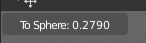
Select the vertices, activate the tool, then drag the mouse in the 3D viewport. In the header you will read the current factor then. Which tells you how close you are towards the sphere shape.
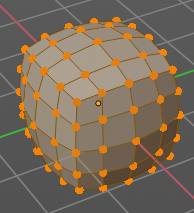
Adjust Last Operation - To Sphere
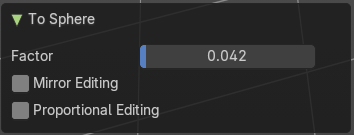
| Entry | What it does |
|---|---|
| Factor | The factor to transform the selection into a shape form. |
| Mirror Editing | Enable mirror editing. |
Proportional editing
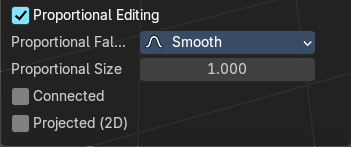
Enables proportional editing. Activating proportional editing reveals further settings
| Entry | What it does |
|---|---|
| Proportional Falloff | Adjust the falloff methods. |
| Proportional Size | See and adjust the falloff radius. |
| Connected | The proportional falloff gets calculated for connected parts only. |
Projected(2D)
The proportional falloff gets calculated in the screen space. Depth doesn't play a role. When it's in the radius, then it gets calculated.
´
Shear
Shear shears the selection.
In Object mode this tools requires to have more than one object selected.
The shear tool works along a imaginary 2d plane. The shear axis controls if the items are sheared along the x or the y axes of this plane. This is the plane along which the transformation happens. You can shear along the x or the y axis of this plane.
To make things even more complicated, the orientation of this imaginary plane is defined by the Axis and Axis Ortho items below.
Adjust Last Operation - Shear
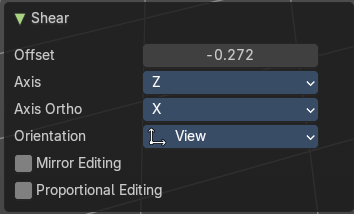
Offset
Adjust an offset.
Axis
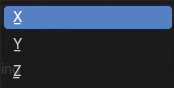
Defines one axis of the imaginary shear axis plane.
Axis Ortho
Defines the other axis of the imaginary shear axis plane.
Orientation
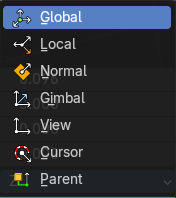
Choose the orientation for the shear action.
Mirror Editing
Enable mirror editing.
Proportional editing
Enables proportional editing. Activating proportional editing reveals further settings.
| Entry | What it does |
|---|---|
| Proportional Falloff | Adjust the falloff methods. |
| Proportional Size | See and adjust the falloff radius. |
| Connected | The proportional falloff gets calculated for connected parts only. |
| Projected(2D) | The proportional falloff gets calculated in the screen space. Depth doesn't play a role. When it's in the radius, then it gets calculated. |
Push/Pull
It pushes or pulls the object positions relative to the center of the selection.
In Object mode this tool requires to have more than one object selected.
Adjust Last Operation - Push/Pull
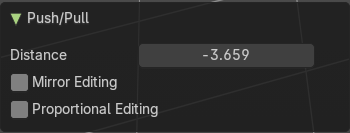
| Entry | What it does |
|---|---|
| Distance | Adjust the distance of influence of the tool. |
| Mirror Editing | Enable mirror editing. |
Proportional editing
Enables proportional editing. Activating proportional editing reveals further settings.
| Entry | What it does |
|---|---|
| Proportional Falloff | Adjust the falloff methods. |
| Proportional Size | See and adjust the falloff radius. |
| Connected | The proportional falloff gets calculated for connected parts only. |
| Projected(2D) | The proportional falloff gets calculated in the screen space. Depth doesn't play a role. When it's in the radius, then it gets calculated. |
Scale Feather
Scale feather weight for the selected points.
The curve type that is used to create mask splines is almost a Bezier curve. But it has some differences. Smooth edges of the mask are defined by feathering. The curve needed to support feathering in a way that stuck to the curve as you edited it, for ease of editing an animation. These are called S-Curves.
Besides the handles, every control point also has points that define the feather between the current point and the next point on the spline. Each feather point is stored in UV space, where U means position across spline segment, and V means distance between main spline and feather points.
Adjust Last Operation - Transform
Values
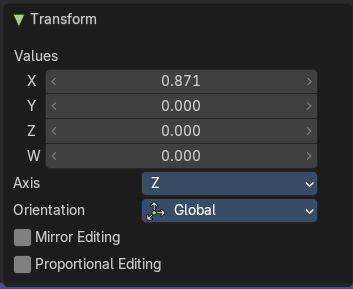
Adjust the scale amount.
X, Y and Z defines the position. W defines the rotation.
Axis
Around which axis to rotate. X, Y or Z.
Orientation
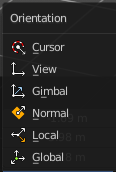
Orientation is a drop-down box to choose the type of orientation for the transform action.
Mirror Editing
Enable mirror editing.
Proportional editing
Enables proportional editing. Activating proportional editing reveals further settings.
| Entry | What it does |
|---|---|
| Proportional Falloff | Adjust the falloff methods. |
| Proportional Size | See and adjust the falloff radius. |
| Connected | The proportional falloff gets calculated for connected parts only. |
| Projected(2D) | The proportional falloff gets calculated in the screen space. Depth doesn't play a role. When it's in the radius, then it gets calculated. |
| Entry | What it does |
|---|---|
| Duplicate | Deletes the selected spline(s) or spline points. |
| Delete | Deletes the selected spline(s) or spline points. |
| Copy Splines | Copy the selected spline(s) or spline points. |
| Paste Splines | Pastes the copied spline(s) or spline points. |
| Make Parent | Parents the selected spline points. Mask splines can be parented to motion tracker markers. |
| Clear Parent | Clears the parent relationship. |
Toggle Cyclic
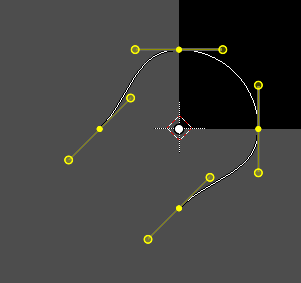
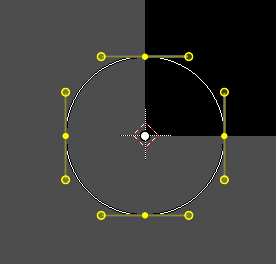
Closes or opens the spline.
Switch Direction
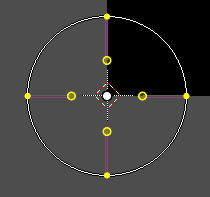
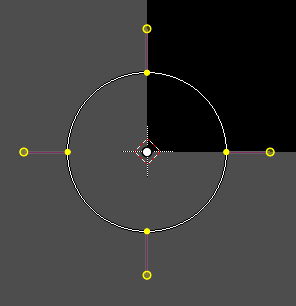
A curve has a start point and a end point. Here you can switch them. The end point becomes the starting point and vice versa. As a consequence the handler can switch their location too. With handle type aligned single they can appear outside or inside of the circle.
Recalculate Handles
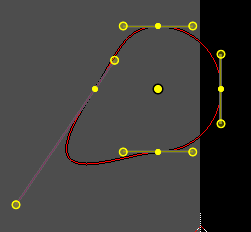
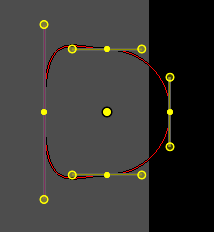
Recalculating the normals smoothens out the curve, and realigns the handlers. A square shape with handle type aligned would become round.
Set Handle Type submenu
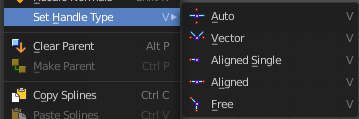
Opens a sub menu where you can choose different handle types.
Adjust Last Operation - Set Handle Type
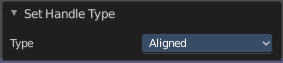
Type
Choose the handle type again.
Animation
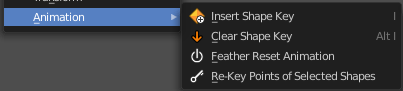
Masks can be animated.
| Entry | What it does |
|---|---|
| Insert Shape Key | Inserts a shape key for the currently selected curve points |
| Clear Shape Key | Removes the shape keys for the currently selected curve points at the current frame. |
| Feather Reset Animation | Resets the feather weight on all selected curve points at the current frame. |
| Re-Key Points of Selected Shapes | Recalculate animation data for the currently selected curve points for frames that are selected in the dope sheet. |
Show/Hide submenu
Show/Hide Faces

This is a sub menu where you can show or hide the selection.
| Entry | What it does |
|---|---|
| Show Hidden | Makes hidden splines visible again. |
| Hide Selected | Hides the selected spline(s). |
| Hide Unselected | Hides the not selected spline(s). The selected spline(s) stays visible. |