



































Sidebar
This panel displays the properties for the active F-Curve.
The pages of this part are listed in the sidebar under Sidebar.
F-Curve Tab
F-Curve Tab - Active F-Curve Panel

This panel displays the properties for the active F-Curve.
Note that you need to have a channel selected to reveal the tabs.
| Entry | What it does |
|---|---|
| Channel Name | The name of the currently active F-Curve channel. |
| RNA Path | RNA Path to property. This is a read only information. |
| RNA Array Index | The RNA Array Index to the specific property affected by the F-Curve if applicable. This is a read only information. |
Display Color
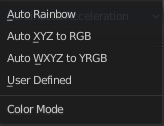

With what colors to display the curves. User defined allows you to choose a custom color for the curve. A color field appears. The other methods works random.
Handle Smoothing
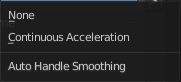
Select the method to compute automatic Bezier Handles.
| Entry | What it does |
|---|---|
| None | Only directly adjacent key values are used when computing the handles. Vector handles points directly at the adjacent keyframes. |
| Continuous Acceleration | Also keyframes behind the next or previous keyframe gets used for calculation. Which results in a smoother curve. |
F-Curve Tab - Active Keyframe Panel
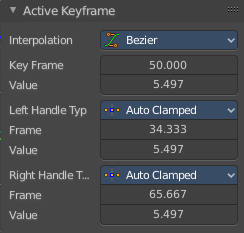
Interpolation
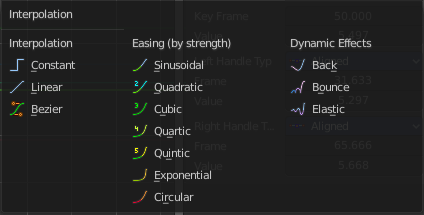
Set the interpolation type for this keyframe.
Key Frame
The current position of this keyframe.
Value
The Y value of this keyframe.
Left Handle Type / Right Handle Type
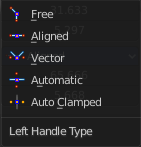
Set the handle type. The handles of a keyframe can be independent. Some constellations just works with some other constellations.
| Entry | What it does |
|---|---|
| Free | Move and adjust the handles independently. |
| Aligned | With the left handler the right handler moves too. |
| Vector | Creates a curve with straight lines. |
| Automatic | Creates a smooth curve. |
| Auto Clamped | Creates a smooth curve that only changes the direction at other curve points. It is clamped to prevent overshoots in the curve shape. |
| Entry | What it does |
|---|---|
| Frame | The current frame of this handle. |
| Value | The current Y position of this handle. |
Drivers Tab
Driven Property Panel
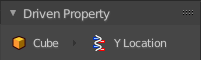
This panel displays the driven property of the object. It is read only.
Note that you need to have a channel selected to show the tabs.
Driver Panel
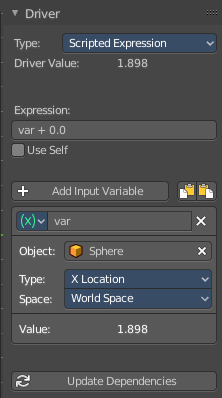
The actual driver with all its settings.
Type
Built in functions
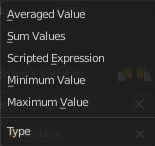
Average, Sum, Min and Max are Built-In functions. The driven property will have the value of the average, sum, lowest or highest values of the referenced driver variables. Remember that you can add more than one input variable. So when you for example use the X position of two cubes as the input, and the method Average, then the driven object will be located at the average X value of cube 1 and cube 2.
When there is just one Input variable, then the driven object will be positioned at the value of the driver object.
Scripted Expression
Allows you to use Python expressions that can refer to the driver variables by name. An expression allows you to use standard constants and math functions.
Expression
A text field with the current expression. Not available with all variable types.
Use Self
The variable Self can be used for drivers to reference their own data. Example:
self.location.x applied to the Y rotation property of the same object will make the object tumble when moving.
Note that dependencies for properties accessed via self may not be fully tracked.
| Entry | What it does |
|---|---|
| Add Input Variable | Adds a new driver variable. |
| Copy Driver variable | Copies the driver variable. |
| Paste Driver variable | Pastes a copied driver variable. |
Driver variable panel
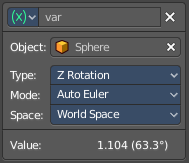
Variable type
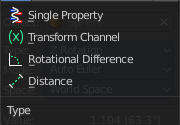
The type of variable to use.
Single Property
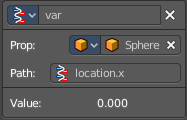
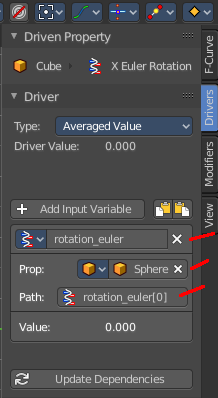
Allows you to retrieve a single value of a RNA Property, specified by a data block reference ( the source object) and a path string ( the property of this source object).
Prop
Type
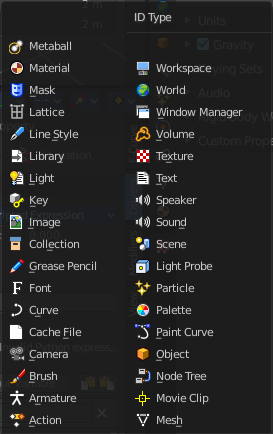
Define the input type of the object. You can retrieve values from nearly every object type.
ID
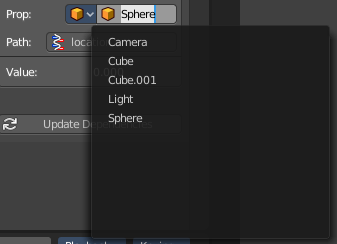
The source object. This is also a drop down field where you can pick objects from the scene.
Path
The path string to use. This defines the property where you get the value from.
Setting up by hand
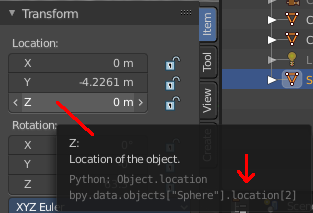
Have a look at the python tool tip in the property of the source object. The bpy.data string gives you a hint of the expression that you need.
For example, if i want to use the Z location of the sphere as the driver value.
The python string in the tool tip of the Z location property says
bpy.data.objects["Sphere"].location[2]
The sphere is already chosen as the source object. Remains the part behind objects["Sphere"] in the string.
location[2]
To use location[2] in the path will already work. But you can point directly to the single axis too. The tool tip uses an array for the axis. 0 for X, 1 for Y and 2 for Z. When you want to use the axis letters, then you need a dot between location and the axis letter. And so the other working string is:
location.z
Setting up by Copy as New Driver
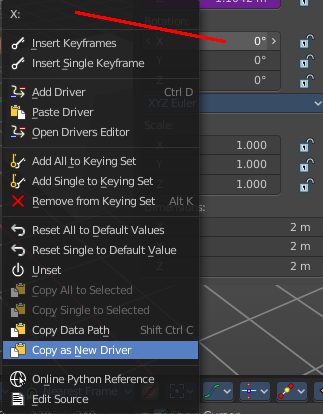
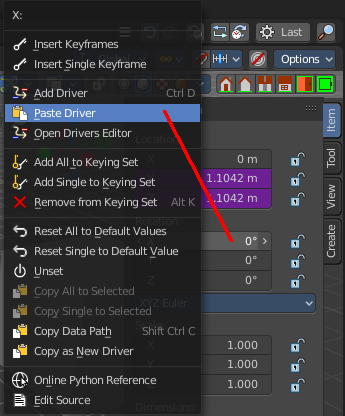
The easier way is to right click at the value that you want to use as the driver value. Here choose Copy as new Driver. In the target property choose Paste Driver. And this creates a driver with the correct values then that contains all relevant settings.
Value
The result of the diver variable. Read only.
Transform Channel
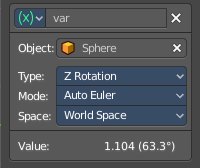
Uses the transform values of the source object.
Type
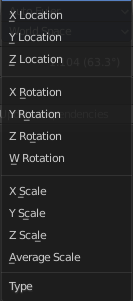
The transform type.
Rotation Mode
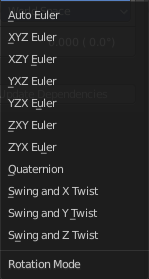
Just for Rotation transformations. The rotation mode.
Transform space
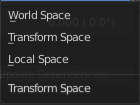
In which transform space the transformation should happen.
| Entry | What it does |
|---|---|
| World Space | Transforms includes effect of parenting / restpose and constraints. |
| Transform Space | Transforms don't include effect of parenting / restpose and constraints. |
| Local Space | Transforms include constraints, but not effect of parenting / restpose. |
Value
The result of the diver variable. Read only.
Rotational Difference
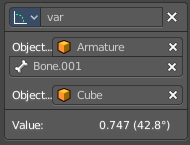
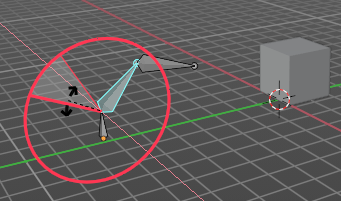
Use the angle between two bones. The parent bone acts as the second bone here.
| Entry | What it does |
|---|---|
| Object 1 | The source armature. · Bone Name: The source bone of this armature. |
| Object 2 | The target object. |
| Value | The result of the diver variable. Read only. |
Distance
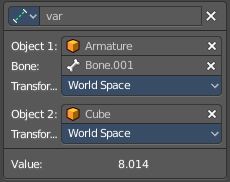
The distance between two bones or objects is used for the driver.
Object 1
The source armature.
Bone Name
The source bone of this armature.
Transform space
In which transform space the transformation should happen.
| Entry | What it does |
|---|---|
| World Space | Transforms includes effect of parenting / restpose and constraints. |
| Transform Space | Transforms don't include effect of parenting / restpose and constraints. |
| Local Space | Transforms include constraints, but not effect of parenting / restpose. |
Object 2
The target object.
Transform space
In which transform space the transformation should happen.
| Entry | What it does |
|---|---|
| World Space | Transforms includes effect of parenting / restpose and constraints. |
| Transform Space | Transforms don't include effect of parenting / restpose and constraints. |
| Local Space | Transforms include constraints, but not effect of parenting / restpose. |
Value
The result of the diver variable. Read only.
Variable name

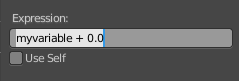
The name of the variable. This name of the variable is used for calculation in the expression. This variable can be renamed. Make sure to update the name of the variable in the expression then too.
Delete Target Variable
Removes the variable.
Update Dependencies
Some changes may not update automatically. Update dependencies updates all the changes done to the drivers.
Modifiers Tab
Modifiers Tab - Modifiers Panel
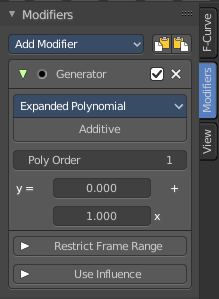
F-Curve modifiers are similar to Object modifiers. They allow to add adjustable non destructive effects. And they can be layered on top of each other.
Different to the Object modifiers you can't reorder this modifiers. You have to create it in the order that you need it.
Add Modifier
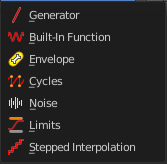
The list of modifiers. Choose by clicking.
| Entry | What it does |
|---|---|
| Copy F-Curve Modifiers | Copy the F-Curve Modifiers of the active F-Curve. |
| Paste F-Curve Modifiers | Paste copied F-Curve modifiers to the active F-Curve. |
Adjust Last Operation - Add F-Curve Modifier
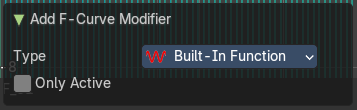
| Entry | What it does |
|---|---|
| Type | A drop down list with the Type of modifier to add. |
| Only Active | Only add a modifier to the currently active curve. |
Modifier header

Every modifier is a panel. And every panel has a header area with some general UI elements.
| Entry | What it does |
|---|---|
| Triangle button | Every modifier panel can be expanded or collapsed by clicking at this triangle button. |
| Active | This is the panel that you currently edit. When you edit a panel while it is not set to the active one, then the changes will not be applied. |
| Modifier name | The name of the modifier. Read only. |
| Muted | Enable or disable this modifier. |
| Delete F-Curve Modifier | Delete this modifier. |
Generator modifier
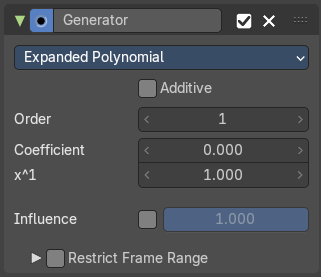
Polynomial Mode
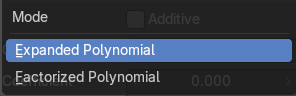
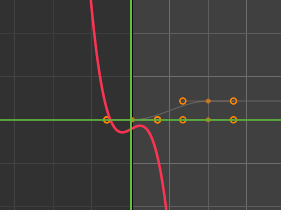
Use Expanded Polynominal or Factorized Polynominal algorithm. With these mathematical formulas you can create lines, parabolas, and other more complex curves by changing the values in the poly order field.
| Entry | What it does |
|---|---|
| Additive | Add on top of the existing curve instead of replacing the existing curve. |
| Order | The hightes value of X for this polynominal. |
| Coefficient | Coefficient for X. |
| x^1 | Coefficient for X. |
| Use Influence | Temper the F-Curve Modifier effect by a default influence factor. Expanding the Use Influence sets it to active. It reveals a value slider then. · Influence: The influence factor. |
Restrict Frame Range
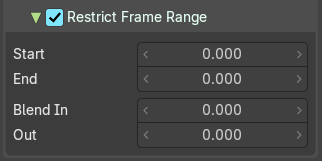
Expanding the Restrict Frame range sets it to active. It reveals some value slider then.
| Entry | What it does |
|---|---|
| Start / End | The start and end frame of the generated curve. |
| Blend In / Out | Fade the curve in or out for chosen frame numbers. |
Built- in Function modifier
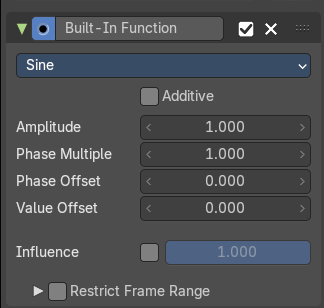
Generate a curve by built in functions.
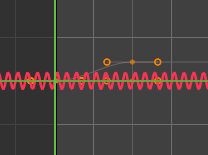
Curve Type
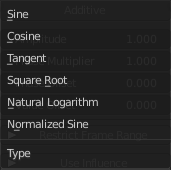
The available wave forms for the curve.
| Entry | What it does |
|---|---|
| Additive | Add on top of the existing curve instead of replacing the existing curve. |
| Amplitude | The amplitude of the curve wave. Adjusts the Y scaling. |
| Phase Multiplier | A phase multiplier for the curve wave. Adjusts the X scaling. |
| Phase Offset | A phase offset for the curve wave. Adjusts the Y scaling. |
| Value Offset | A constant value offset for the whole curve. Adjusts the X scaling. |
| Use Influence | Temper the F-Curve Modifier effect by a default influence factor. Expanding the Use Influence sets it to active. It reveals a value slider then. · Influence: The influence factor. |
Restrict Frame Range
Expanding the Restrict Frame range sets it to active. It reveals some value slider then.
| Entry | What it does |
|---|---|
| Start / End | The start and end frame of the generated curve. |
| In / Out | Fade the curve in or out for chosen frame numbers. |
Envelope modifier
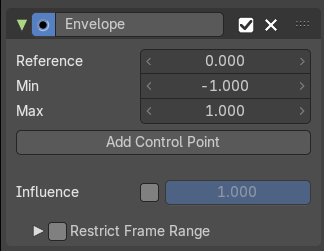
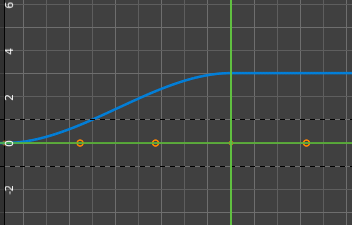
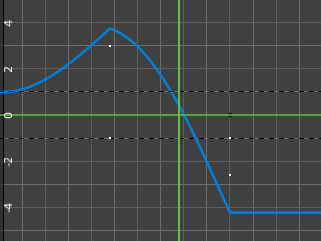
The Envelope modifier allows you to modify the overall shape of the curve by control points.
| Entry | What it does |
|---|---|
| Envelope | Reference Value: Set the Y value to center the envelope around. · Min: The lower distance from reference value for 1:1 default influence. · Max: The higher distance from reference value for 1:1 default influence. |
| Add Control Point | Add a control point. A control point has two sub points, a lower control point and a higher control point. |
Use Influence

Temper the F-Curve Modifier effect by a default influence factor.
Expanding the Use Influence sets it to active. It reveals a value slider then.
Influence
The influence factor.
Restrict Frame Range
Expanding the Restrict Frame range sets it to active. It reveals some value slider then.
| Entry | What it does |
|---|---|
| Start / End | The start and end frame of the generated curve. |
| In / Out | Fade the curve in or out for chosen frame numbers. |
Cycles modifier
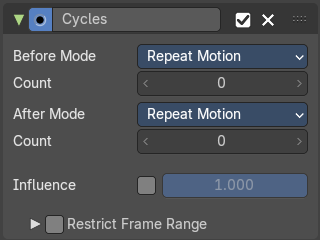
Add a cyclic motion to a curve that has two or more control points. The option can be set before or after the curve.
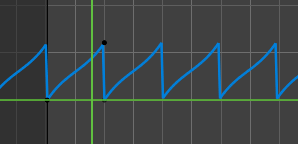
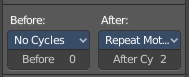
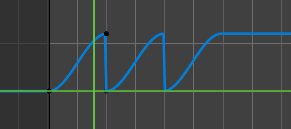
Trivially Cyclic Curves
When the Cycle Mode for both ends is set to either Repeat Motion or Repeat with Offset, and no other options of the modifier are changed from their defaults, it defines a simple infinite cycle.
This special case receives some additional support from other areas of Blender:
Automatic Bezier handle placement is aware of the cycle and adjusts to achieve a smooth transition.
The Cycle-Aware Keying option can be enabled to take the cycle into account when inserting new keyframes.
Before Mode
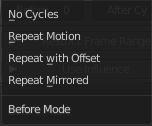
Set the cycle mode before the first keyframe.
Count
Maximum number of cycles to allow before first keyframes. A value of 0 means infinite.
After Mode
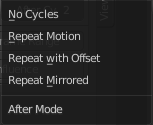
Set the cycle mode after the first keyframe.
Count
Maximum number of cycles to allow after last keyframes. A value of 0 means infinite.
Use Influence
Temper the F-Curve Modifier effect by a default influence factor.
Expanding the Use Influence sets it to active. It reveals a value slider then.
Influence
The influence factor.
Restrict Frame Range
Expanding the Restrict Frame range sets it to active. It reveals some value slider then.
| Entry | What it does |
|---|---|
| Start / End | The start and end frame of the generated curve. |
| In / Out | Fade the curve in or out for chosen frame numbers. |
Noise modifier
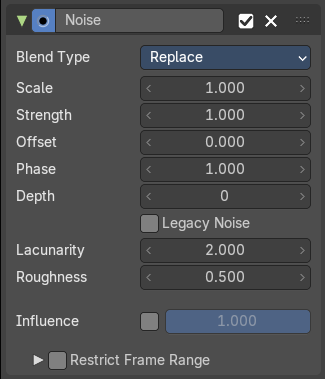
Adds noise to the curve.
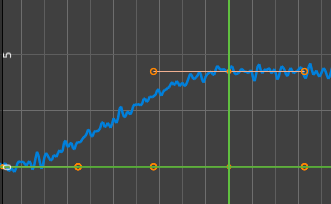
Blend Type
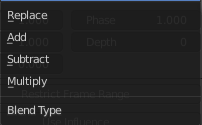
How to blend the noise with the curve.
| Entry | What it does |
|---|---|
| Scale | The overall size of the noise. The bigger the value the less frequent the noise. |
| Strength | Adjust the Y value of the noise. |
| Offset | Time offset of the noise. |
| Phase | The random seed for the noise. |
| Depth | How detailed the noise function is. |
| Legacy Noise | Use the legacy way of generating noise. |
| Lacunarity | Gap between successive frequencies. A value of 0 disables the feature. |
| Roughness | Amount of high frequency details. |
| Use Influence | Temper the F-Curve Modifier effect by a default influence factor. Expanding the Use Influence sets it to active. It reveals a value slider then. · Influence: The influence factor. |
Restrict Frame Range
Expanding the Restrict Frame range sets it to active. It reveals some value slider then.
| Entry | What it does |
|---|---|
| Start / End | The start and end frame of the generated curve. |
| In / Out | Fade the curve in or out for chosen frame numbers. |
Limits modifier
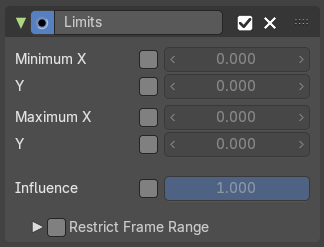
Sets limits to the curve in specified x and y range values.
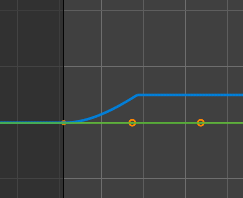
| Entry | What it does |
|---|---|
| Minimum / Maximum X | Cuts the curve at these minimum and maximum frame values. |
| Minimum / Maximum Y | Clamps the curve at these minimum and maximum values. |
| Use Influence | Temper the F-Curve Modifier effect by a default influence factor. Expanding the Use Influence sets it to active. It reveals a value slider then. · Influence: The influence factor. |
Restrict Frame Range
Expanding the Restrict Frame range sets it to active. It reveals some value slider then.
| Entry | What it does |
|---|---|
| Start / End | The start and end frame of the generated curve. |
| In / Out | Fade the curve in or out for chosen frame numbers. |
Stepped Interpolation modifier
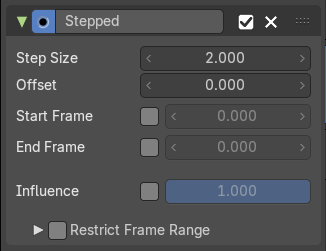
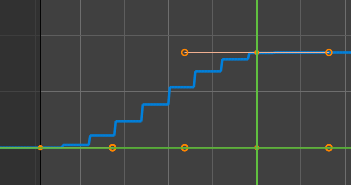
Adds steps to the curve by rounding the values.
| Entry | What it does |
|---|---|
| Step Size | The number of frames to hold each frame |
| Offset | A number of offset frames before frames get held. |
| Start Frame | Restrict the modifier so that it just acts before its end frame. |
| End Frame | Restrict the modifier so that it just acts after its start frame. |
| Use Influence | Temper the F-Curve Modifier effect by a default influence factor. Expanding the Use Influence sets it to active. It reveals a value slider then. · Influence: The influence factor. |
Restrict Frame Range
Expanding the Restrict Frame range sets it to active. It reveals some value slider then.
| Entry | What it does |
|---|---|
| Start / End | The start and end frame of the generated curve. |
| In / Out | Fade the curve in or out for chosen frame numbers. |
View Tab
Show Cursor panel
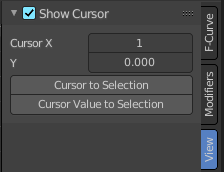
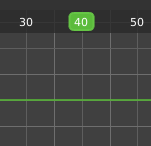
The green playhead at the top is the time cursor. The horizontal green line is called the cursor. Or ground line cursor. Together they are the 2d cursor.
| Entry | What it does |
|---|---|
| Show Cursor checkbox | Hides the green ground line cursor. |
| Cursor X | The frame position of the playhead cursor. |
| Cursor Y | The Y position of the ground line cursor. |
Cursor to Selection
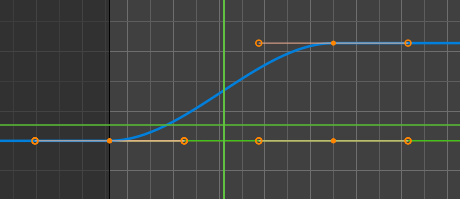
Sets both cursors to the center of the selection. This button also works when the ground line cursor is deactivated. In this case just the playhead cursor gets set to the center of the selection.
Cursor Value to Selection
Place the cursor value on the average value of selected keyframes.