








































Header
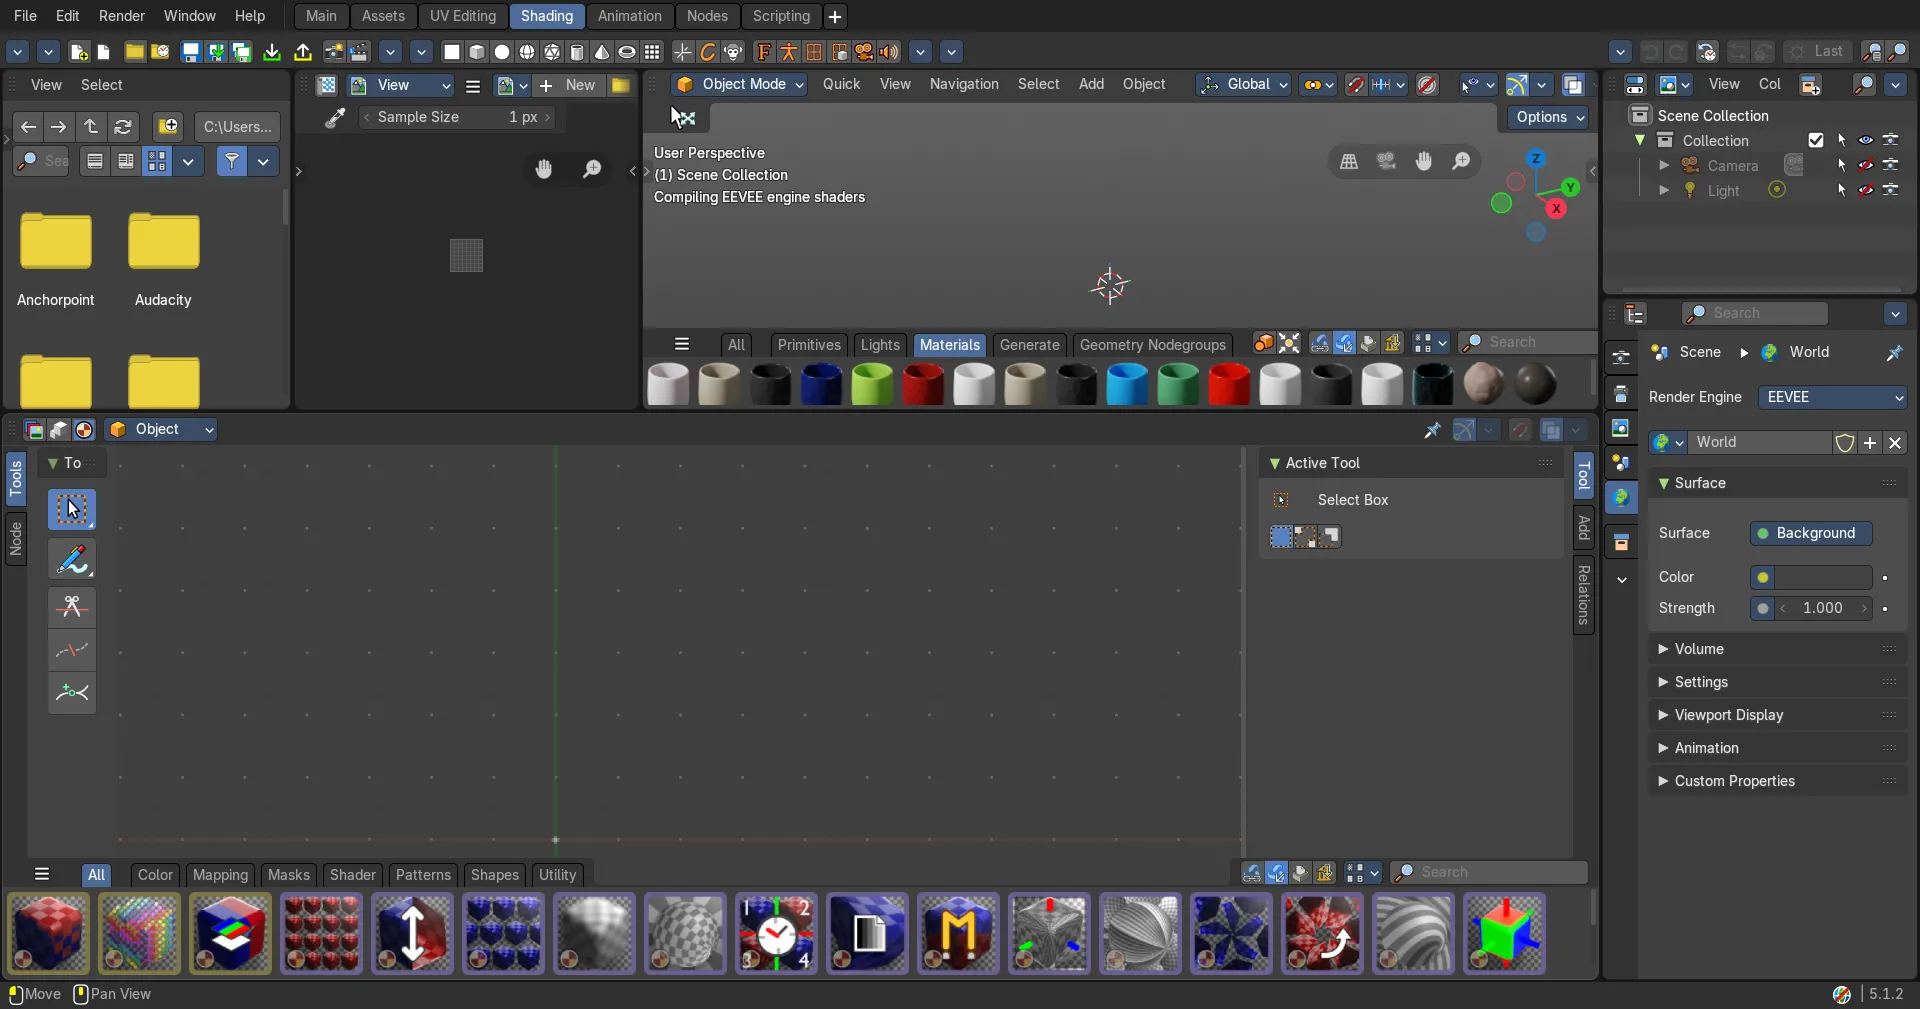
The header contains various menus and tools.
The pages of this part are listed in the sidebar under Header.
Header Tools and Options
Introduction
The header contains various menus and tools. This chapter here is about the tools, modes and options elements in the header.
The text menus are covered in a own chapter each. They vary too much, dependent of mode and object type.

Header Tabs

The tabs at the very left allows you to switch between the four most important editor types by one click. Dope sheet Editor, Graph Editor, Driver Editor, NLA Editor.
Use Normalization, Create Ghost Curves
| Entry | What it does |
|---|---|
| Use Normalization | Normalizes the curves so that the maximum does not exceed 1 and the minimum does not go lower than -1 |
| Create Ghost Curves | Creates a snapshot of the current curves, and displays it as a background image in the viewport. This background image is not permanent, and will be deleted when you close Bforartists. When a ghost background image is created then the button turns into a delete button with which you can remove the ghost image. |
Snapping
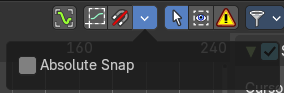
Snapping in animation editors helps align the playhead and keyframes to meaningful time-based elements, improving precision and workflow efficiency across the Timeline, Dope Sheet, Graph Editor, NLA, and Video Sequencer.
Note: This sub-subpanel is not available for Grease Pencil Dopesheet Mode
Absolute Time Snap
When enabled, snapping uses absolute time rather than relative pixel proximity. Ensures consistent snapping behavior regardless of zoom level or cursor position.
Show Hide elements

| Entry | What it does |
|---|---|
| Only Show Selected | Display only the data for the selected object in the list of elements. If off it displays all available animation data of the whole scene. |
| Show Hidden | Include channels from objects / bones that are not visible. This feature just works with Only Selected off. |
| Only Show Errors | Only display F-Curves and Drivers that have errors or are disabled. |
Filters
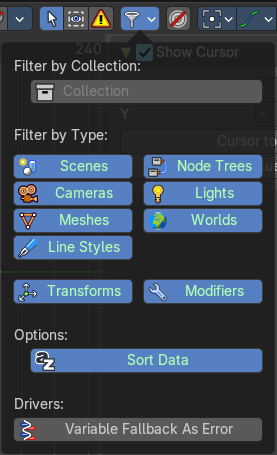
The show hide elements allows you to filter out the general elements. The Filters panel allows you to filter out further elements.
| Entry | What it does |
|---|---|
| Filter by Collection | Just display the content from the chosen collection in the list of elements. |
| Filter by Type | In this section you can choose what type of animation data should be displayed. The names should be self explaining. |
| Options | Sort Data Blocks: Alphabetically sort the data in the list of elements. |
| Drivers | Variable Fallback as Error: Include drivers thar relied on any fallback values for their evaluation in the Only Show Errors Filter. Even if the driver evaluation succeded. |
Proportional Editing
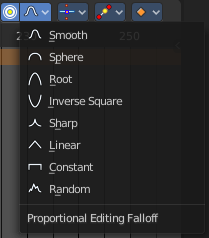
Enable proportional editing.
Proportional editing allows you for example to scale two keyframes and influence the not selected neighbor keyframes in a proportional way. Or the proportional editing of fcurve points.
The drop down menu to choose the proportional editing falloff method is just available when the proportional tool is active.
Pivot Point
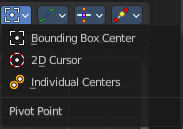
The pivot point defines the center of manipulations.
| Entry | What it does |
|---|---|
| Bounding Box Center | Transformation happens around the bounding box center. |
| 2D Cursor | Transformation happens around the timeline cursor. |
| Individual Centers | Transformation happens around the individual centers of the selected elements. |
Easing Mode
Easing Mode
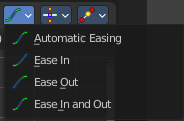
The easing methods in the interpolation mode menu are for the easing shape. This menu allows you to choose an easing method.
Adjust Last Operation - Set Keyframe Easing Type
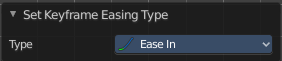
Type
Set the easing type.
Keyframe Handle Type
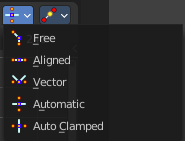
Set the handle type for the currently selected keyframes.
This is a feature for the Graph editor, where each curve point has its own handler with which you can influence the curve behavior. But the handler type also influences how the animation curve acts at the chosen keyframes. So it has its use in the dope sheet editor too.
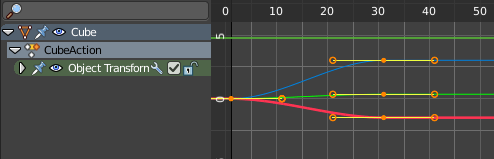
Adjust Last Operation - Set Keyframe Handle Type
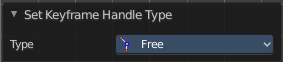
Type
Set the handle type for the currently selected curve point.
Keyframe Interpolation
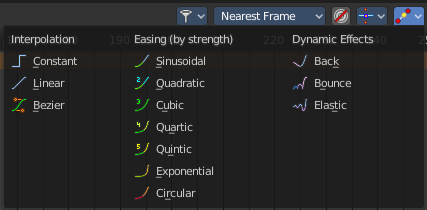
The keyframe interpolation mode defines how the curve acts from keyframe to keyframe. You can have a linear curve between two keyframes instead of a bent one for example.
The easing methods here in the interpolation mode menu are for the easing shape. There is also an easing menu where you can choose a easing method.
Adjust Last Operation - Set Keyframe Interpolation
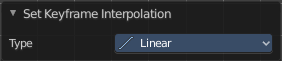
Type
Set the interpolation mode.
Options
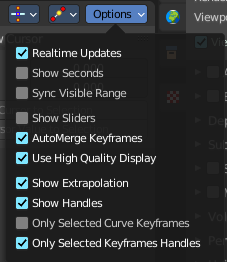
Real-time Updates
When transforming keyframes then this transformation is also immediately visible in other editors.
Show Seconds
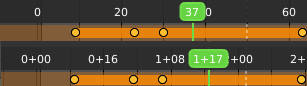
Show the timing in the timeline area in seconds instead of frames.
Sync visible range
Synchronize the visible timeline range with other visible time based editors. When you zoom in or out in the one editor, then it zooms in or out in the other editor too. Each editor to sync needs to have Sync Visible Range ticked.
Show Sliders
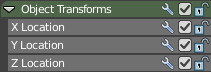
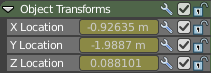
Shows the value sliders for f-curve channels in the channel list.
| Entry | What it does |
|---|---|
| AutoMerge Keyframes | Automatically merge nearby keyframes. |
| Use High Quality Display | Display the curves in highest quality. |
| Show Extrapolation | Shows the curves after the last keyframe. |
| Show Handles | Show the handles at the keyframes. |
| Only selected Curve Keyframes | Just show the keyframes from the selected curves. |
| Only Selected Keyframes Handles | Just show the handles of the keyframes from the selected curves. |
Quick Menu
Quick Menu
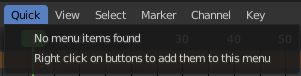
The quick menu, or in long Quick Favorites menu, is a menu that can be customized to your needs. Here you can add operators for quick access.
It is located in the header. But it can be called by hotkey Q directly under the mouse. This hotkey works in other editors too.
When the menu is empty, then you will see the message "No Menu Items found". This means that you first have to add some tools to the menu. It is a user configurable menu.
Note that added operators in this menu does not have icons. Just text.
Note that Graph Editor and Drivers Editor shares the same quick menu.
Adding an operator to the Quick menu
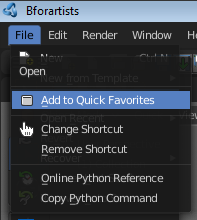
Open the panel or the menu where your operator is that you want to add.
Let's add the open command from the File menu. Open the File menu, right click at open, and choose Add to Quick Favorites.
Do the same with Save As. We should now have two new menu items in the Quick menu, which you can use now.
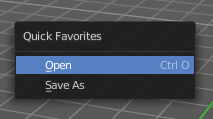
As a rule of thumb, when the right click menu has an Add to Quick Favorites, then you can add it to the quick menu.
Note that you can also add operators from the tool shelf at the left. And also operators from other editor types. Some other editors have their own quick menu though. The Image Editor for example. These operators gets added in the quick menu of the image editor then. And does not show in the quick menu in the header of the 3D view.
Adding a menu to the Quick menu
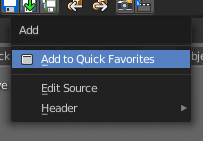
It is also possible to add a menu to the Quick menu. For example the whole Add menu. The way is the same. Right click at it, and choose Add to Quick Favorites.
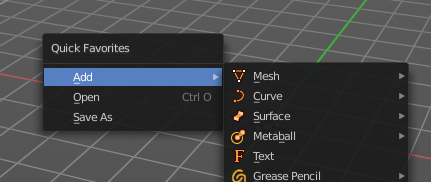
Order
You might notice that the add menu adds at the top of the menu, and not at the bottom as you would expect. First comes menus, then comes operators. And they get added in the order in which you add them.
Besides that, operators and menus gets added in the order that you add them. They cannot be sorted afterwards. So be careful how you add them. You can of course always remove operators and menus, and re-add them at the end of the list.
Removing an operator from the Quick menu
The Quick Favorites menu (Q) holds the tools and menus you add to it yourself. See Quick Favorites in the Interface chapter.
Context and mode dependent content
The quick favorites. menu exists in nearly all editors. But it is just in the 3D view available in the header. So that you know this functionality exists. In the other editors you call it with hotkey Q.
The content of the quick favorites. menu changes, dependent over which editor you are, and in what mode you are. When you add for example an operator from the image editor, then this operator just shows in the quick menu when you call the menu from the image editor. Same goes for the modes. Edit mode tools will just show in edit mode. And so on.
View Menu
Drivers Editor - View Menu
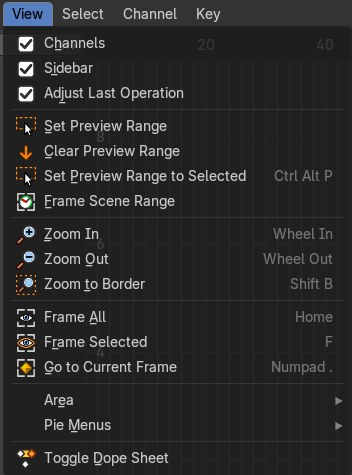
The View menu contains all View related tools.
The content is for all modes the same.
Channels List
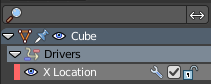
Shows or hides the Channels list at the left in the viewport.
Sidebar
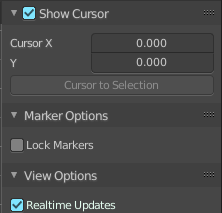
Shows or hides the sidebar at the right in the viewport.
Adjust last Operator
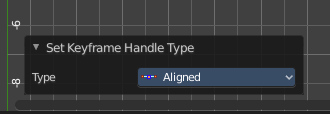
Show the Adjust Last Operation panel down left when you perform a tool.
Set Preview Range
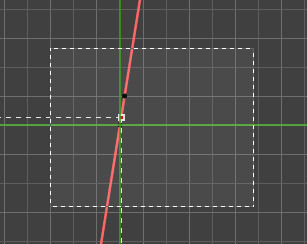
Rectangle select an area of the timeline that gets previewed. The playback now just happens in this marked area.
Note that you can set the range in the Drivers editor, but the preview range is currently not visible in the Drivers editor. You need to check it in the Dope Sheet editor for example.
| Entry | What it does |
|---|---|
| Clear Preview Range | Clears an existing preview range. |
| Set Preview Range to selected | Sets the preview range to fit the first and last selected keyframe. |
| Frame Scene Range | With Use Preview Range off , reset the horizontal view to the current scene frame range. |
| Frame Preview Range | With Use Preview Range on , reset the horizontal view to the current preview frame range. |
| Zoom In | Zooms into the viewport. |
| Zoom Out | Zooms out of the viewport. |
| Zoom Border | Draws a rectangle and zooms then to fit the size of this rectangle. Zooming in is done with drawing the rectangle with left mouse button. Zooming out is done with drawing the rectangle with middle mouse button. |
| Frame All | Zooms in or out in the viewport until all objects in the scene are displayed fitting in the viewport. |
| Frame Selected | Centers the view at the currently selected keyframe(s). |
| Go to current Frame | Centers the view at the frame slider. |
Area submenu
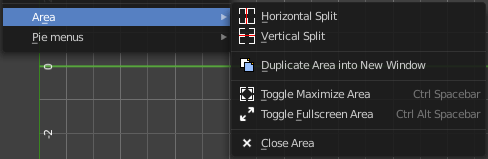
This menu contains general view functionality. And exists in most other editor types too.
| Entry | What it does |
|---|---|
| Horizontal Split | Splits the current view horizontally into two independent editor windows. |
| Vertical Split | Splits the current view vertically into two independent editor windows. |
Duplicate Area into New Window
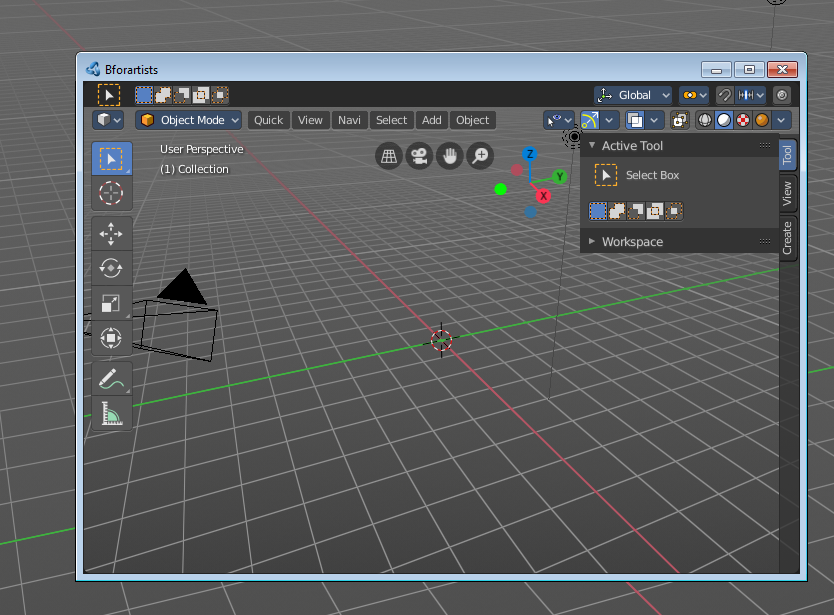
Duplicate Area into New Window opens this editor in a floating window. See Floating editor windows in the Interface chapter.
| Entry | What it does |
|---|---|
| Toggle Maximize Area | Displays the editor maximized with menus. To return from the maximized view press hotkey Ctrl + Space. Or reuse the menu item in the area menu. |
| Toggle Full screen Area | Displays the editor maximized without menus. To return from the full screen view press hotkey Ctrl + Alt + Space. |
| Close Area | Closes the editor. |
Pie Menus

The available pie menus for this editor.
Toggle Dope Sheet
Switch to the Dope Sheet Editor.

Note that this is a Blender relict. In Bforartists we already have a convenient top level UI menu entry to switch between the editors. We haven't removed this Blender entry for two reasons. It can be hotkeyed. And the entry shows that this Blender functionality exists.
Select Menu
Drivers Editor - Select Menu
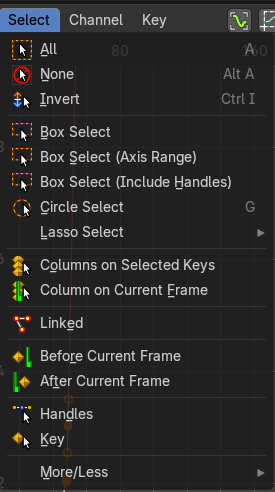
The Select menu contains various tools to select elements.
The content is the same in all modes. With one exception. Grease Pencil mode is missing the More / Less menu items.
| Entry | What it does |
|---|---|
| All | Select everything. |
| None | Select nothing. |
| Inverse | Invert the current selection. |
| Box Select | Box select enters the Border Select mode. Select elements by dragging a rectangle around it. Just what's inside of the rectangle gets selected then. It adds to selection by default. To subtract from selection hold down Shift key. The selection gets applied when you release the mouse. You leave the mode automatically when you release the mouse. |
| Box Select(Axis Range) | Box select enters the Border Select mode. Select elements by dragging a rectangle around it. And what's inside the horizontal range of the rectangle gets selected then. Even when the keyframes are outside of the rectangle. It adds to selection by default. To subtract from selection hold down Shift key. The selection gets applied when you release the mouse. You leave the mode automatically when you release the mouse. |
| Box Select(Include Handles) | Box select enters the Border Select mode. Select elements by dragging a rectangle around it. And what's inside the horizontal range of the rectangle gets selected then. Even when the keyframes are outside of the rectangle. And it selects all involved handlers too. |
| Circle Select | Circle select enters the Circle Select mode. This is a special select mode where you can select elements by moving with the mouse over it. It adds to selection by default. To subtract from selection hold down Shift key. To exit the Circle select click with the right mouse button. The pencil radius of the circle select tool can be adjusted with the scroll wheel. |
Lasso Select

A sub menu with the available lasso select modes.
| Entry | What it does |
|---|---|
| Columns on Selected Keys | Select the keyframes in the columns of the currently selected keyframe. |
| Columns on Current Frame | Select the keyframes in the columns of the current frame. |
| Linked | Select all UV vertices linked to the active UV map. The previous selection gets cleared. |
| Before current Frame | Select the keyframes before the current frame. |
After current Frame
Select the keyframes after the current frame.
Adjust Last Operation - Select Left/Right
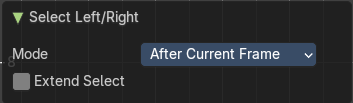
Mode
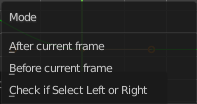
The selection mode to use.
Extend Select
Extend the current selection.
Handles
For selected keyframes, also select the handles.
Key
For selected keyframes, only select the keyframe, and deselect the handles.
Adjust Last Operation - Select Key / Handles
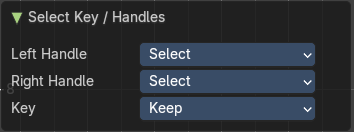
| Entry | What it does |
|---|---|
| Left Handle | What to do with the left handle. |
| Right Handle | What to do with the right handle. |
| Keep | What to do with the keyframe. |
More / Less submenu
| Entry | What it does |
|---|---|
| More | Grow the selection. |
| Less | Shrink the selection. |
Channel Menu
Drivers Editor - Channel Menu
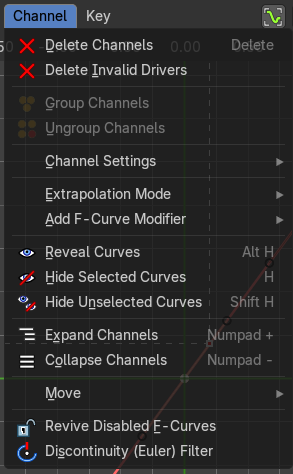
This menu contains functionality to manage the channels in the channels list at the left.
The menu doesn't exist in all modes. It exists in Dopesheet, Action Editor and Grease Pencil mode. And has different content.
| Entry | What it does |
|---|---|
| Delete Channels | Deletes the selected channels and all its keyframes. |
| Delete Invalid Drivers | Deletes invalid drivers. |
Group Channels
Creates a custom group from the selected channels.
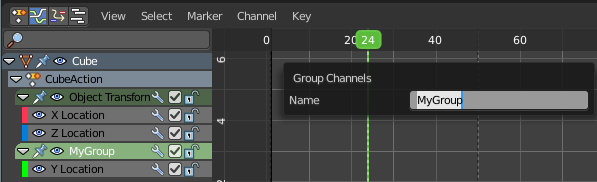
Ungroup Channels
Removes the selected channels from the group, and adds them back to the original hierarchy.
Channel Settings submenu
Adjust the locks and check boxes in the channels list from outside of the channels list for all selected elements at once. With Toggle Mute you could for example disable all selected channels at once.
The menu items should be self explaining.
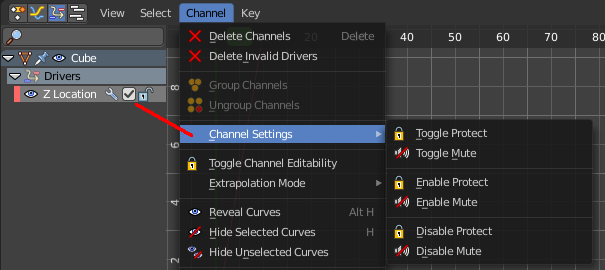
Adjust Last Operation - Toggle Channel Settings
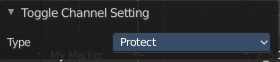
Type
The type to toggle.
Extrapolation Mode
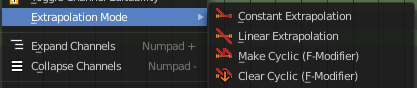
Sets the extrapolation mode for the selected F-Curves. Means how the curve acts at the beginning and the end of the F-Curve.
| Entry | What it does |
|---|---|
| Constant Extrapolation | The animation curve continues straight at the end. |
| Linear Extrapolation | The animation curve continues the last direction. |
| Make Cyclic | Makes the animation loopable. The interpolation curves are adjusted so that the first frame fits to the last frame. |
| Clear Cyclic | Removes the cyclic extrapolation. |
Adjust Last Operation - Set F-Curve Extrapolation
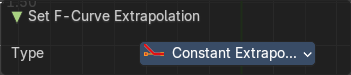
Type
Set the extrapolation mode for the selected F-Curves.
Add F-Curve Modifer submenu
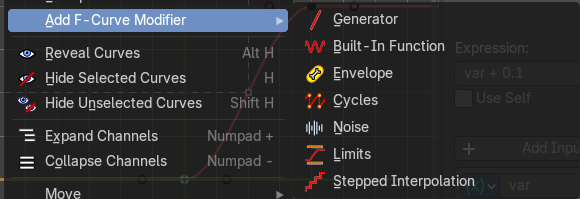
Add an F-Curve Modifier. The modifiers can be found in the Sidebar in the Modifiers tab then.
Reveal Curves
Reveals all hidden curves.
Adjust Last Operation - Reveal Curves
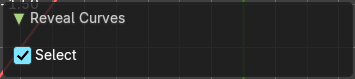
Select
Select all revealed curves.
Hide selected Curves
Hides the selected curves.
Hide unselected curves
Hides the unselected curves.
Adjust Last Operation - Hide Curves
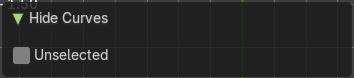
Unselected
Hide the unselected or selected curves.
Expand Channels
Expands all channels in the channel list.
Adjust Last Operation - Expand Channels
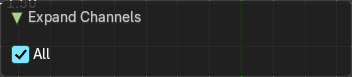
All
Expand all Channels, or just the selected channels.
Collapse Channels
Collapses all channels in the channels list.
Adjust Last Operation - Collapse Channels
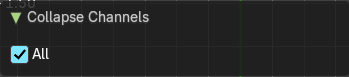
All
Collapse all Channels, or just the selected channels.
Move submenu
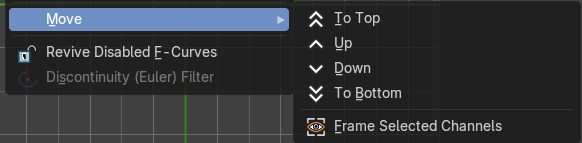
Sort the items in the channels list.
Frame Selected Channels
Zooms in or out to fit the selected channels into the view.
Adjust Last Operation - Move Channels
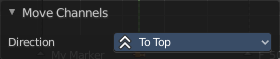
Direction
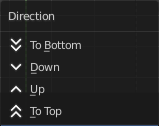
Sort the items in the channels list.
| Entry | What it does |
|---|---|
| Revive Disabled F-Curves | Clears the disabled tag from all f-curves to get broken F-Curves working again. |
| Discontinuity (Euler) Filter | Fix large jumps and flips in the selected Euler Rotation F-Curves. These can arise from rotation values being clipped when baking physics. |
Key Menu
Drivers Editor - Key Menu
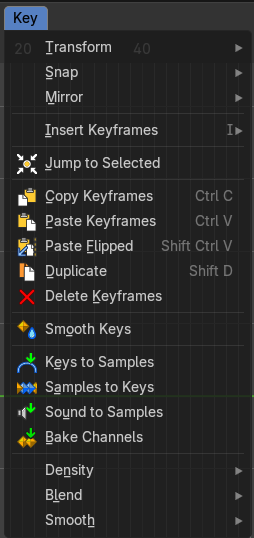
This menu contains functionality to manage the keyframes.
Transform
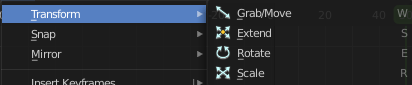
Grab/Move
Moves the selected keyframe(s).
Adjust Last Operation - Move
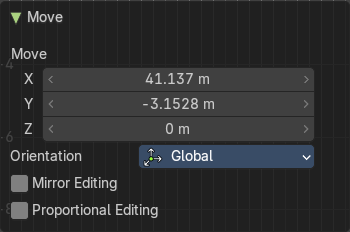
Move X, Y Z
The position. Attention, the actual world orientation and rotation does not matter here. It always starts with a value of zero, and moves relative to this zero then. For the actual location values have a look in the sidebar in the transform panel.
Orientation
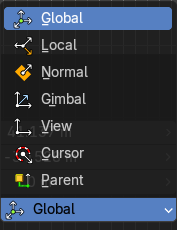
The widget can have different orientations. The menu items should be self explaining.
Mirror Editing
Enable Mirror Editing.
Proportional editing
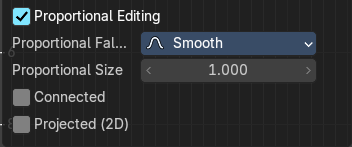
Enables proportional editing. Activating proportional editing reveals further settings.
| Entry | What it does |
|---|---|
| Proportional Falloff | Adjust the falloff methods. |
| Proportional Size | See and adjust the falloff radius. |
| Connected | The proportional falloff gets calculated for connected parts only. |
| Projected(2D) | The proportional falloff gets calculated in the screen space. Depth doesn't play a role. When it's in the radius, then it gets calculated. |
Extend
Moves the last keyframes of the selection.
Adjust Last Operation - Transform
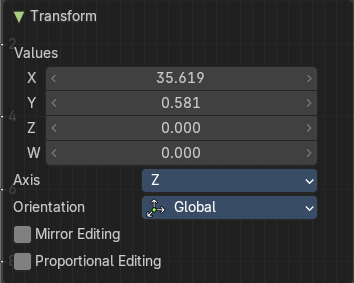
| Entry | What it does |
|---|---|
| Values X, Y Z, W | The new position. |
| Axis | Which axis to transform. |
Orientation
The widget can have different orientations. The menu items should be self explaining.
Mirror Editing
Enable Mirror Editing.
Proportional editing
Enables proportional editing. Activating proportional editing reveals further settings.
| Entry | What it does |
|---|---|
| Proportional Falloff | Adjust the falloff methods. |
| Proportional Size | See and adjust the falloff radius. |
| Connected | The proportional falloff gets calculated for connected parts only. |
| Projected(2D) | The proportional falloff gets calculated in the screen space. Depth doesn't play a role. When it's in the radius, then it gets calculated. |
Rotate
Rotates the selection.
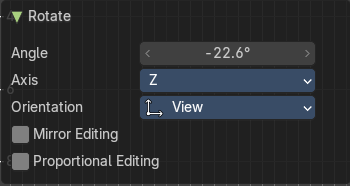
Adjust Last Operation - Rotate
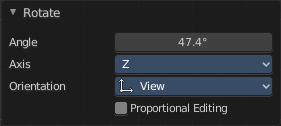
| Entry | What it does |
|---|---|
| Angle | The rotation. Attention, the actual world orientation and rotation does not matter here. It always starts with a value of zero, and rotates relative to this zero then. For the actual rotation values have a look in the sidebar in the transform panel. |
| Axis | Which axis to rotate. |
Orientation
The widget can have different orientations. The menu items should be self explaining.
Mirror Editing
Enable Mirror Editing.
Proportional editing
Enables proportional editing. Activating proportional editing reveals further settings.
| Entry | What it does |
|---|---|
| Proportional Falloff | Adjust the falloff methods. |
| Proportional Size | See and adjust the falloff radius. |
| Connected | The proportional falloff gets calculated for connected parts only. |
| Projected(2D) | The proportional falloff gets calculated in the screen space. Depth doesn't play a role. When it's in the radius, then it gets calculated. |
Scale
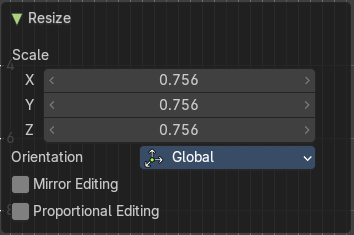
Scales the selected keyframes. You need to have more than one keyframe selected.
Adjust Last Operation - Resize
| Entry | What it does |
|---|---|
| Angle | The rotation. Attention, the actual world orientation and rotation does not matter here. It always starts with a value of zero, and rotates relative to this zero then. For the actual rotation values have a look in the sidebar in the transform panel. |
| Axis | Which axis to rotate. |
Orientation
The widget can have different orientations. The menu items should be self explaining.
Mirror Editing
Enable Mirror Editing.
Proportional editing
Enables proportional editing. Activating proportional editing reveals further settings.
| Entry | What it does |
|---|---|
| Proportional Falloff | Adjust the falloff methods. |
| Proportional Size | See and adjust the falloff radius. |
| Connected | The proportional falloff gets calculated for connected parts only. |
| Projected(2D) | The proportional falloff gets calculated in the screen space. Depth doesn't play a role. When it's in the radius, then it gets calculated. |
Snap
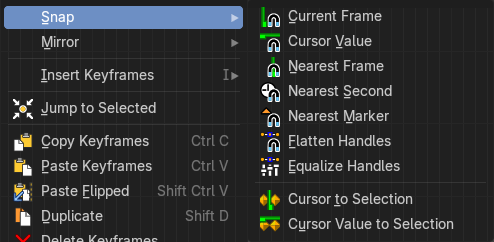
Snaps the selected keyframes by the chosen method.
Adjust Last Operation - Snap Keys
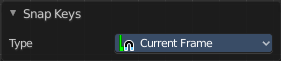
Type
Snaps the selected keyframes by the chosen method.
Mirror
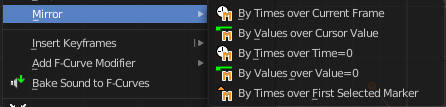
Flips the selected keyframes over the current frame position.
Adjust Last Operation - Mirror Keys
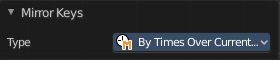
Type
Flips the selected keyframes over the current frame position by the chosen method.
Insert Keyframes
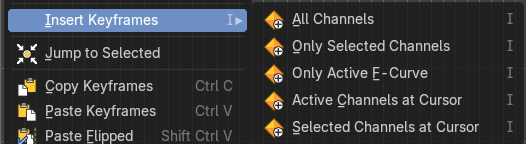
Choose a method how to insert a new keyframe at the current frame position.
Adjust Last Operation - Insert Keyframes
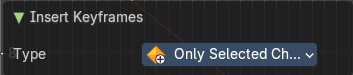
Type
Choose a method how to insert a new keyframe at the current frame position.
| Entry | What it does |
|---|---|
| Jump to Selected | Sets the frame marker at the average position of the currently selected keyframes. |
| Copy Keyframes | Copy selected keyframes. |
| Paste Keyframes | Pastes copied keyframes. |
Paste Flipped
Pastes copied keyframes, but flipped.
Adjust Last Operation - Paste Keyframes / Flipped
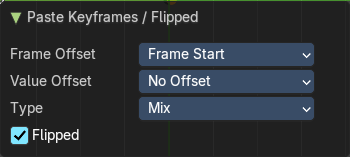
Offset
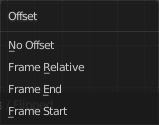
Define an offset for the paste position.
Type
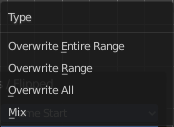
Choose a method how to paste the copied keyframes.
Flipped
Pastes keyframes from mirrored bones if they exists.
Duplicate
Duplicate selected keyframes.
Adjust Last Operation - Duplicate
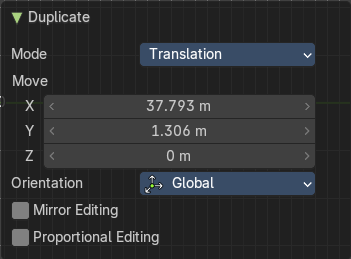
| Entry | What it does |
|---|---|
| Mode | — |
| Values X / Y | The x and y values for the pasted keyframes. Note that these values starts at the position of the original copied keyframe. These values are relative. Values Z and W have no effect here. |
| Axis | These values have no effect. |
Orientation
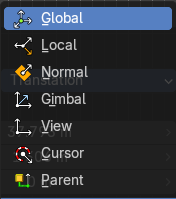
Transformation orientation. These values have no effect.
Mirror Editing
Enables Mirror Editing. These values have no effect.
Proportional editing
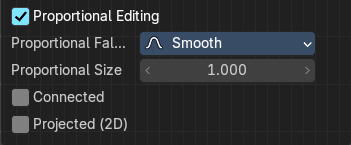
Enables proportional editing. Activating proportional editing reveals further settings.
| Entry | What it does |
|---|---|
| Proportional Falloff | Adjust the falloff methods. |
| Proportional Size | See and adjust the falloff radius. |
| Connected | The proportional falloff gets calculated for connected parts only. |
| Projected(2D) | The proportional falloff gets calculated in the screen space. Depth doesn't play a role. When it's in the radius, then it gets calculated. |
| Entry | What it does |
|---|---|
| Delete Keyframes | Deletes selected keyframes. |
| Smooth Keys | Smoothens the curve for the selected keys |
Keys to Samples
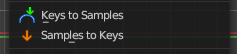
Bake selected F-Curves to a set of sampled points. This makes the curve not longer editable.
Sample to Keys
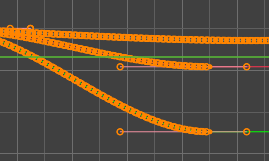
Un-bake a sampled point F-Curve to make it editable again.
Sound to Samples

Thisoperator takes a sound file and uses its sound wave to create the animation data. When running it, you will be prompted to load an audio file to apply to the selected channels.
Bake Channels

Creates keyframes following the current shape of F-Curves of selected channels for the entire channel within the frame range.
Density submenu
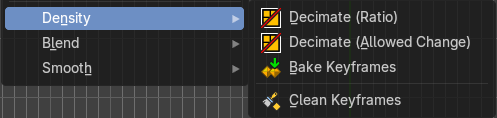
Decimate (Ratio)
Decimate F-Curves by removing keyframes that that has the least influence to the curve shape.
Decimate (Allowed Change)
Decimate F-Curves by specifying how much it can derivate from the original curve.
Adjust Last Operation - Decimate Keyframes
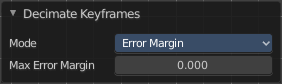
| Entry | What it does |
|---|---|
| Mode | The decimate mode. Error margin is Allowed change. |
| Remove or Max Error Margin | The percentage of keyframes to remove. |
| Entry | What it does |
|---|---|
| Bake Keyframes | Add keyframe on every frame between selected keyframes. |
| Clean Keyframes | Simplify FCurces by deleting keyframes that are close to each other in all channels. |
Blend submenu
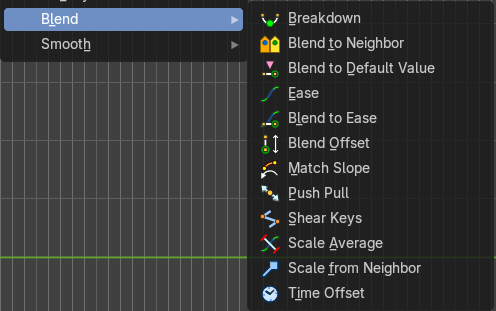
Blending methods.
Breakdown
Move selected keyframes to an inbetween position relative to adjacent keys.
Adjust Last operator Breakdown
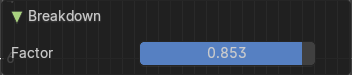
Factor
Favour either the left or the right key. The range goes from -1 to +1
Blend to Neighbor
Blend the keyframe to either the left or the right neighbor.
Adjust Last operator Blend to Neighbor
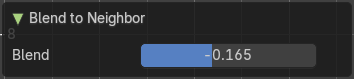
Blend
Blend factor.
Blend to Default Value
Blend selected keys to their default value from their current position.
Adjust Last operator Blend to Default Value
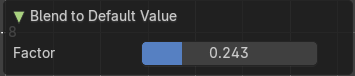
Factor
Blend factor.
Ease
Align keyframes on an ease in or ease out curve.
Adjust Last operator Ease Keyframes
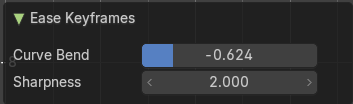
| Entry | What it does |
|---|---|
| Curve Blend | Blend factor. |
| Sharpness | Higher values makes the change more abrupt. |
Blend to Ease
Blends keyframes from current state to an ease in or ease out curve.
Adjust Last operator Blend to Ease Keyframes
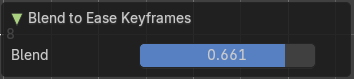
Blend
Blend factor.
Blend Offset
Shift selected keys to ther value of the neighboring keys as a block.
Adjust Last operator Blend Offset Keyframes
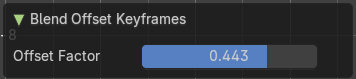
Offset Factor
The offset factor.
Match Slope
Blend selected keys to the slope of neighboring ones.
Adjust Last operator Match Slope
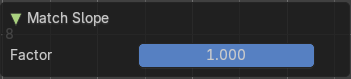
Factor
Blend factor.
Push Pull
Exaggerate or minimize the value of the selected keys.
Adjust Last operator Push Pull Keyframes
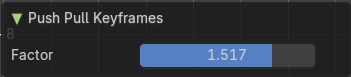
Factor
Blend factor.
Shear Keys
Shears the selected keys linearly. But keeps the same relationship between them. By either using the left or the right key as a reference.
Adjust Last operator Push Pull Keyframes
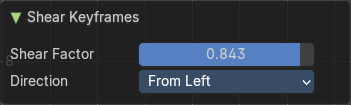
Shear Factor
The shear factor.
Direction
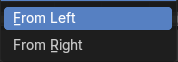
Which end of the segment to use as a reference to shear from.
Scale Average
Scale selected key values by their combined average.
Adjust Last operator Scale Average Keyframes
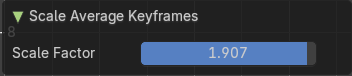
Scale Factor
Scale factor.
Scale from Neighbour
increase or decrease the value of selected keys in relationship to the neighbor keyrframe.
Adjust Last operator Scale from Neighbor
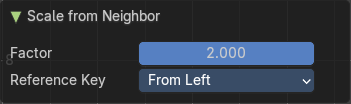
Factor
The blend factor.
Reference Key
Which key to use as the reference key.
Time Offset
Shifts the selected keyframes in time.
Adjust Last operator Frame Offset
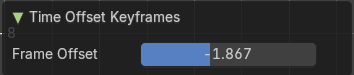
Frame Offset
The frame offset.
Smooth submenu

Make selected curves less bumpy.
Smooth Gaussian
Smoothens the curve with the method Gaussian.
Adjust Last operator Frame Offset
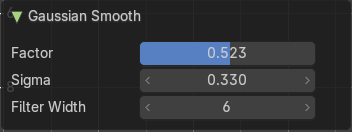
| Entry | What it does |
|---|---|
| Factor | Blend factor. |
| Sigma | The strength of the gaussian distribution. Higher value makes it smoother. |
| Filter Width | How much keyframes at the left or right are influenced. |
Smooth Legacy
Smoothens the curve with a simple method.
Butterworth Smooth
Smooth the f-curve while maintaining the general shape of the curve.
Adjust Last operator Butterworth Smooth
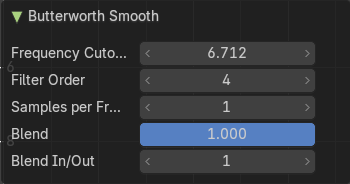
| Entry | What it does |
|---|---|
| Frequency Cutoff | The frequency cutoff in Hz. Lower values gives a smoother curve. |
| Filter Order | Higher values gives a harder frequency cutoff. |
| Samples per Frequency | How many samples to calculate per frame. |
| Blend | Blend factor. |
| Blend In/Out | How much keyframes at the left or right are influenced. |