




































Asset Browser
Browse, drag in and manage assets from your libraries.
Asset Browser
The Asset browser is an explorer dialog that allows you to store assets, and reuse them at a later point.
Assets can be everything. Objects, scenes, grease pencil strokes and so on.
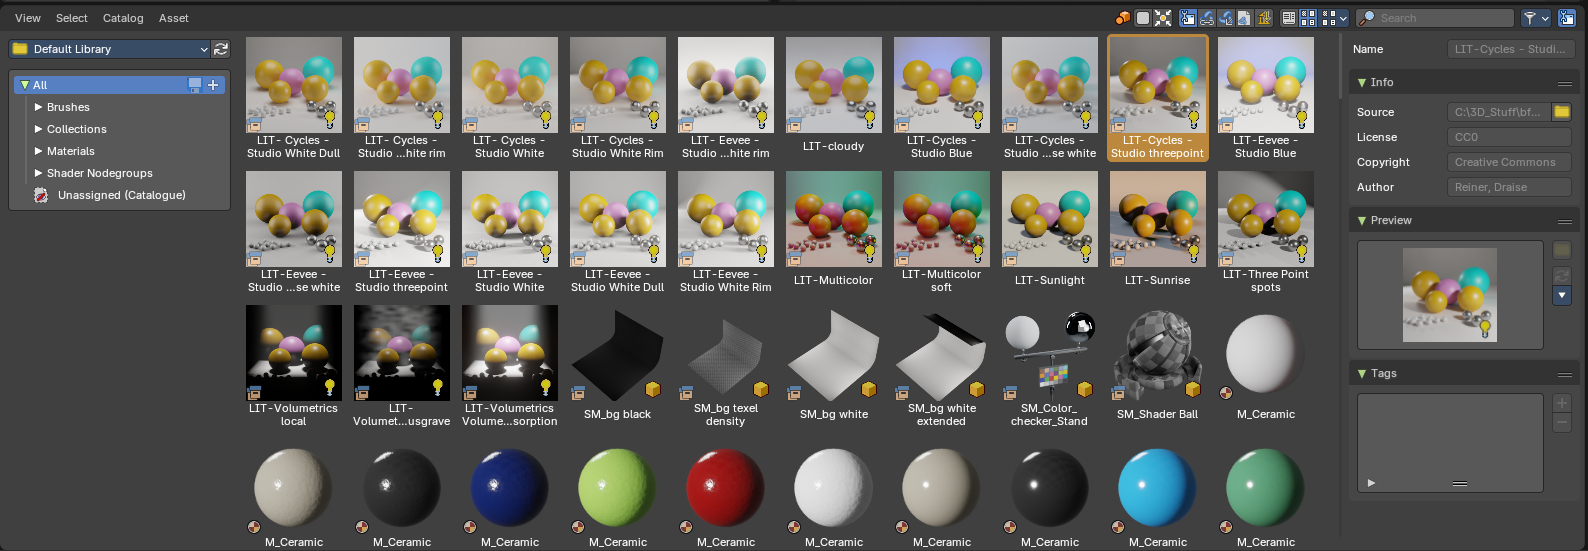
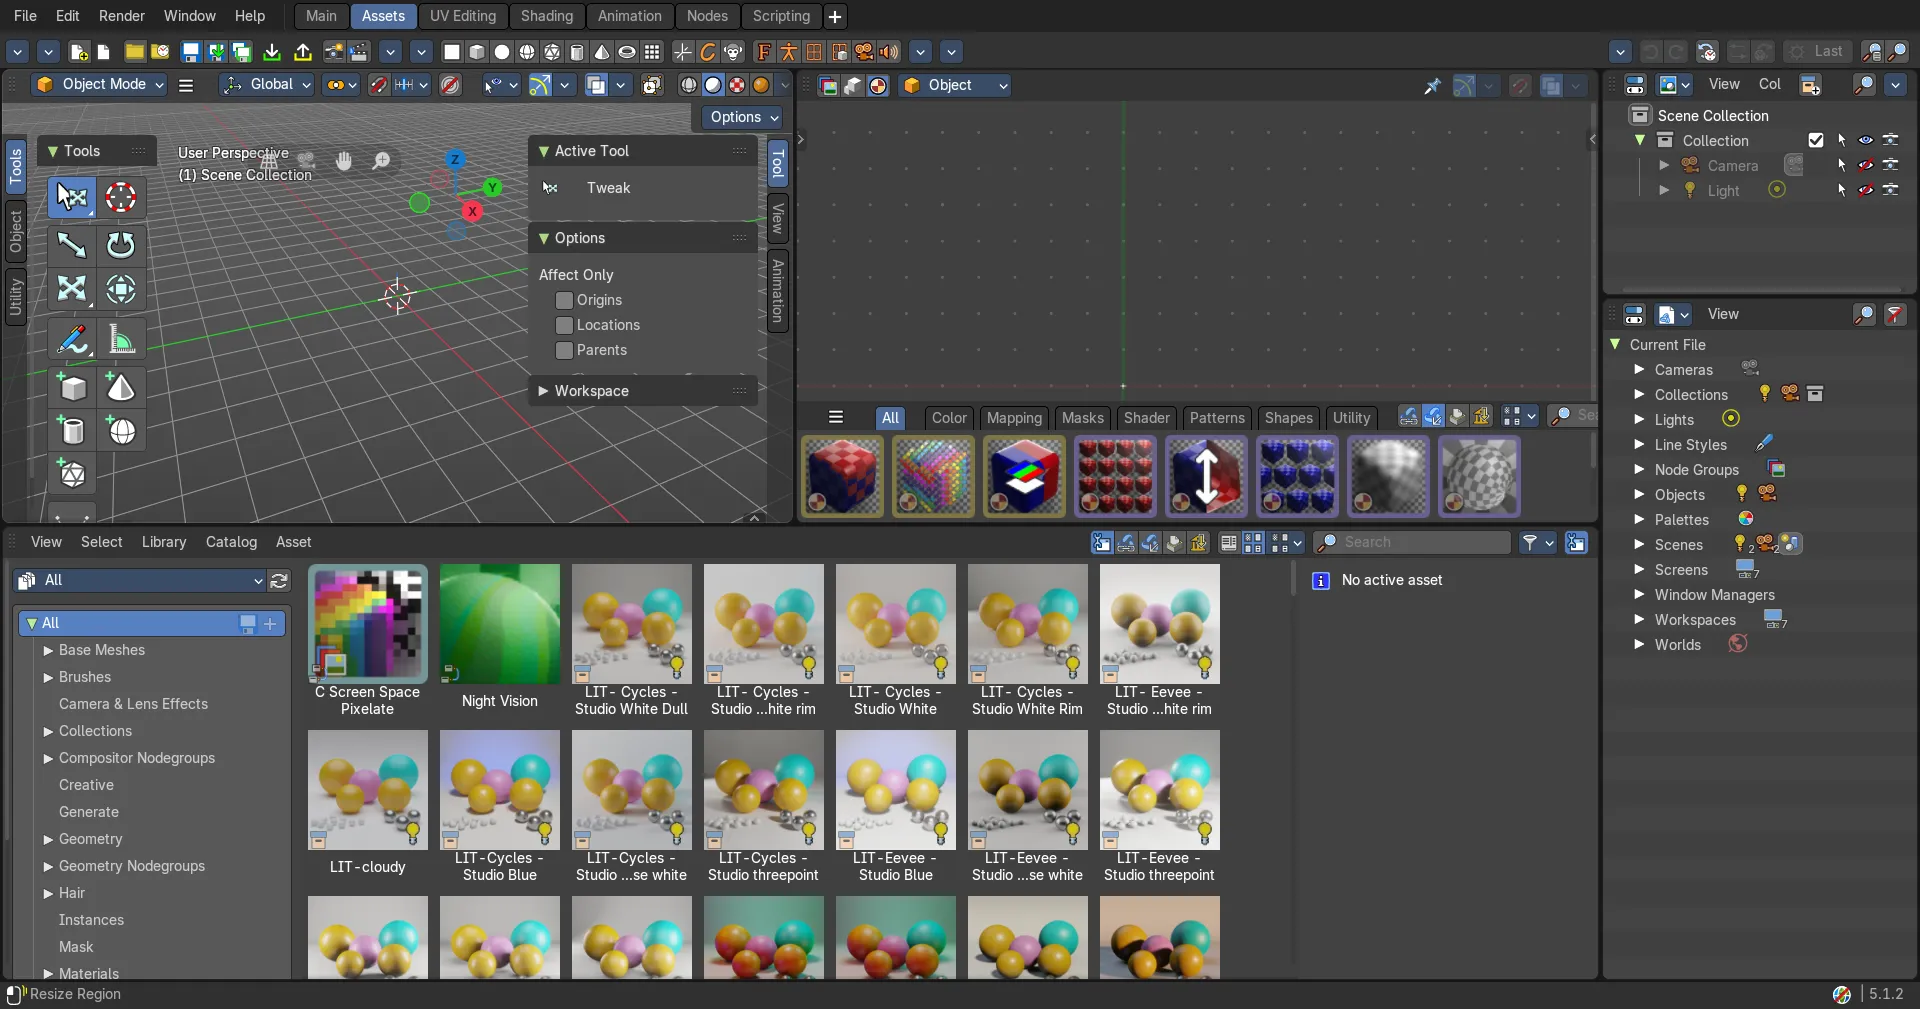
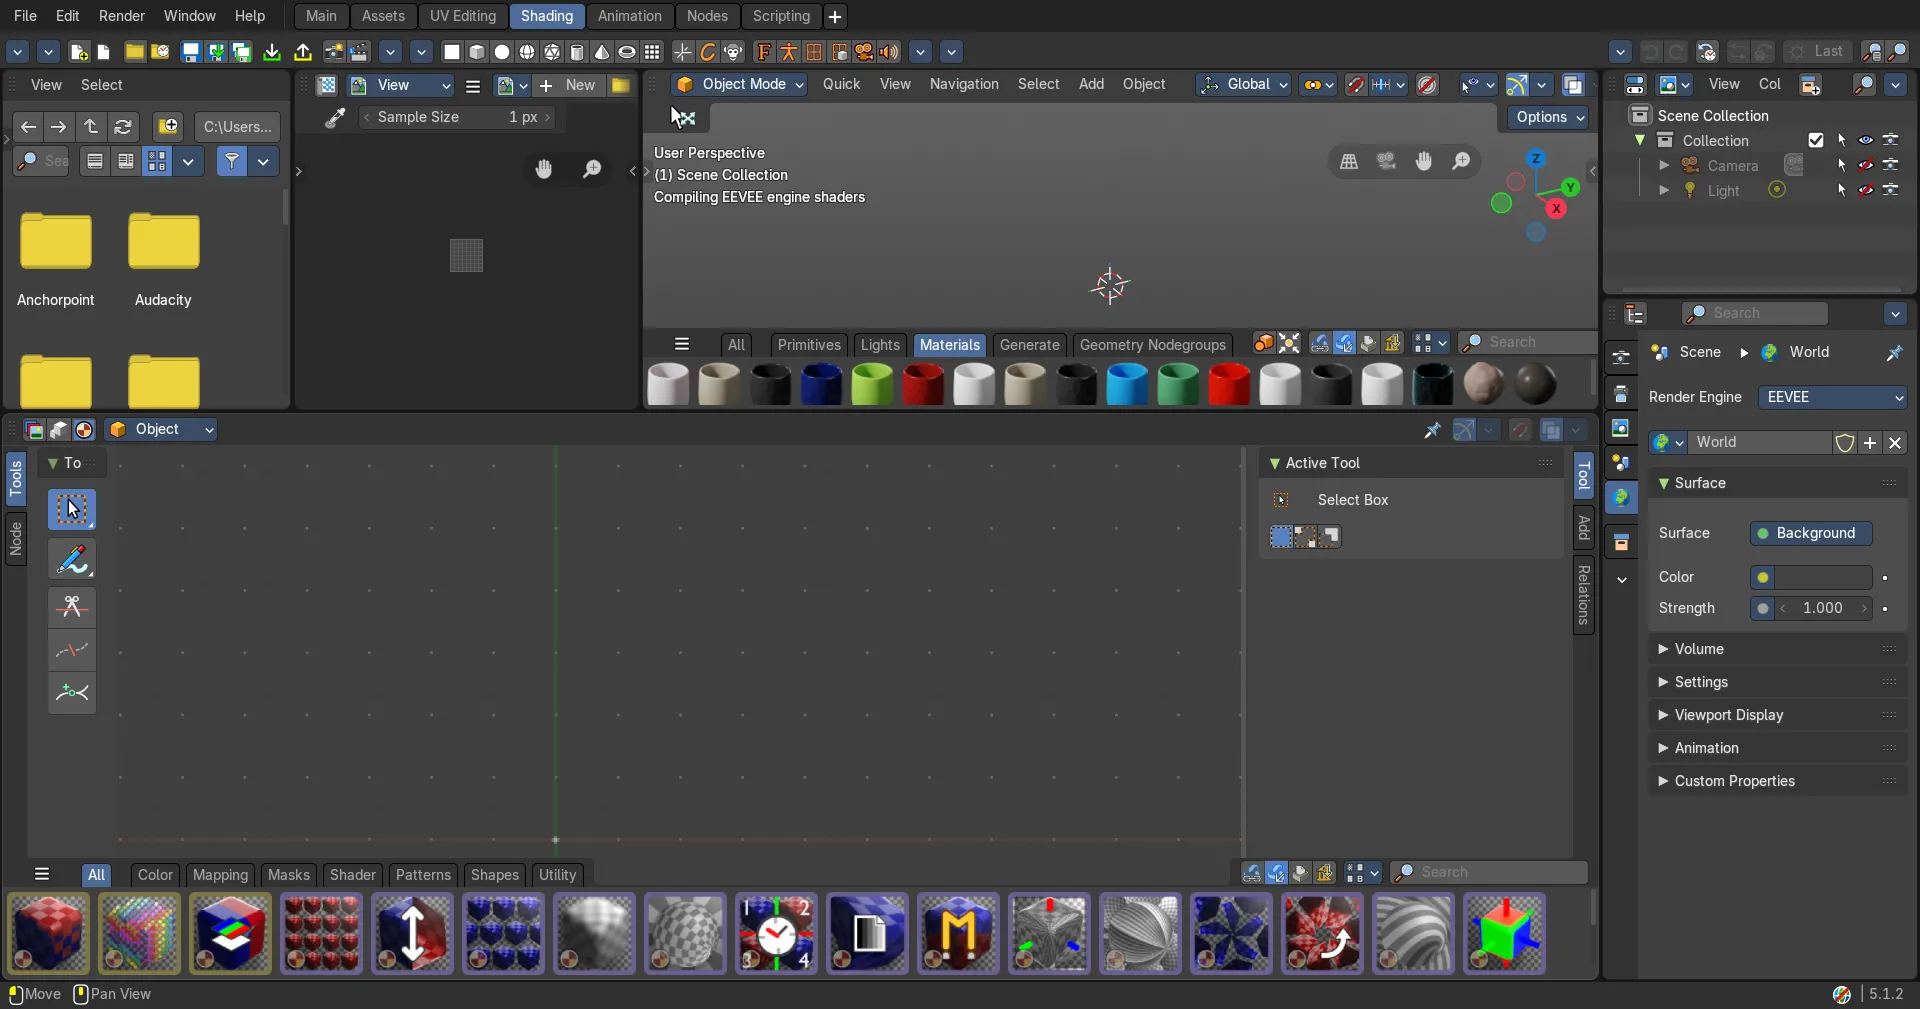
The asset browser interface is divided into several areas.
- Green: Header
- Blue: Categories
- Yellow: Sidebar
- Purple: Content area
How to
Asset handling
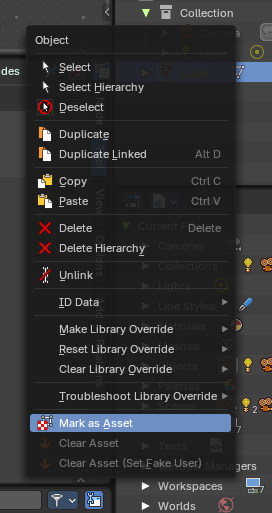
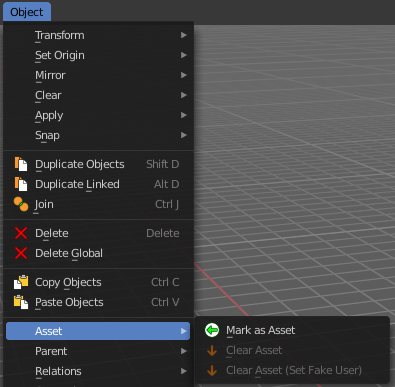
To insert or remove an asset you can use the right click on an object in the outliner and mark as asset. Alternatively, you can use the header object menu in the 3d View Editor to Mark Asset and Clear Asset.
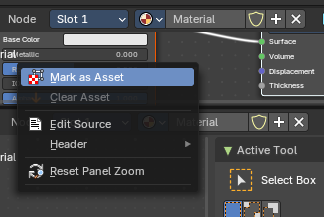
When you want to save a Material, World Shader, or Nodegroup, then you can also right click at the Data menu selector in the data dropdown property. This will also reveal a menu where you can Mark as Asset or Clear Asset.
When an Armature is in Pose Mode, Poses can be inserted using the Header menu entries.
Note: Dragging items into the browser is currently not supported. The other direction works though. You can drag assets from the browser into the 3d view.
Asset Library
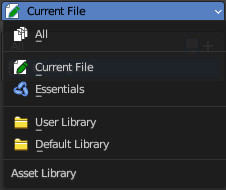
There are two ways to deal with assets. You can either store them in the current blend file for later use. This is the “Current file” method.
Or you can switch to “User Library” or other Default Libraries included with Bforartists, and/or create an external library from a fixed path.
If you’d like to view all, select the “All” category.
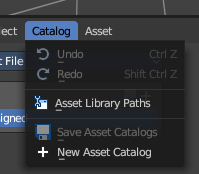
To setup your external library, go to Preferences > File Paths > Asset Libraries to add this path to your asset libraries then. You can also do the same from header menu Catalog > Asset Library Paths.
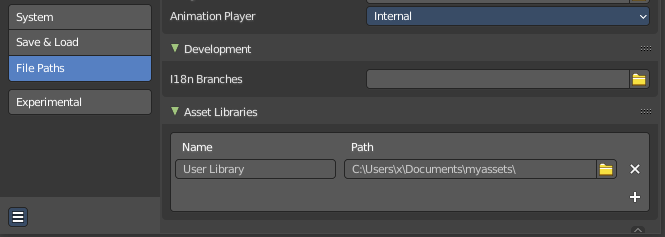
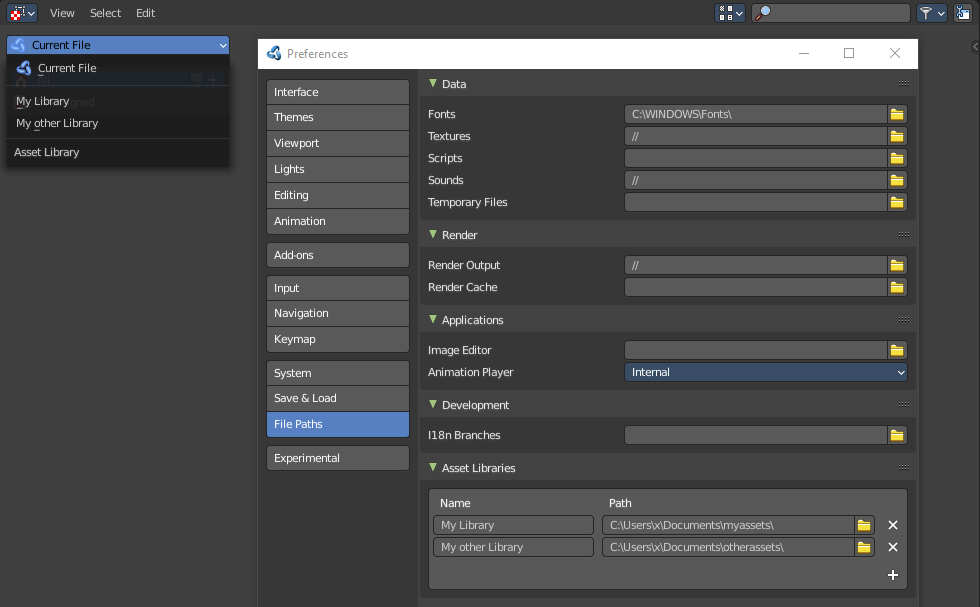
You can add more than one asset library from the preferences.
Online libraries while offline
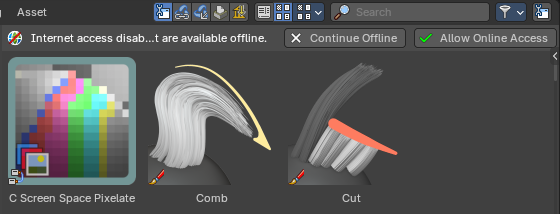
Some libraries, like the online Essentials, live on the internet. When internet access is off in the Preferences, the Asset Browser still shows every asset you've already downloaded, so you can keep working offline.
A banner at the top reminds you that you only see the offline assets.
Continue Offline
Hides the banner, so you can keep working with the assets you already have.
Allow Online Access
Turns internet access on, so the rest of the library can load.
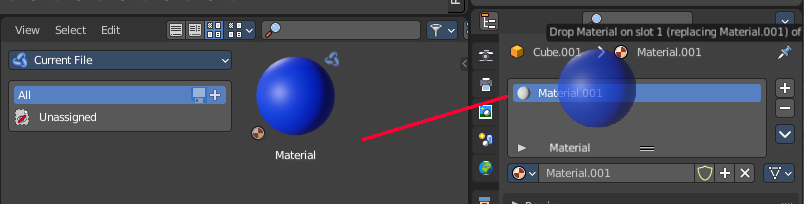
Drag & Drop of materials
Materials can be dragged directly at the material slots in the Properties Editor.
Header

There are several tools in the header to find. Menus, and a few options.
Header - View menu
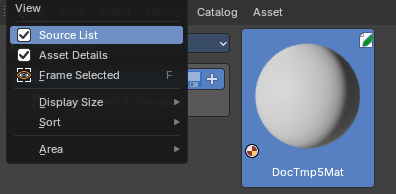
The View menu decides what you see. Source List shows the libraries and catalogs on the left, and Asset Details shows the sidebar with information about the selected asset.
Frame Selected
Scrolls the selected asset into view, handy in a big library.
Sort
Orders the assets, for example by name. This used to be only in the right-click menu.
Display Size
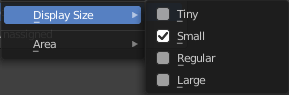
The display size for the assets.
Area Menu
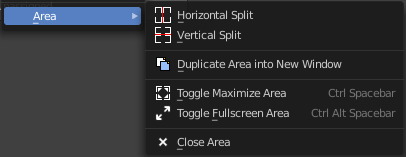
Area is a menu with window related settings.
Horizontal Split
Splits the editor horizontally into two editors.
Vertical Split
Splits the editor vertically into two editors.
Duplicate Area into new Window
Creates a floating window out of the current editor.
Toggle Maximize Area
Displays the editor maximized with menus. To return to split view press hotkey Ctrl Up Arrow, or reuse the menu item in the View menu.
Toggle Fullscreen Area
Displays the editor maximized without menus. To return from the full screen view press hotkey Alt F10, or use the little button that appears up right when you move the mouse in this corner.
Close Area
Closes the editor.
Header - Select menu
Select functionality.
Box Select
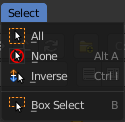
Allows you to box select files. Note that this is an old obsolete operator. You don't need to press the hotkey anymore for box select.
Inverse
Inverts the selection.
None
Select none.
All
Select all.
Header - Library menu
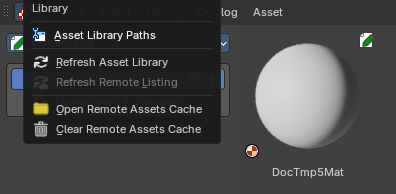
Everything about the asset libraries themselves.
Asset Library Paths
Opens the Preferences, where you add and manage your asset library folders.
Refresh Asset Library
Reloads the current library. Use it after you saved new assets into the library from another file, so they show up here.
Refresh Remote Listing
Fetches the latest list of assets from an online library.
Open Remote Assets Cache
Assets you download from online libraries are kept in a cache folder. This opens that folder.
Clear Remote Assets Cache
Deletes the downloaded online assets to free up disk space. They download again the next time you use them.
Header - Catalog menu
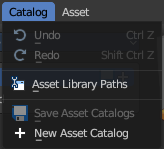
Undo
Undo of the last edit operation.
Redo
Redo of the last edit operation.
Save Asset Catalogs
Save all changed asset catalogs.
New Asset Catalog
Add a new asset catalog.
Header - Asset menu
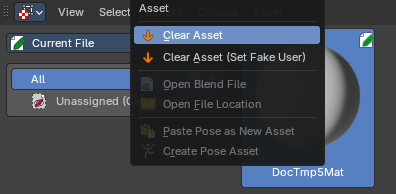
The Asset menu holds the commands for the assets you select. They used to be only in the right-click menu. Select an asset first, otherwise most entries stay greyed out.
Download
Only shows for online libraries. Downloads the selected assets, so you can use them offline.
Clear Asset
Turns the asset back into normal data, so it no longer shows in the Asset Browser.
Clear Asset (Set Fake User)
Same as Clear Asset, but protects the data with a fake user, so it isn't thrown away when you save.
Open Blend File
Opens the .blend file the asset is stored in. Works for assets from other files, not for assets in the current file.
Open File Location
Opens the folder that holds the asset's .blend file.
The two pose entries at the bottom come from the Pose Library add-on, which is on by default. They work in Pose Mode.
Paste Pose as New Asset
Pastes a previously copied pose as a new pose asset.
Create Pose Asset
Creates a pose asset from the selected armature.
Note: When you create a Pose Asset, it will capture what you see in the viewport from the active camera or view.
Use
To create a Pose Asset, follow these step:
- In the 3D View, select your Armature object and go into Pose Mode
- Select the bones you want to store as a pose
- In the Asset Browser Header Asset menu, use the operator Create Pose Asset
- This will create a Pose Asset in the Unassigned (Catalogue) category in the Current File.
- Click on the new Pose Asset in the Asset Shelf or Asset Browser to apply. Press and drag to apply with a slider strength.
- You can alternatively right click on the Pose Asset for alternative methods of applying the pose.
Header - Tools and Options

Drop Collections as Instances (Append/Link)

Drop the asset as instances of another object. When you are in Append mode, you can toggle if you want to append the collection as an instance. When in Link mode, you can toggle if you want to append the collection as an instance.
Note: Only usable with Collection assets
Drop Instance Collections at Origin
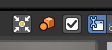
Drop the asset at mouse position or at the world origin in the 3d view.
Note: Only usable with Collection assets
Toggle Drop Collections as Instances (Follow Preferences)
Drop the asset as instances of another object. This toggles both append and link mode at the same time.
Note: Only usable with Collection assets
Import Method
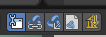
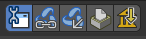
Allows you to define how to import the assets.
Follow Preferences
Use the import method as defined in the preferences.
Link
Link the asset at import.
Append
append the asset at import.
Append (Reuse Data)
Append the asset at import. But avoid multiple copies of the asset.

Recommending using Pack instead.
You can go in the Preferences, in Developers Tools tab and enable No Packing to show Append (Reuse) back.
Pack

Import the asset as packed. Make it is unchanged modified, linked with the original data.
Link (Override)
Import the assets as linked library overrided data. This will only override the active hierarchy. The active hierarchy is defined by the last selected object of a collection or the armature.
To override all selected contents, use the Outliner Editor by right clicking on the asset and Overriding Selected and Content.
Display Mode
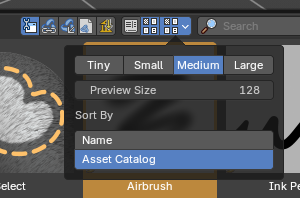
Allows you to switch between list view and thumbnail preview view.
Horizontal List
Displays the content of the file browser as a horizontal list.
Thumbnails
Displays the content of the file browser as thumbnails. This is especially of use for images or blend files with thumbnail preview.
Sort by Name
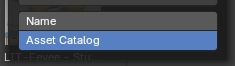
Sort assets by alphabetical order, ignoring catalog order.
Sort by Asset Catalog
Sort the assets list so that assets in the catalog are kept together in groups, then within a single catalog, the assets are ordered by name. The catalogs are in order of the flattened catalog hierarchy, from top to bottom.
Note: This is useful for large amount of assets to “group” catalogs of assets together.
Display mode options
Vertical / Horizontal List
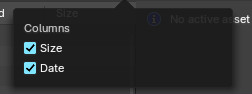
Shows the assets in a vertical list or in a column based horizontal list.
Size
Toggles the column with size information.
Date
Toggles the column with date information.
Thumbnails
Tiny / Small / Medium / Large Buttons
Preset display size of the thumbnails for the assets.
Size
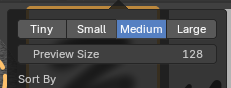
The display size of the thumbnails for the assets. The range for these thumbnails goes from tiny with 32 pixels up to large with 256 pixels.
Search
Name Filter. Allows you to search for specific files and folders.
Filter
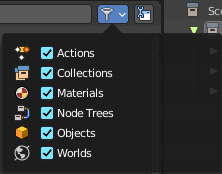
Allows you to filter the assets library in various ways. The menu items should be self explaining.
Toggle Region
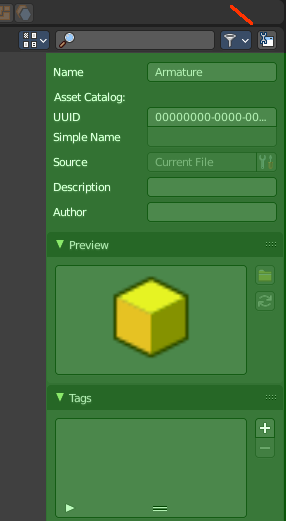
Toggles the sidebar at the right. The sidebar contains various im- and export settings for the single file types.
Drop collection as Instances
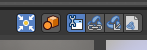
When it's on, you link collections as instances. When off, it links to scene. Default is off.
Drop collection at World Origin
When it's on, you link or append collections or collection as instances to world origin (center). When off, it links or appends to the mouse cursor. Default is off.
Note: When you link a collection to scene, not as an instance, and the world to origin is off, any concurring instances of the linked collection will have an offset. This is used to prevent any collection instance offsets to opt-in to linking in collections to scene at world origin, to later override or use as instance.
Import Method
Follow Preferences
Use the import method set in the Preferences for this asset library, don't override it.
Link
Import the assets as linked data
Append
Import the assets as copied data, with no link to the original asset data
Append (Reuse Data)
Import the assets as copied data-block while avoiding multiple copies of nested, typically heavy data. For example the textures of a material asset, or the mesh of an object asset, don't have to be copied every time this asset is imported. The instances of the asset share the data instead.
Tool shelf
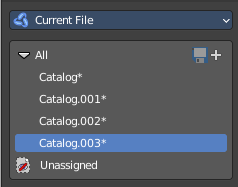
The toolshelf shows the different catalogs that you can use to store your assets.
These catalogs are currently disfunctional. You can just add or remove the categories. But not insert assets to it.
Asset Library chooser

Here you can choose what asset library to use.
The list is grouped by where the libraries come from: your libraries (set in the Preferences), project libraries (set in the Project Setup) and extension libraries (installed with an extension). Each group has its own icon.
Current File
Uses the current Blend file as the asset library. All assets are stored into the current blend file. And this means that when you remove objects from the scene, then the assets in the assets library will also vanish.
User Library
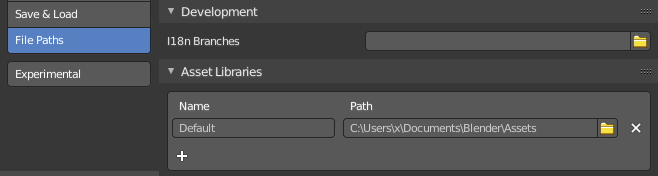
Uses the blend file in the path that is defined in the user preferences as the asset library.
Working with more than one blend file is currently not supported.
Refresh

With a user library you will get a refresh button besides the asset library chooser. Refreshes the content.
Asset Catalogs
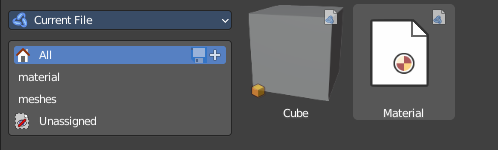
Asset catalogs allows you to organize your assets.
Note that asset catalogs does not work with the external asset libraries. Just with the asset library in the current file.
First save your file. The method does not work at a blend file that is not saved yet.
Then create your catalog, and name them.
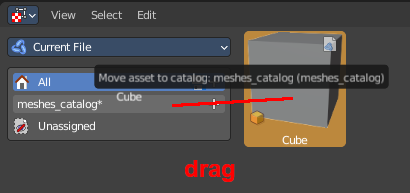
Then select one of your assets. And drag it onto the catalog that you want to add it to.
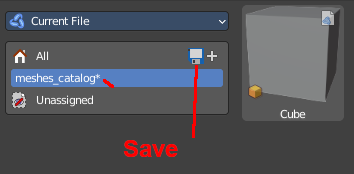
Finally, save the asset.
Save Asset Catalogs
Saves the current asset catalog to file and make the changes permanent.
New Asset Catalog
Creates a new asset catalog. Asset catalogs can be nested too.
Unassigned
The assets that are currently not in a catalog.
Asset catalog right click menus
Note that the Edit Source button is a developer feature.
Right clicking at the All item
Mark as asset
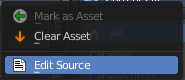
Marks the object as an asset. Dysfunctional in this context.
Clear Asset
Removes all assets.
Right clicking at one of the catalog items


Content depends if you have an asset selected or not.
New Catalog
Creates a new nested catalog inside of the current catalog.
Delete catalog
Deletes the catalog and all of its childs.
Rename
Rename the current catalog.
Mark as asset
Marks the object as an asset. Dysfunctional in this context.
Clear Asset
Removes all assets.
Sidebar
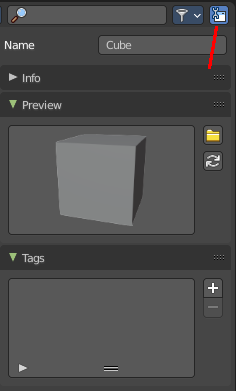
At the right side you will find the Sidebar. It is usually hidden. But can be revealed by a click at the litte triangle button, or with a click at the Toggle Region button in the header at the right.
Name
The name of the asset. Here you can also rename the asset. Note that the name of the asset in the view does not refresh immediately at the moment. You can force a refresh of it in the Preview panel by clicking at the Generate Preview button
Info Panel
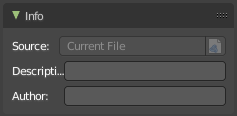
Some additional infos about the asset.
Source
A source that can't be edited for the Blender developers.
Description
Add a description for the asset.
Author
Add the name of the author of the asset.
Preview Panel
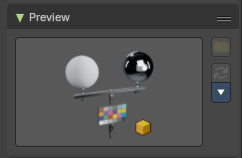
A preview of the asset. By default the same image that you see in the view when you create the asset.
Load Custom Preview
Opens a file browser where you can choose a custom icon for this asset.
Generate Preview
Generates a preview icon from the content. Note that this will reset the custom icon.
Preview Menu
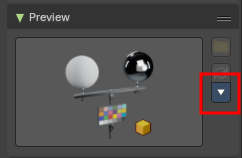
Render Active Object
Creates a preview for the currently active object.
Remove Preview
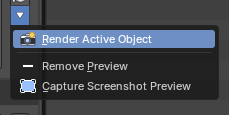
Removes the current preview for the selected asset.
Capture Screenshot Preview
Allows the user to create a new preview by selecting any region,
the user interface fades with a crosshair cursor, simply click and drag.
Tags Panel
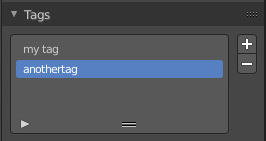
Enter custom tags for this asset. This tags allows you to sort your assets by tag.
Tags List
The list of the current tags.
Drag handler
Allows you to resize the list.
Search
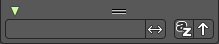
Search the list. This search can be expanded by clicking at the little triangle button down left.
Add Asset Tag
Adds a tag to the tag list. This tag can be renamed in the list.
Remove Asset Tag
Removes the selected tag from the tag list.
Asset Shelf Buttons Row
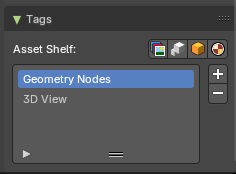
When you select a Node Group asset, you have an additional set of tags you can assign. These tags will define if the Node Group asset will show in the toolshelf in the Compositor, Geometry Nodes and Shader editor toolshelves, or in the 3D View.
Note: This row of quick tag buttons only show when you have a Node Group asset selected in the Asset Browser.
Compositor Tag

Assigns the “Compositor” tag to show the Node Group in the Compositor Asset Shelf in the footer of the Compositor editor.
Geometry Nodes Tag
Assigns the “Geometry Nodes” tag to show the Node Group in the Geometry Nodes Asset Shelf in the footer of the Geometry Nodes editor.
3D View Tag
Assigns the “Geometry Nodes” tag and the “3D View” tag to show the Node Group in the Geometry Nodes Asset Shelf in the footer of the Geometry Nodes editor and the 3D View Asset Shelf at the footer of the 3D View editor.
Note: Only Geometry Nodes can also be shown in the 3D View. You must assign the Node Group a Geometry Nodes tag before assigning a 3D View tag.
Shader Tag
Assigns the “Shader” tag to show the Node Group in the Shader Asset Shelf in the footer of the Shader editor.
Assets context menu
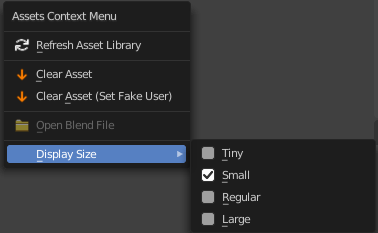
When you right click into the view then an Asset context menu opens.
Download Assets
Downloads the selected assets of an online library, so you can use them offline.
Refresh Asset Library
Refresh the file list.
Refresh Remote Listing
Downloads the list of assets of a remote library again, for example to see new assets. Only available for remote libraries and the Essentials library.
Clear Asset
Removes the asset from the asset library.
Clear Asset (Set Fake User)
Removes the asset from the asset library. But sets it to fake user, so that it remains in the scene.
Open Blend File
Opens the blend file that contains the active asset. Just active with User Library.
Open File Location
Opens the file browser of your system at the blend file that contains the active asset.
View Extension
Opens the extension that provides the active asset in Preferences > Extensions. Only available for assets that come from an extension library.
Pose Assets context menu
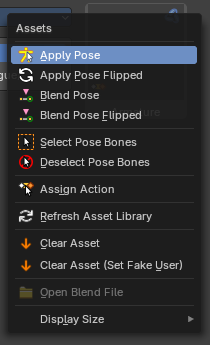
When you right click on a pose asset in the Asset Browser or 3D View Asset shelf, you get extra options to help apply the pose. To use them, make sure you have a compatible armature selected, are in Pose Mode and have the bones you’d like to pose selected.
Note: Pose action assets are single keyframe action clips marked as assets preview either from the NLA or the Dopesheet editors. Animation keyframe sequences cannot be marked as assets.
Apply Pose
Apply the given pose action to the active rig. When you select this, this will apply the pose to selected bones.
Apply Pose Flipped
Apply the given pose action to the active rig with a flipped axis. When you select this, this will apply the flipped pose to selected bones. Flipping happens usually from bones labeled .L and .R
Blend Pose
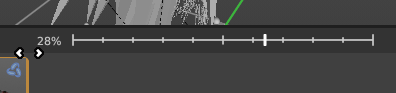
Blend the given pose action to the active rig. This is useful to interpolate from the original pose to the new pose. When using, you will see a slider in the asset browser header giving you a degree of blend.
Blend Pose Flipped
Blends the selected bones with the flipped Pose asset.
Select Pose Bones
Select those bones used in this pose action. This will select all the necessary bones you need to apply the pose effectively. If you have no bones selected, the pose will not apply. Poses only apply to bones that are selected.
Deselect Pose Bones
Deselect those bones used in this pose action. This will ultimately clear the selection based on the pose action bones defined in the marked action clip.
Assign Action
Set the pose action as the active action on the active object. This will ultimately load the pose action animation clip to the Action Editor of the Dopesheet, allowing you to edit the pose. This only works in the source file with the marked poses.